Getting Set Up
Some essential set up steps may happen only once, or otherwise infrequently:
Campus Billing Configuration
Your organization's Billing rules and options are set once initially, and then updated as needed (typically Infrequently)
Resident Billing Configurations
When new residents are admitted, their billing configuration is set up; when a resident's needs or Payer contract rates change, their billing configuration is updated.
Monthly Billing Process
Throughout the month, there are some key steps your team can take to ensure a quality billing process.
1. Entering Charges (anytime prior to posting invoices)
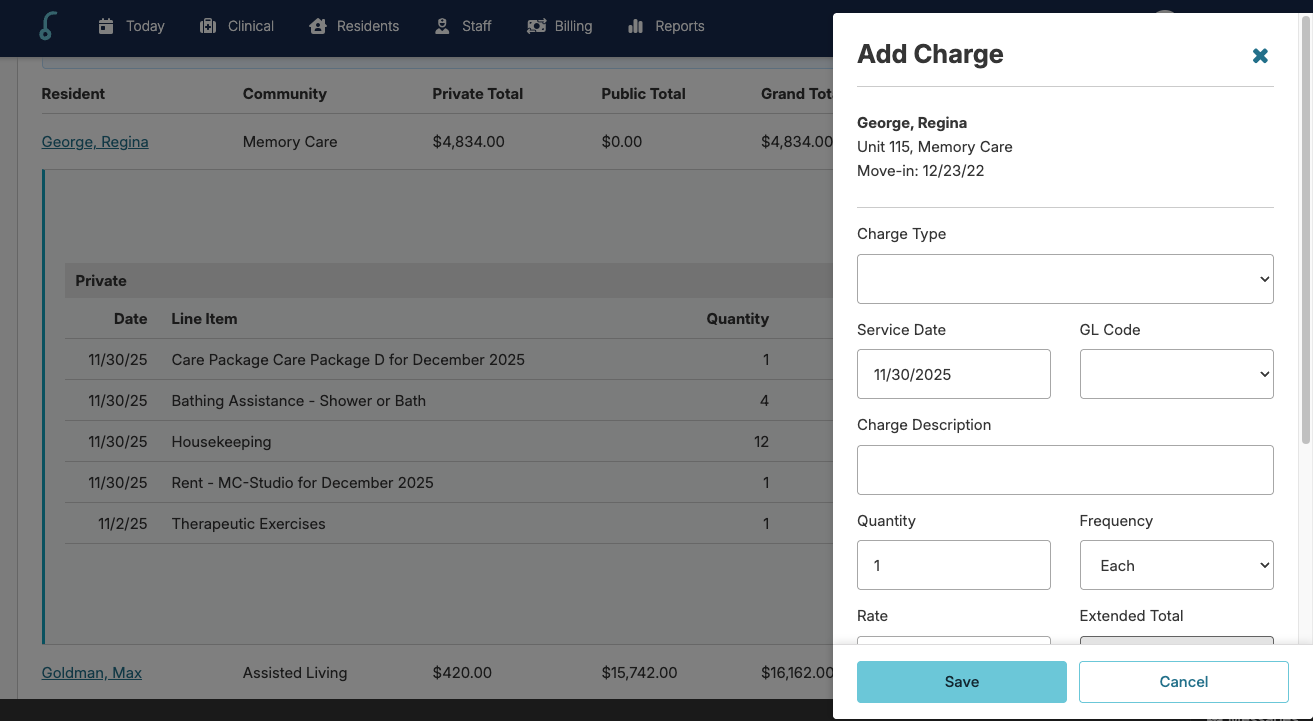
At any point throughout the month before the Posting step, new Resident Charges can be added manually.
Charges entered manually typically come from outside of Residex, including guest meals, utility fees, beauty shop fees, replacement key charges, assorted charges for a new admit, etc.
2. Check for Missing Recap (daily)
Ensuring that all services and medication administration work provided by your staff have been appropriately charted is critical to your success. Being vigilant in ensuring your Campus' charting is complete is essential not just for maintaining a high quality of care and regulatory compliance, but also in making sure you are billing appropriately for the care you are providing.
Various methods are available to do this, including automatic login reports that notify nurses on a daily basis of any incomplete charting.
3. Testing (anytime prior to generating invoices)
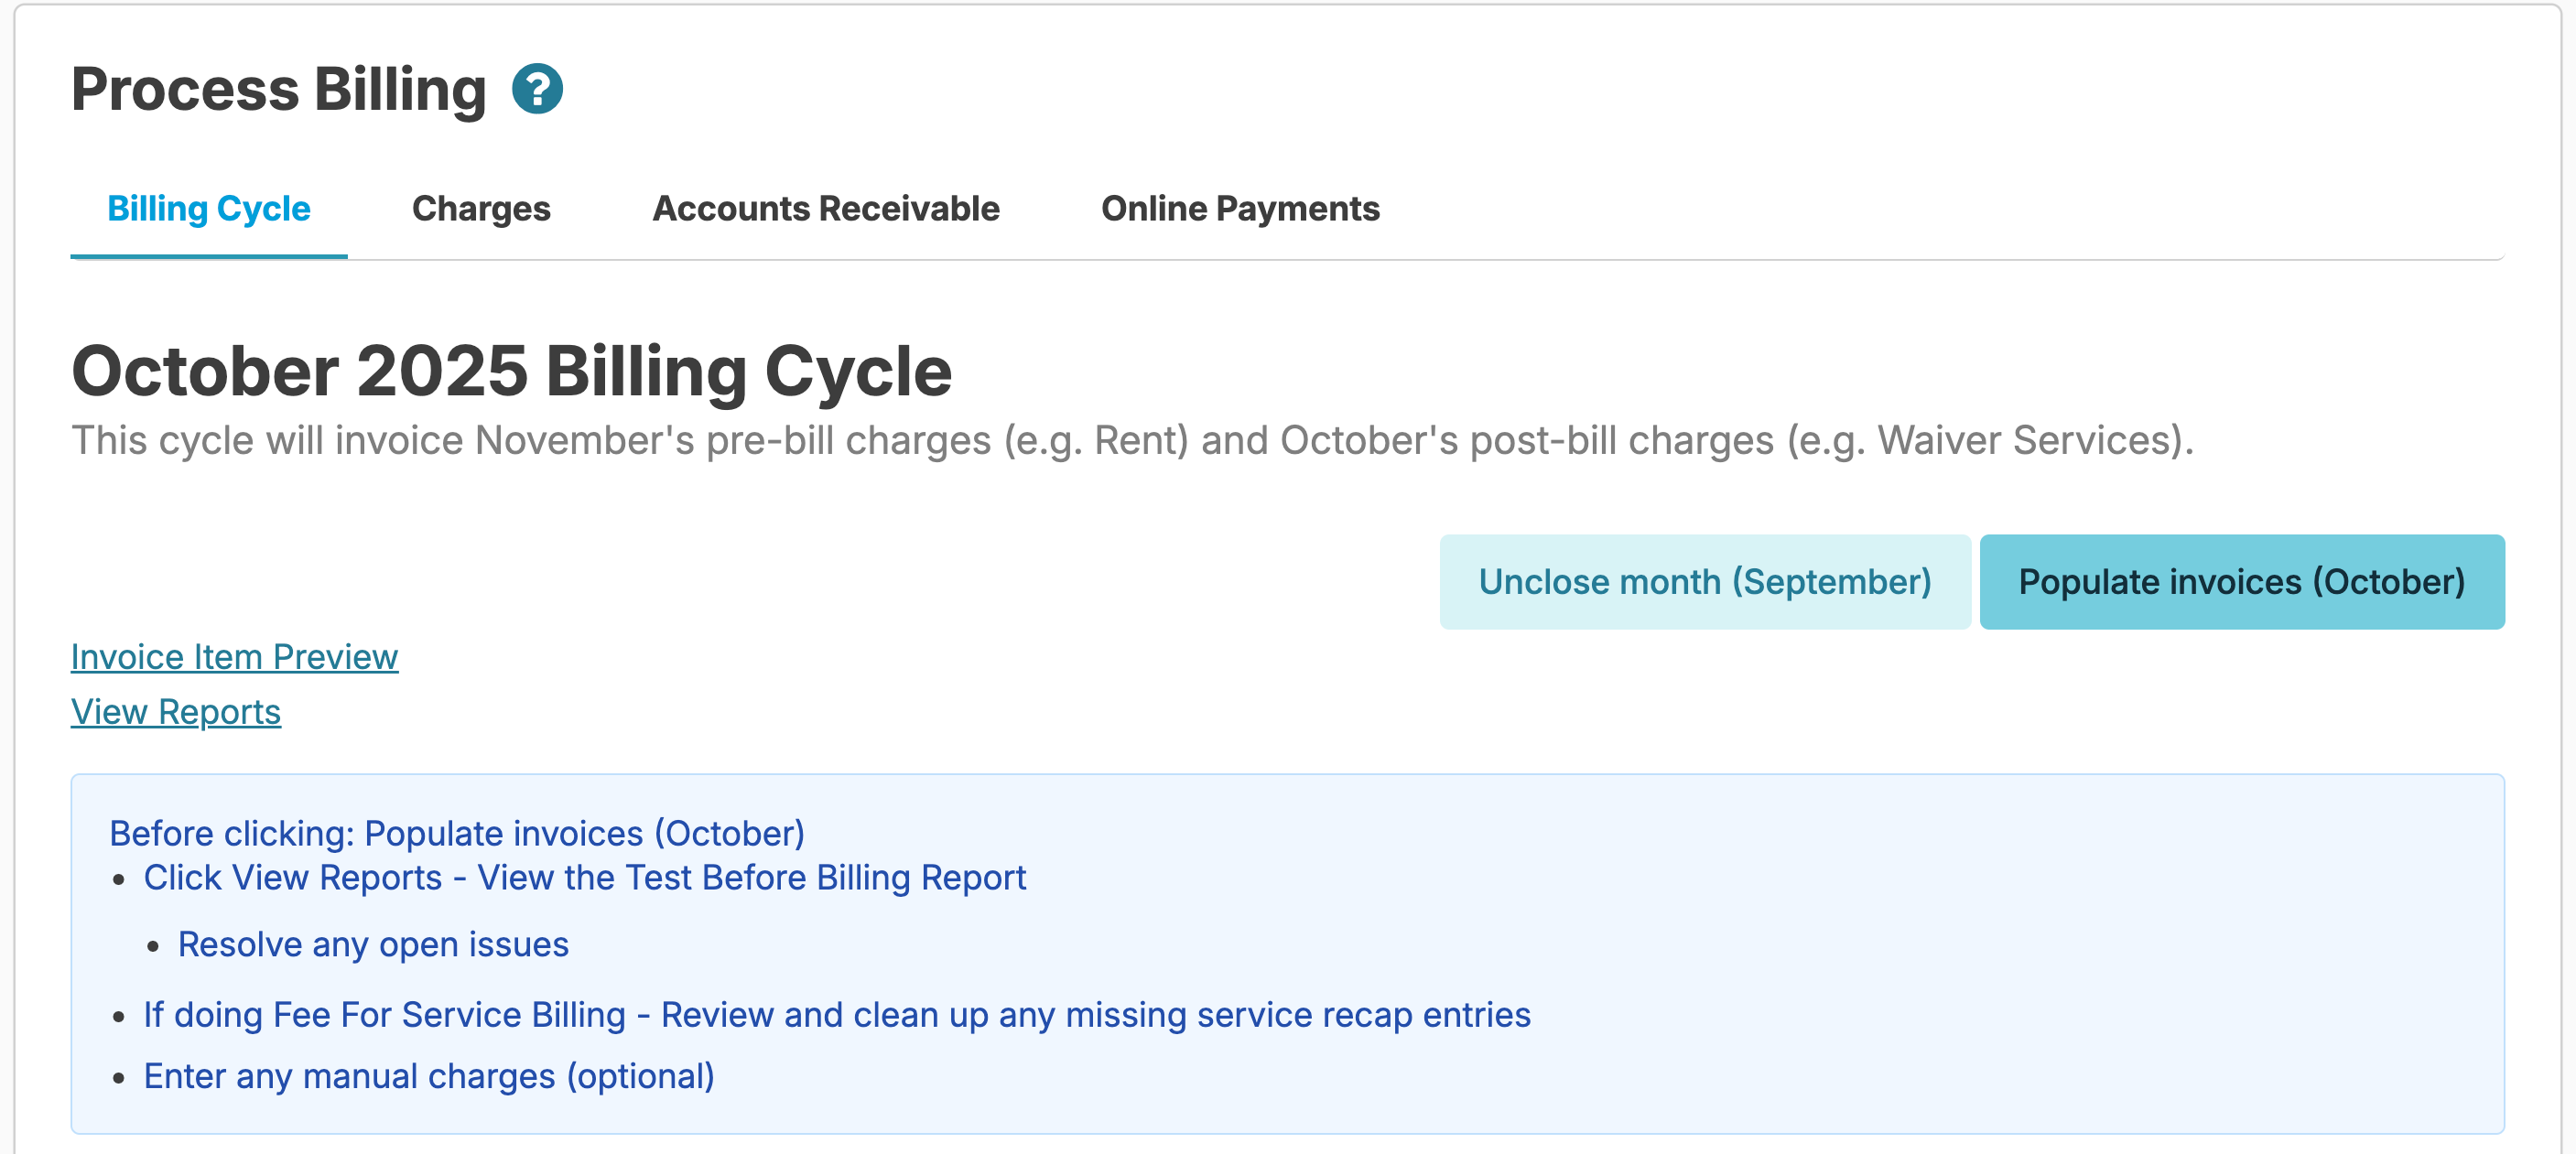
You want to be sure you are not missing any details in resident billing configurations prior to populating your invoices. You can do this from Billing > Process Billing > Billing Cycle > View Reports.
Select the Test Before Billing report to review details you may need to be aware of, such as resident status changes, residents' missing elements of their billing profile, etc.
Make any needed corrections (adding missing Care Packages, Rents, etc.) and rerun the Test Before Billing report. When this report displays "No issues found," you are ready to continue the billing process
4. Populate Invoices
From the Billing > Process Billing > Billing Cycle screen, press the Populate Invoices (month) Button
The Populating process will generate all charges (care packages, rents, supplemental packages, incremental service fees, contract amounts) for your residents. In generating these charges, pro-rated amounts, fee-for-service amounts, variable rate services, etc., will be calculated.
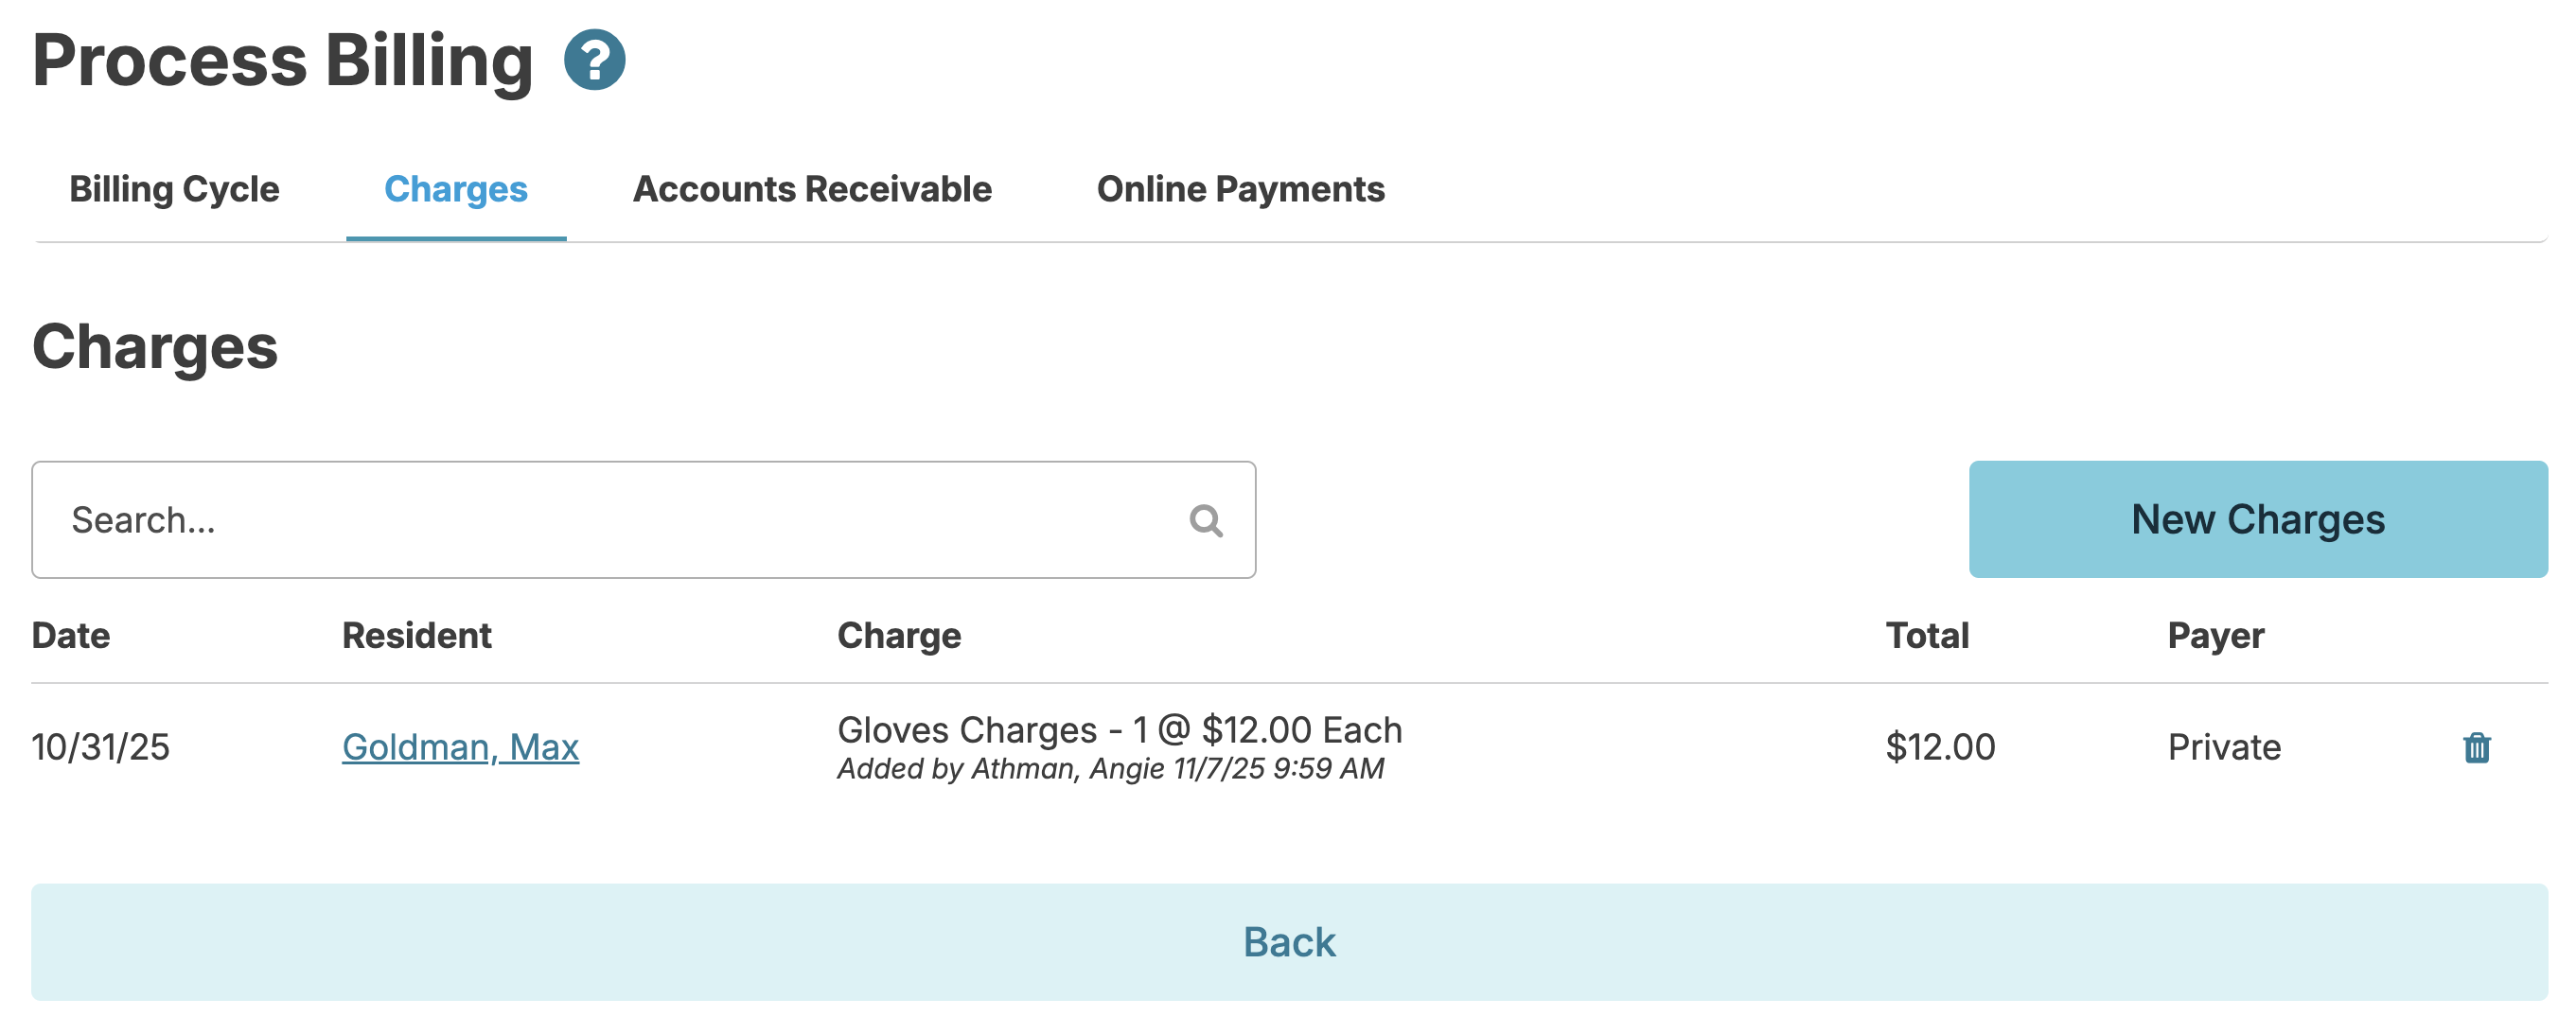
Once you populate you will see a list of all resident private pay and public pay totals for the month on the Billing Cycle screen. When you Populate Charges the system "populates" all charges for the month. You can view a list of all resident charges by clicking on the Charges tab or you can click on a resident name on the billing cycle screen to view an individual resident's charges. You may need to update the 'populated data' in the Fees tab (example: a resident added a supplemental package) and it didn't populate because it wasn't added. You will need to add the supplemental package>unpopulate JUST that resident and populate to get the data to pull through.
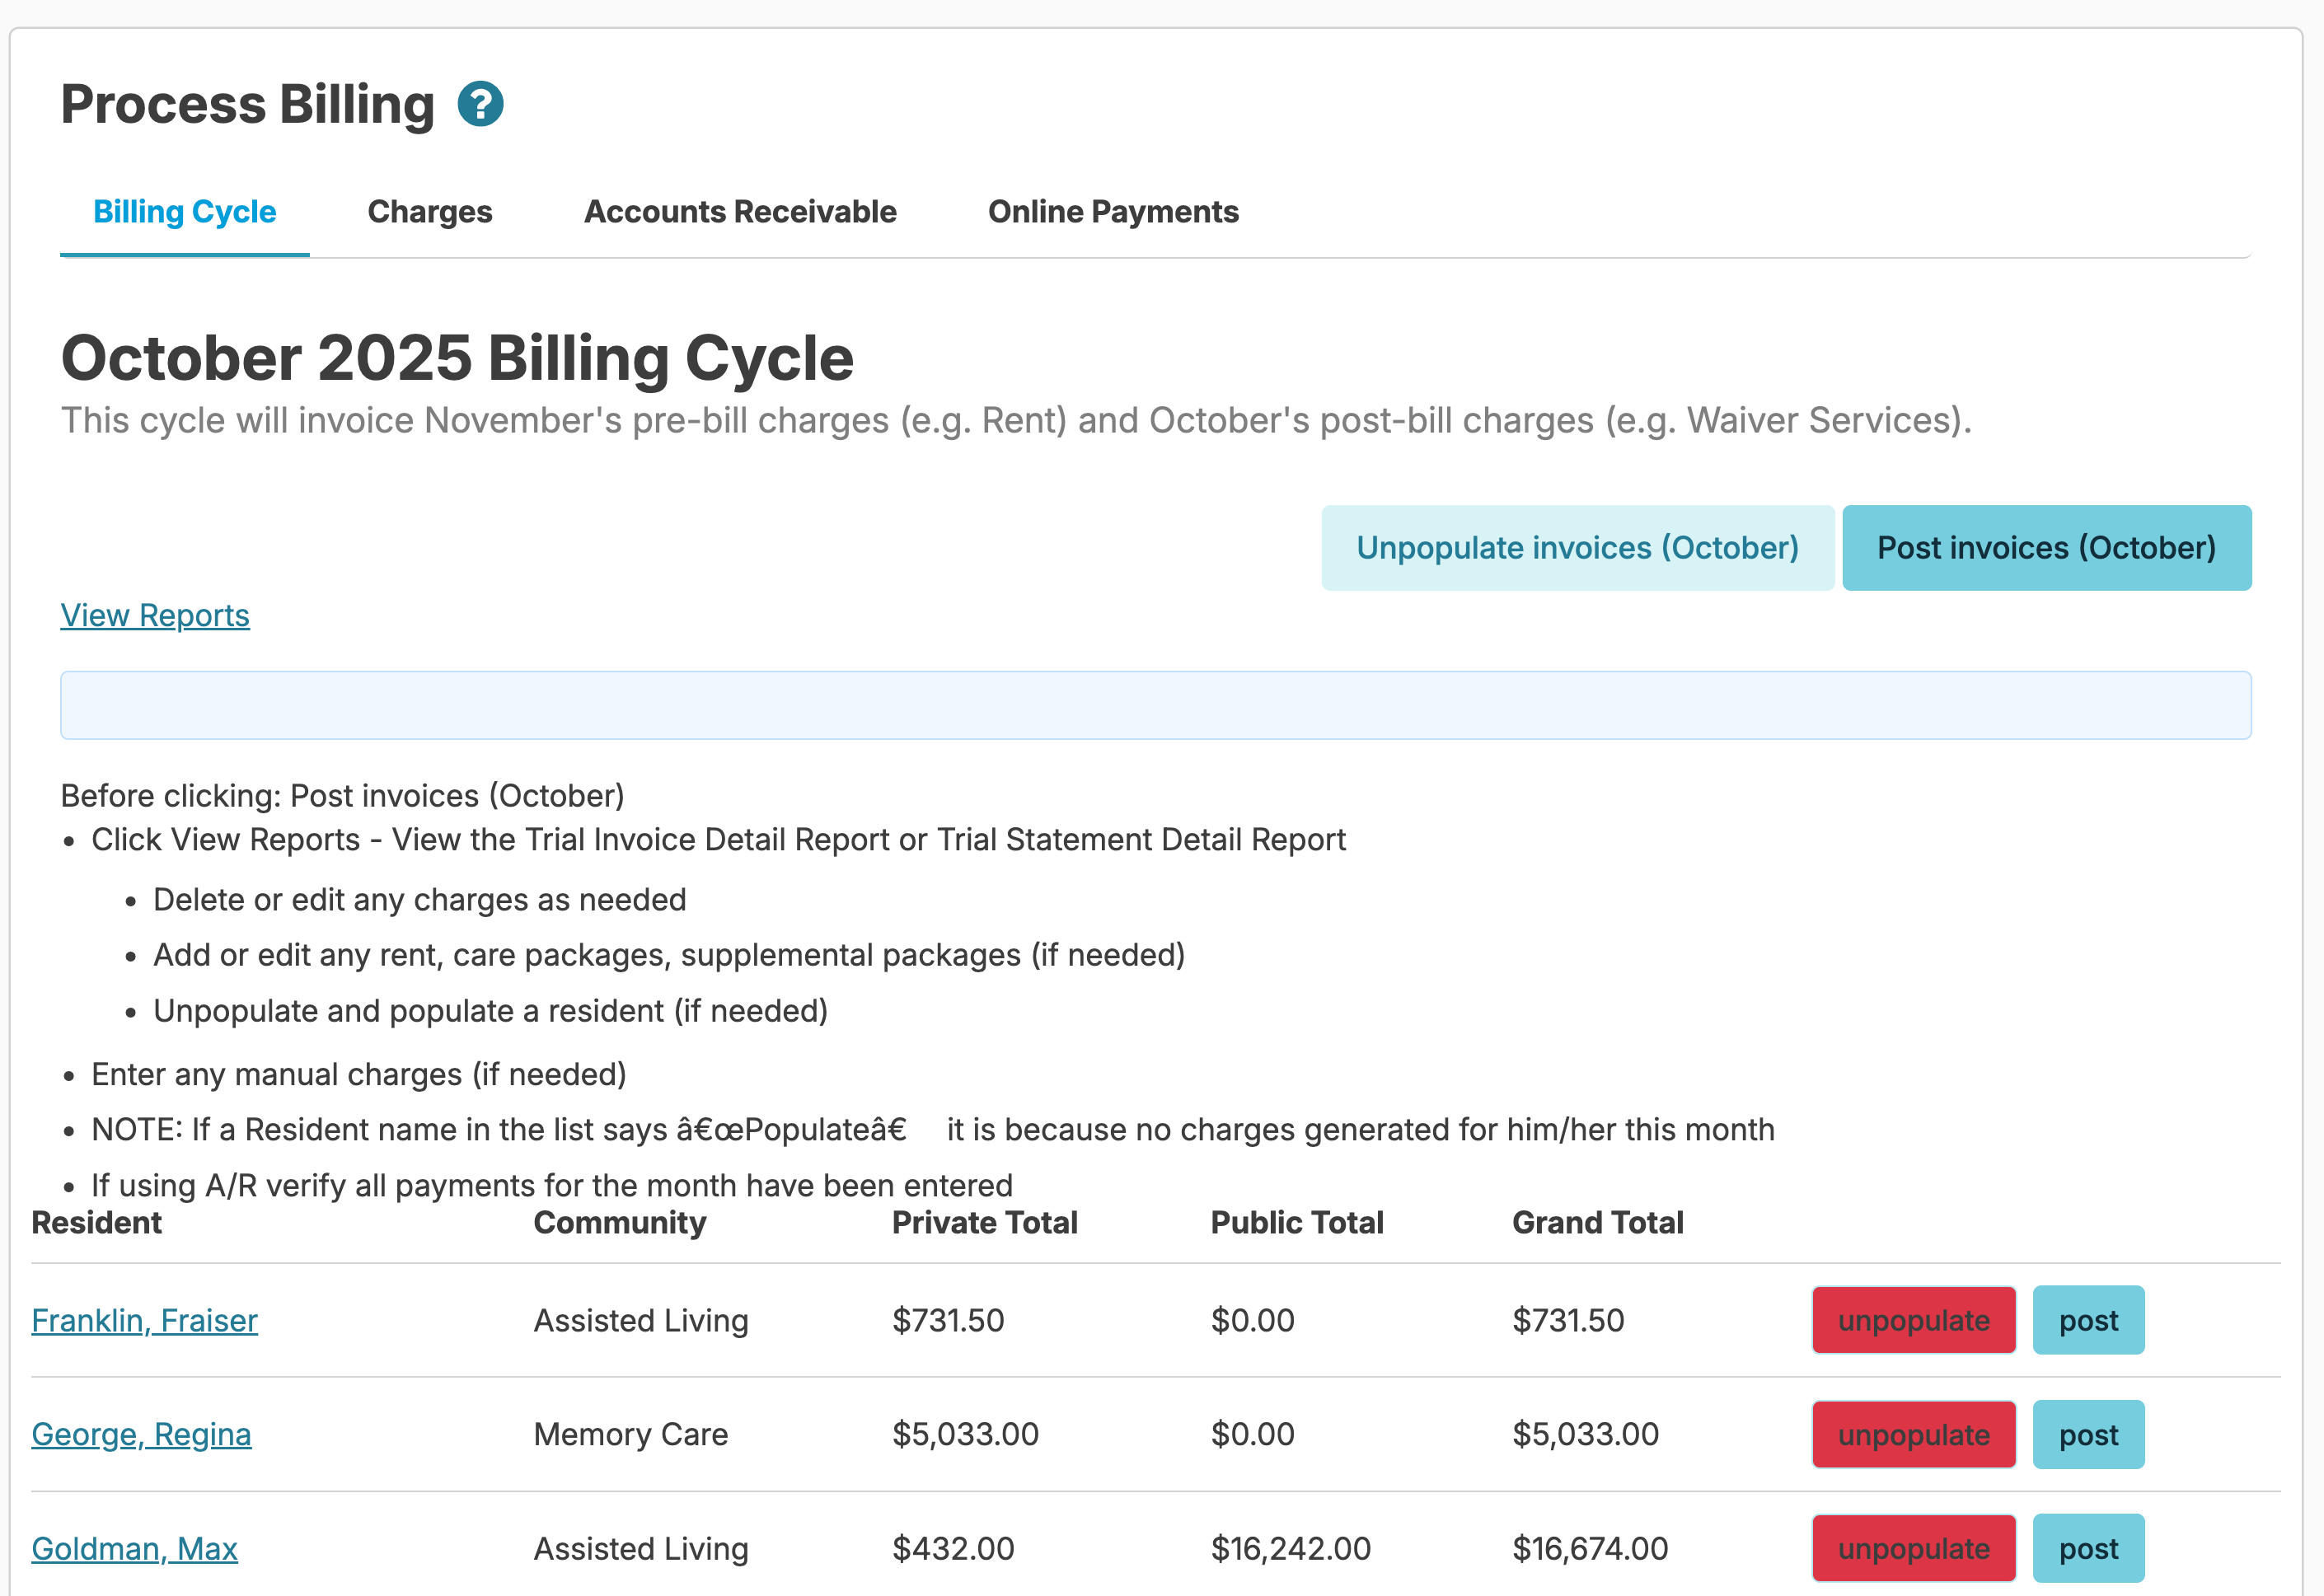
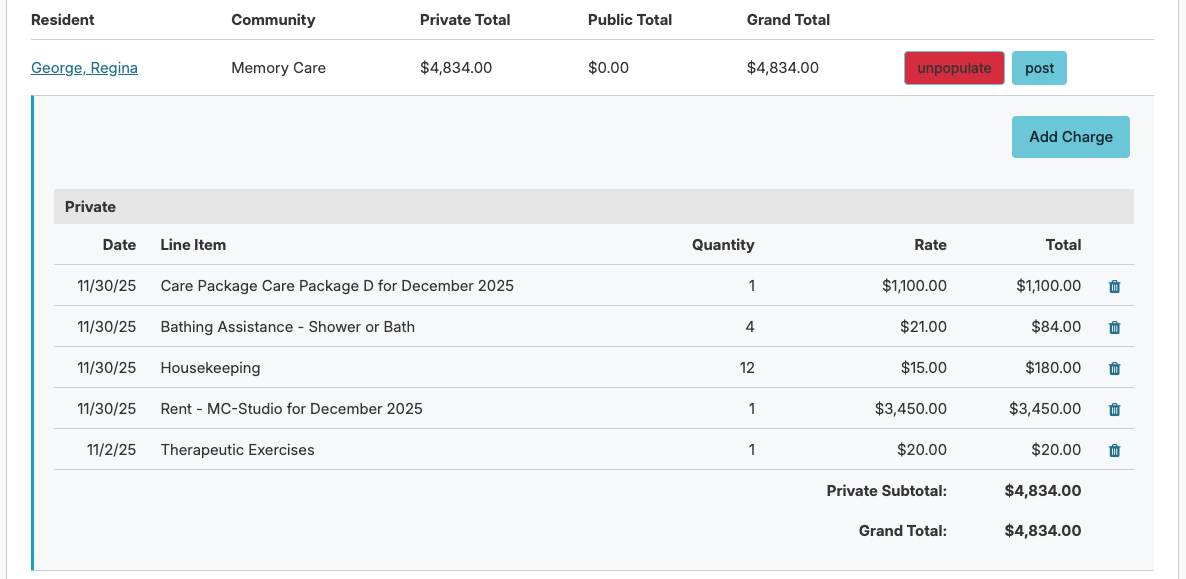
Click on a resident line item to view additional charge details.
5. Reviewing Invoices, Editing Charges
Review your charges for your residents to determine if any changes are needed.
- The Review for Possible Adjustments report will help you determine if any credits need to be made or additional charges need to be added for residents who moved in, moved out or went on hold.
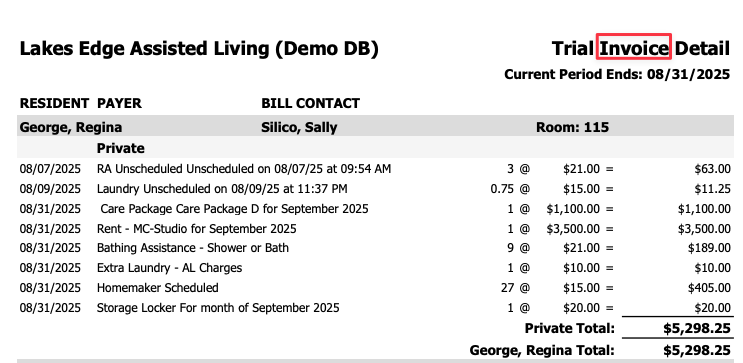
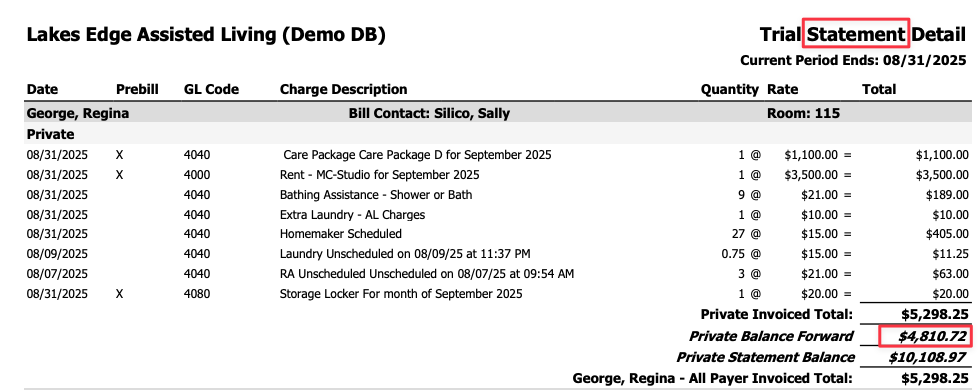
- The Trial Invoice or Statement Detail report will allow you to see a consolidated view of all of your residents with every charge for that billing period. This report should be reviewed closely by both the billing and clinical teams to verify accuracy. This report will show each resident's private pay total and contract payer totals. The Trial Invoice Detail report shows just current month's charges and the Trial Statement Detail will show past due balances. If you use Accounts Receivable you should be using the Trial Statement Detail report.
During your review, you may find the need to add, edit, or delete charges. This process can be done up until you Post your invoices. Deleting a charge is done by clicking on the trash can. If you click on the charge you can edit details of the charge. Note: Before you delete or edit you will want to pause and determine why the charge populated? Do you need to change populated data, Unpopulate one resident and populate again. Deleting and editing charges only changes the data for this one statement.
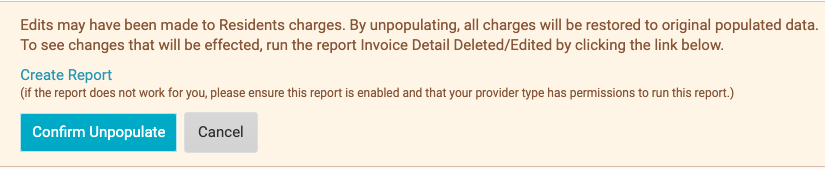
Note: if you Un-Populate and Re-populate charges, any changes that were made when editing and deleting charges will be lost. If you click Unpopulate Charges you will get a warning explaining what will happen if you have used the trash can button or edited a lot of charges in the charge screen. You will want to unpopulate and populate if you make a lot of changes to the populated data. You can run a report to see if you have made any changes in the charge screen. Note:** Manually added and uploaded charges will not be affected.
6. Posting Invoices
When you are finished reviewing and everything looks right, run the Test Before Posting report. If there are no issues, click the Post Invoices (month) button.
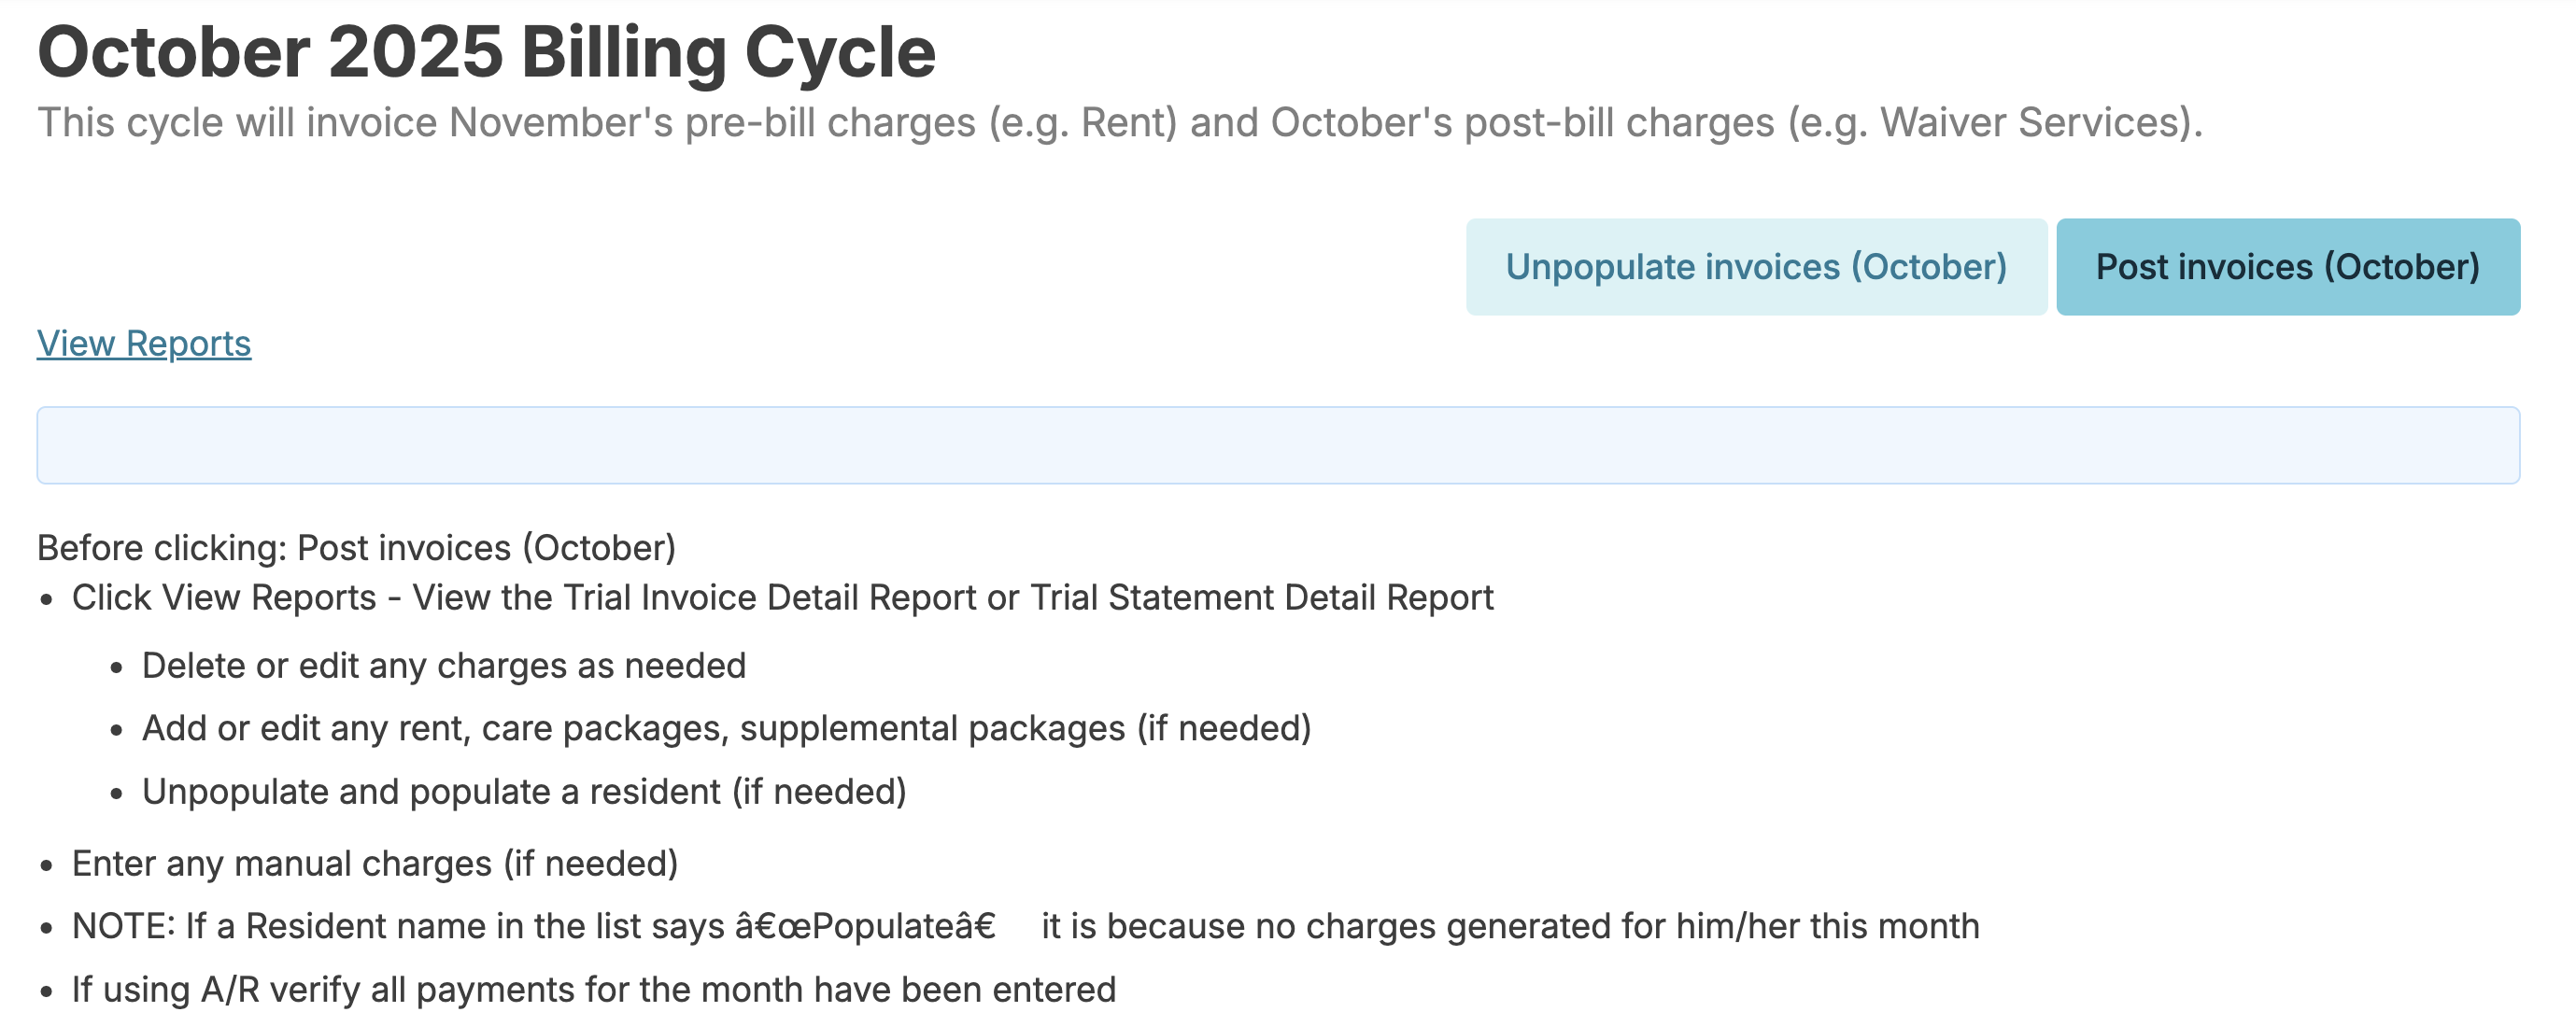
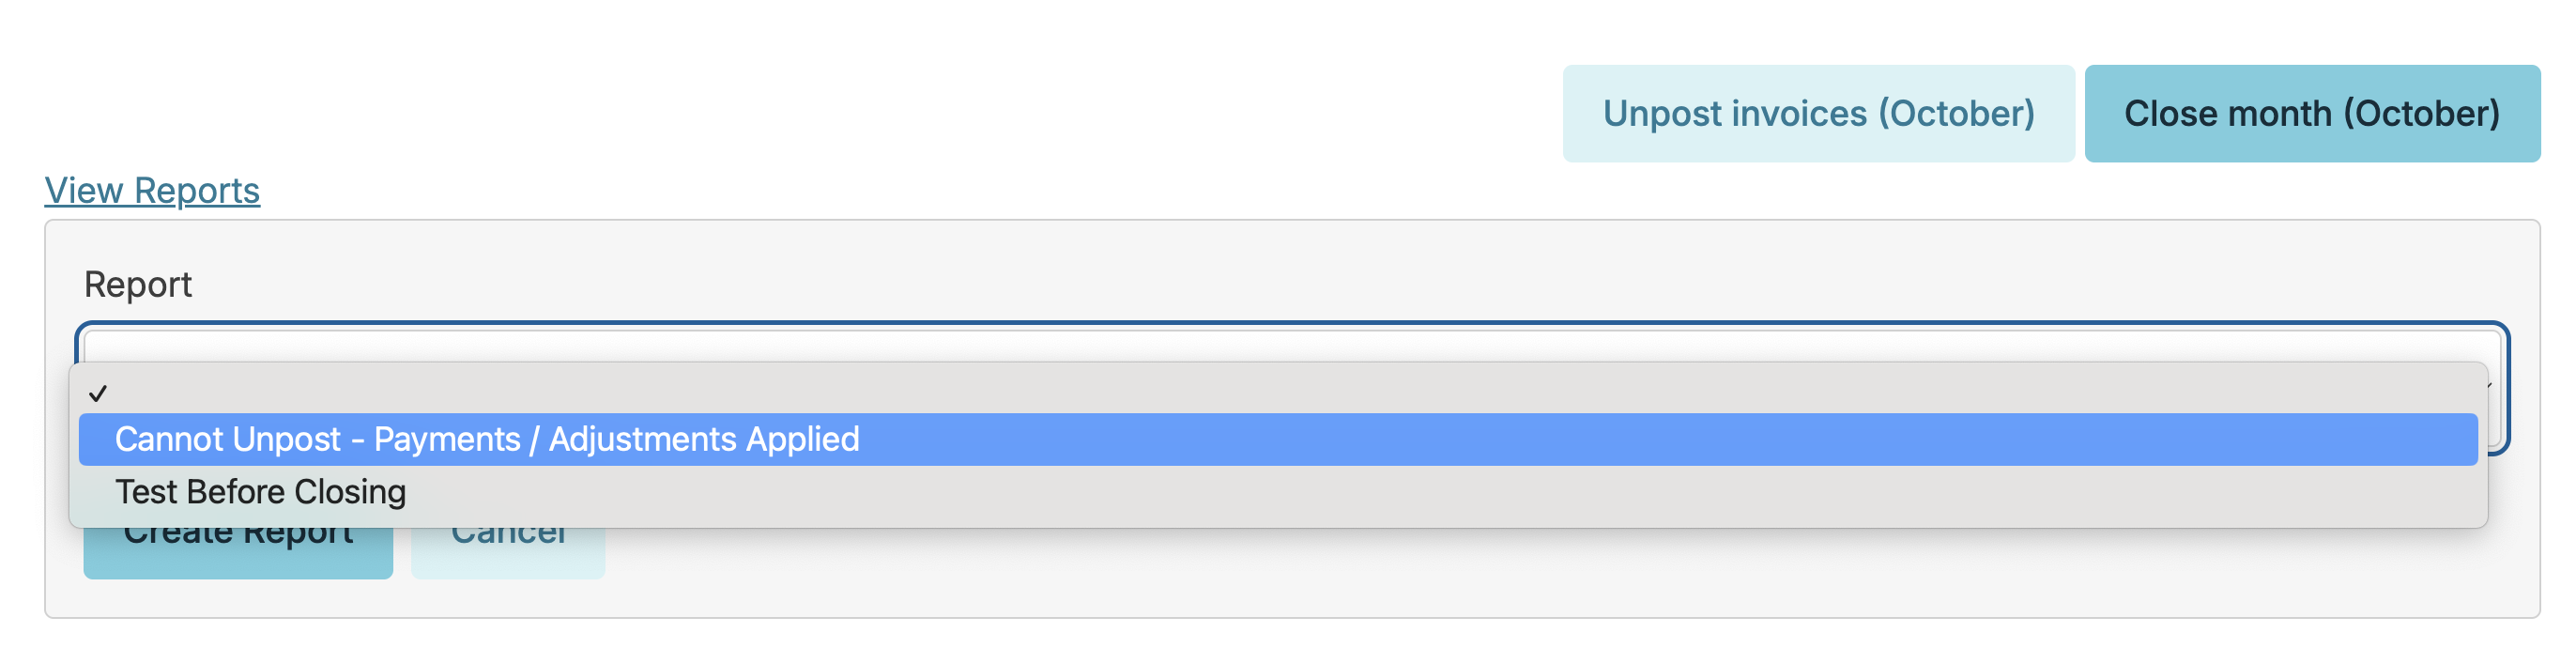
Individual invoices can be UnPosted, modified, and RePosted as needed until the month has been Closed and as long as you have not added any payments or adjustments to those invoices. If you are prevented from Unposting you can run the report: 'Cannot Unpost Payments/Adjustments Applied.
Unposting
If you need to Unpopulate an invoice because of a change to the resident's data, you can Unpost ALL invoices which allows you to Unpopulate just one resident. Populating again will update the changes made to the data. Unposting invoices creates invoices with a new invoice number.
📘 Note: If you Unpost just one resident you will not see the Unpopulate button next to each invoice.
If you click Unpost one resident here is the view. You can make changes to the statement by clicking on the resident line item if necessary. These changes can also be made in the Charges tab.

If you click Unpost Invoices (Month) in the top right corner here is the view. Note the red Unpopulate button next to each resident.

Cannot Unpost Payments/Adjustments Applied
If any payments or adjustments are applied to an invoice, you cannot unpost the invoice until the payments are unapplied or the adjustments are deleted. Run the report Cannot Unpost - Payments / Adjustments Applied to identify all payments and adjustments that are preventing invoices from being unposted for any resident.
To resolve this issue:
Once the edits are made, post the invoice and you can print statements to mail or hand out
Additionally, if you are signed up for Billing Connect and Payments you can send statements to Connect for residents or their billing contacts who want an emailed copy of their statement. If you have signed up for our payments feature, you can schedule Auto Payments, or send Payment Links for residents or their billing contacts to pay their bill through a link that is sent to them. Payments made using this method automatically applies payments to the invoice saving staff data entry time!
If you are signed up for Payments, or if you have the configuration enabled to send statements via Connect, you will see one or some of the links below:
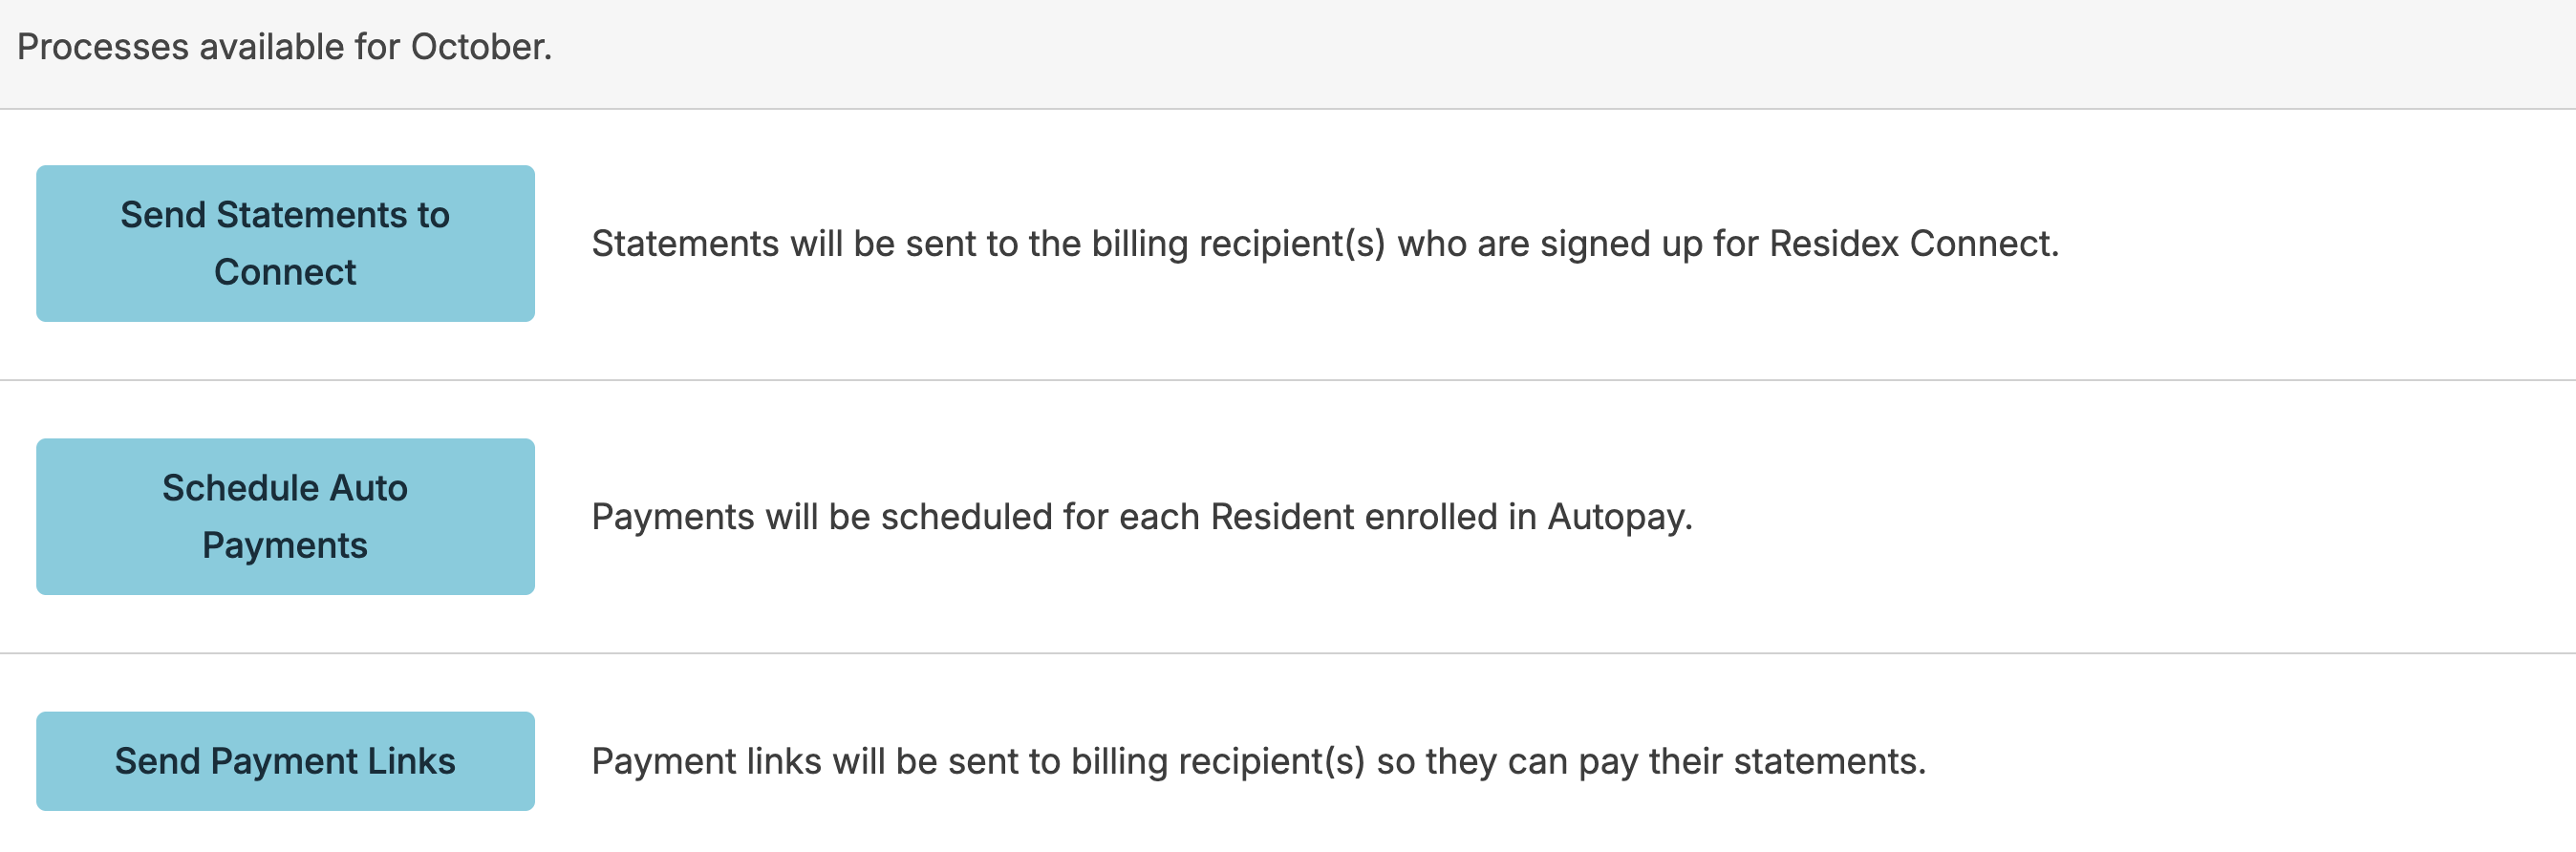
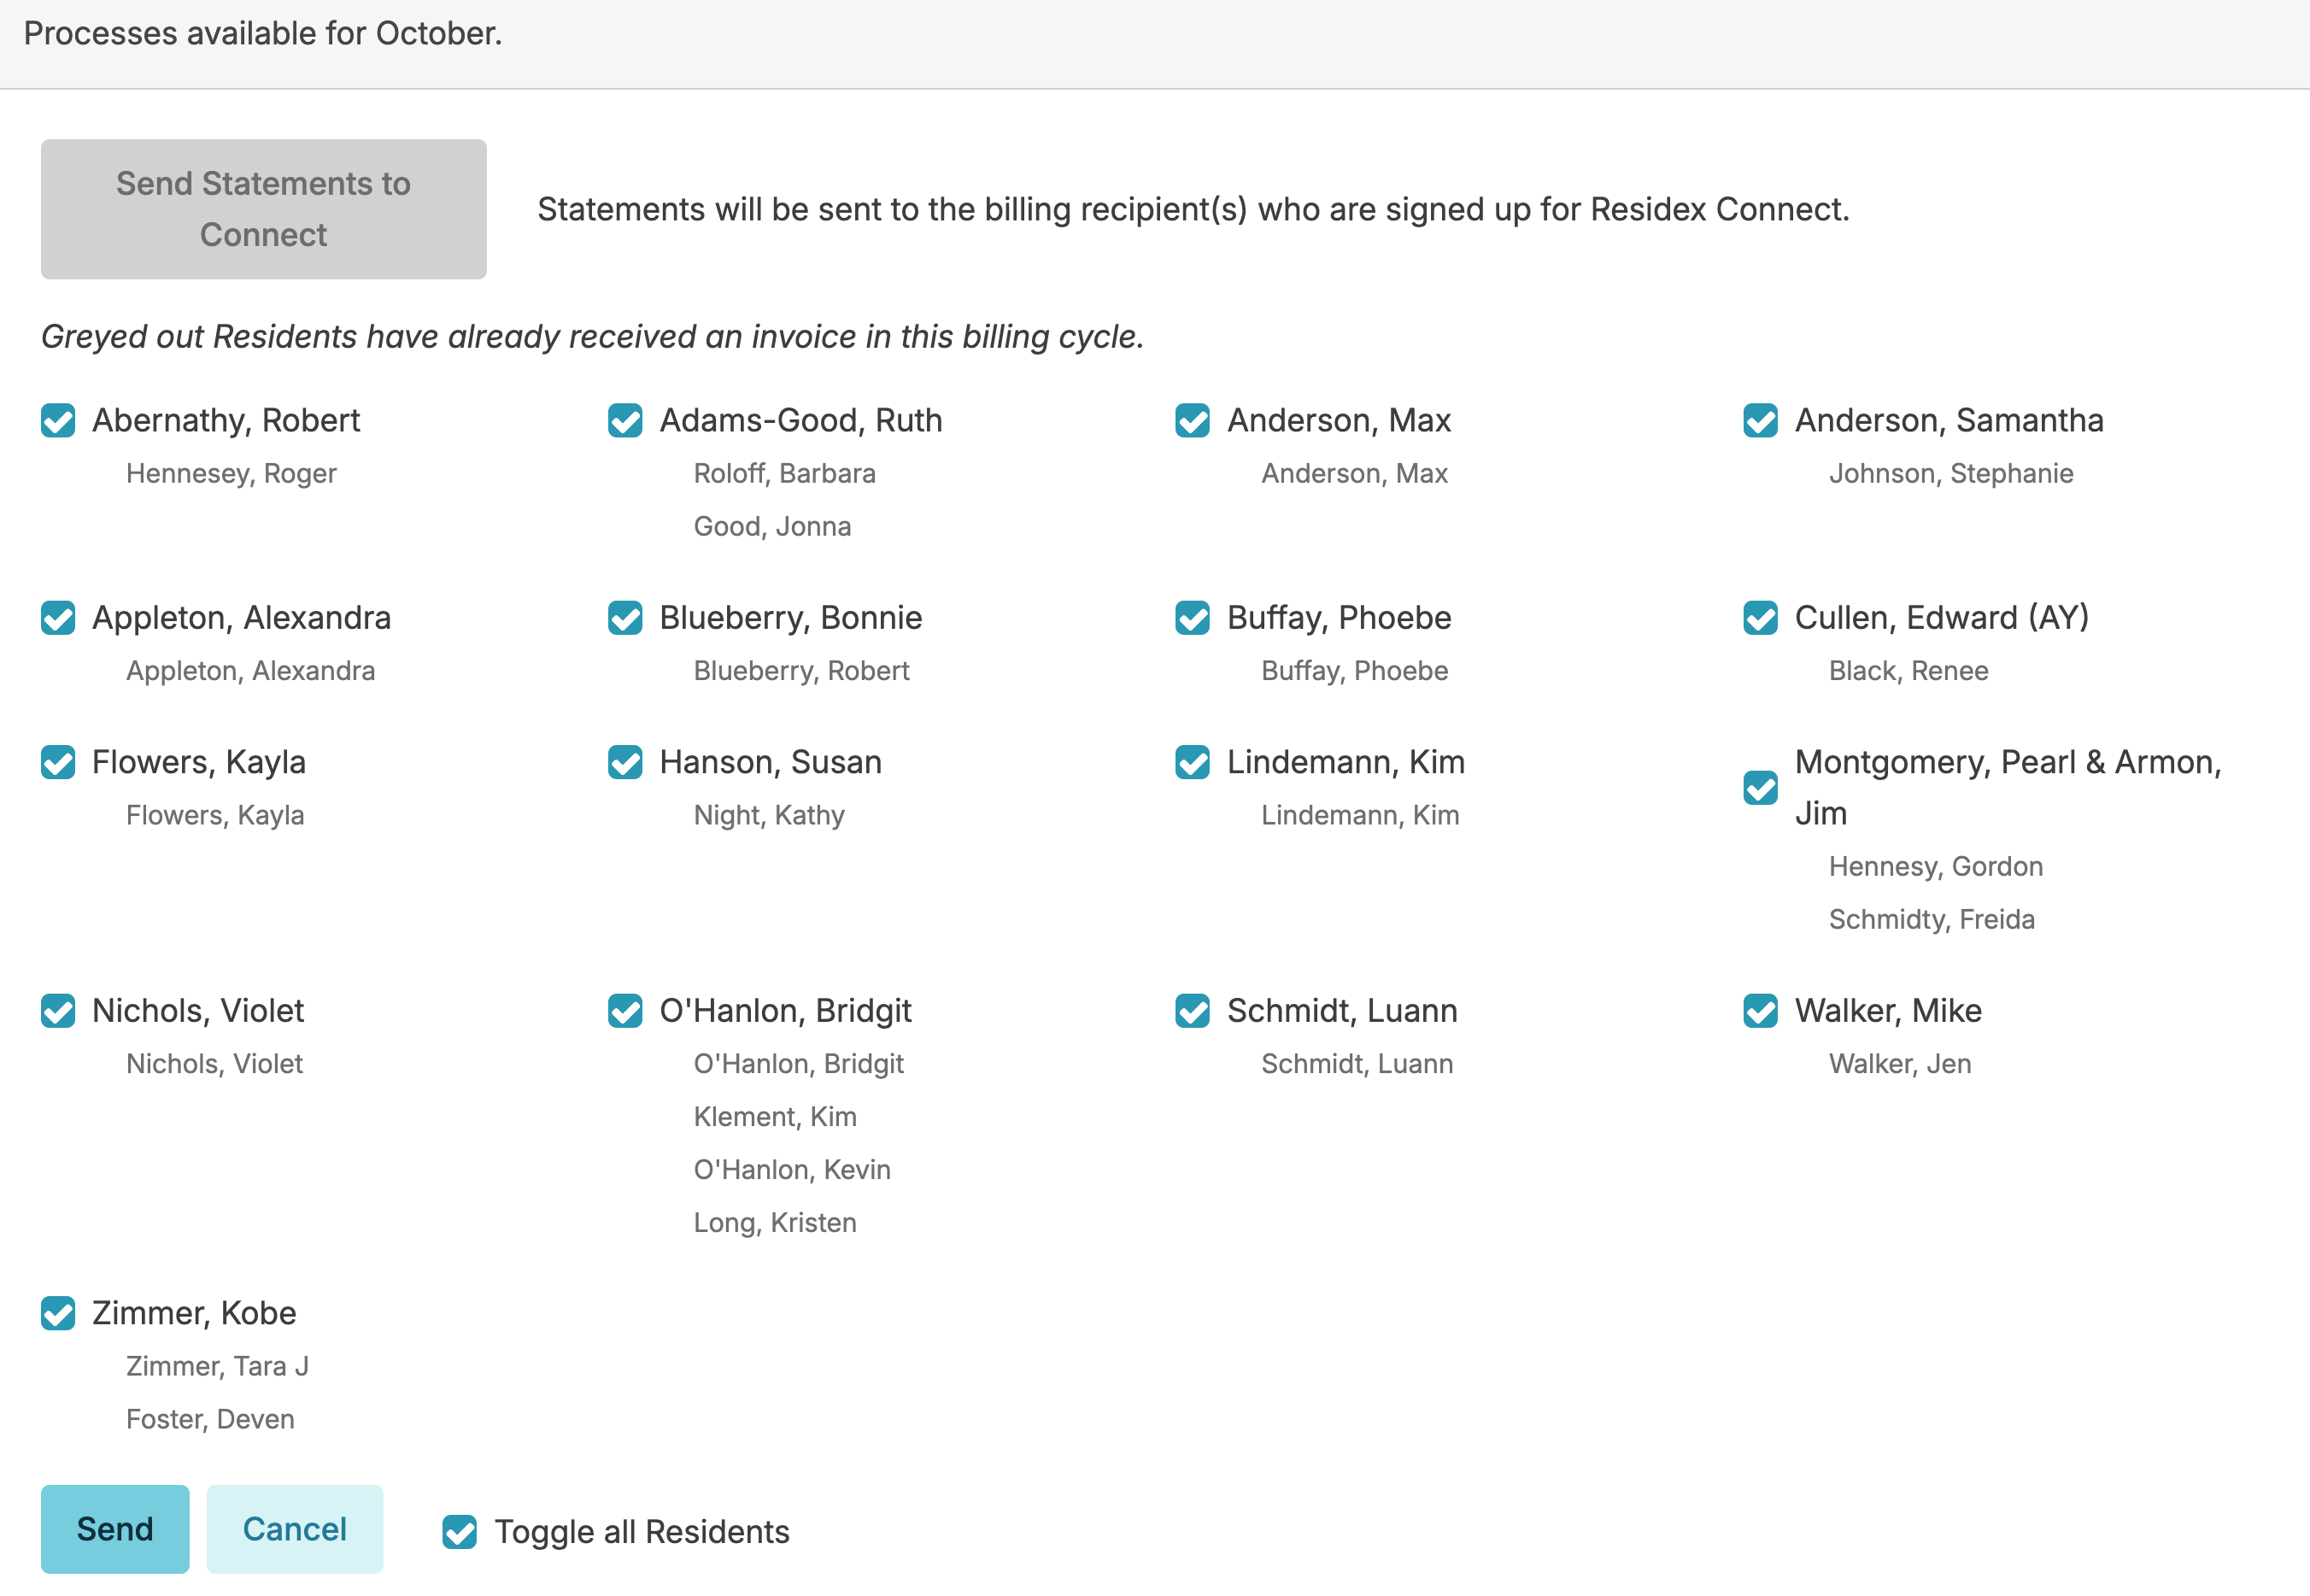
If you click Send Statements to Connect you will see a list of all residents and/or their billing contacts who are enrolled in Connect. You can uncheck anyone who you are not ready to send a Statement to.
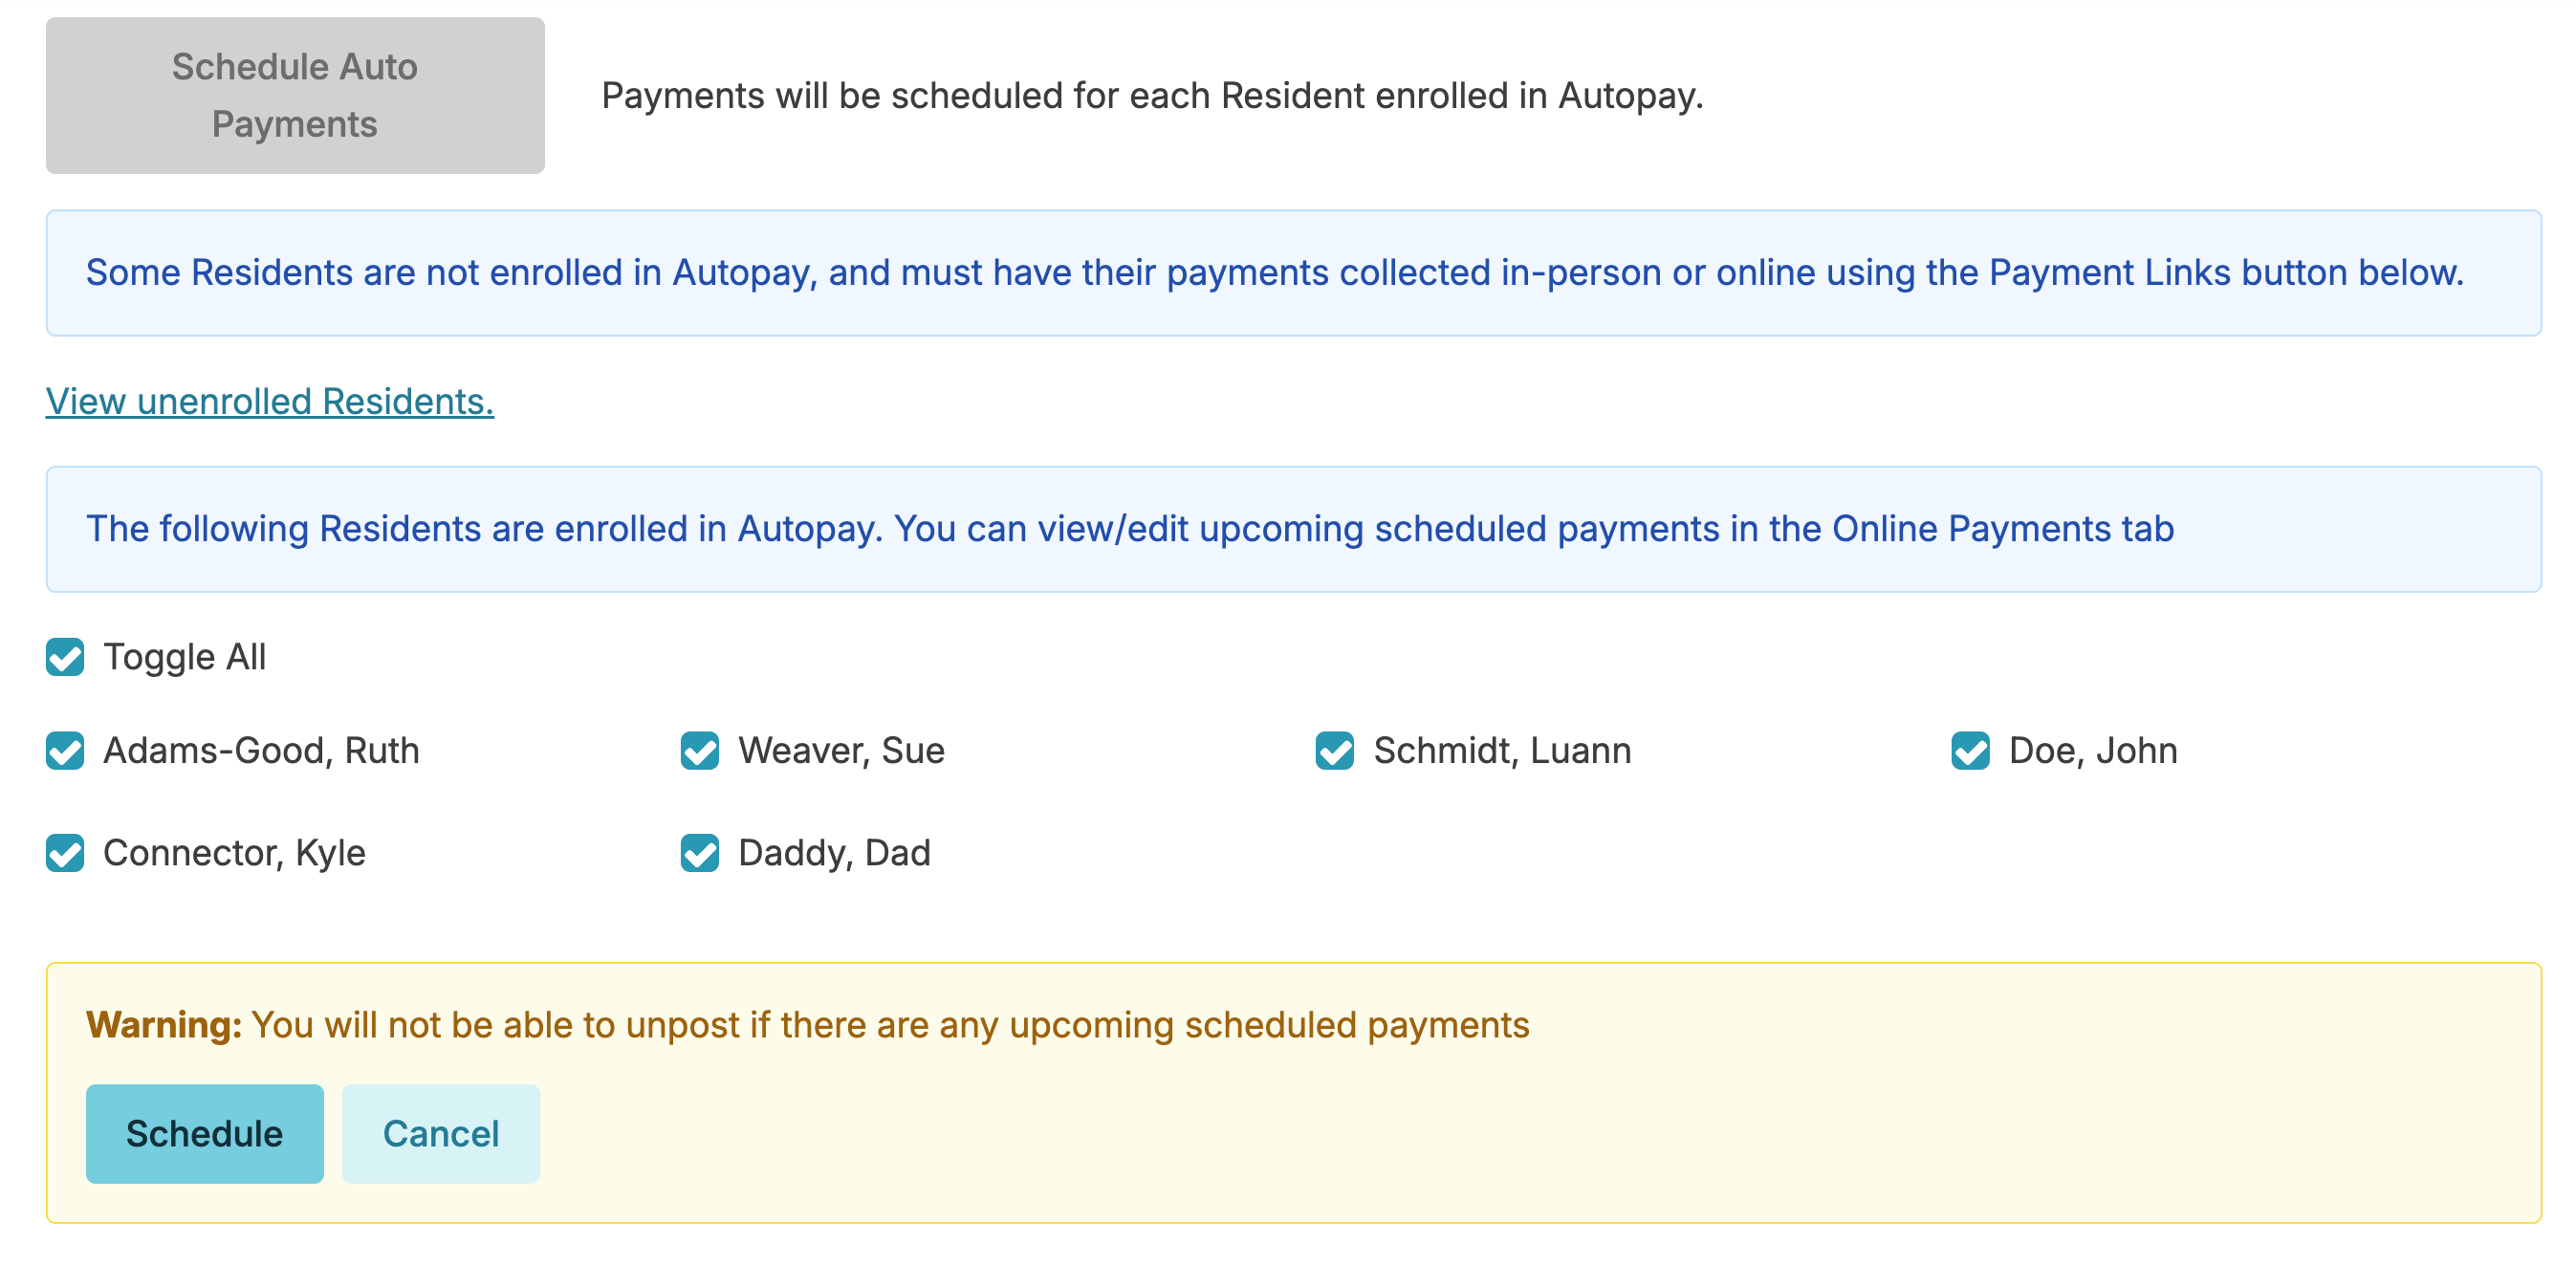
If you click Schedule Auto Payments you will see a list of residents who are enrolled in Autopay and you will click schedule to schedule their ACH withdrawal on their scheduled day chosen from their Billing and Finance Tab.
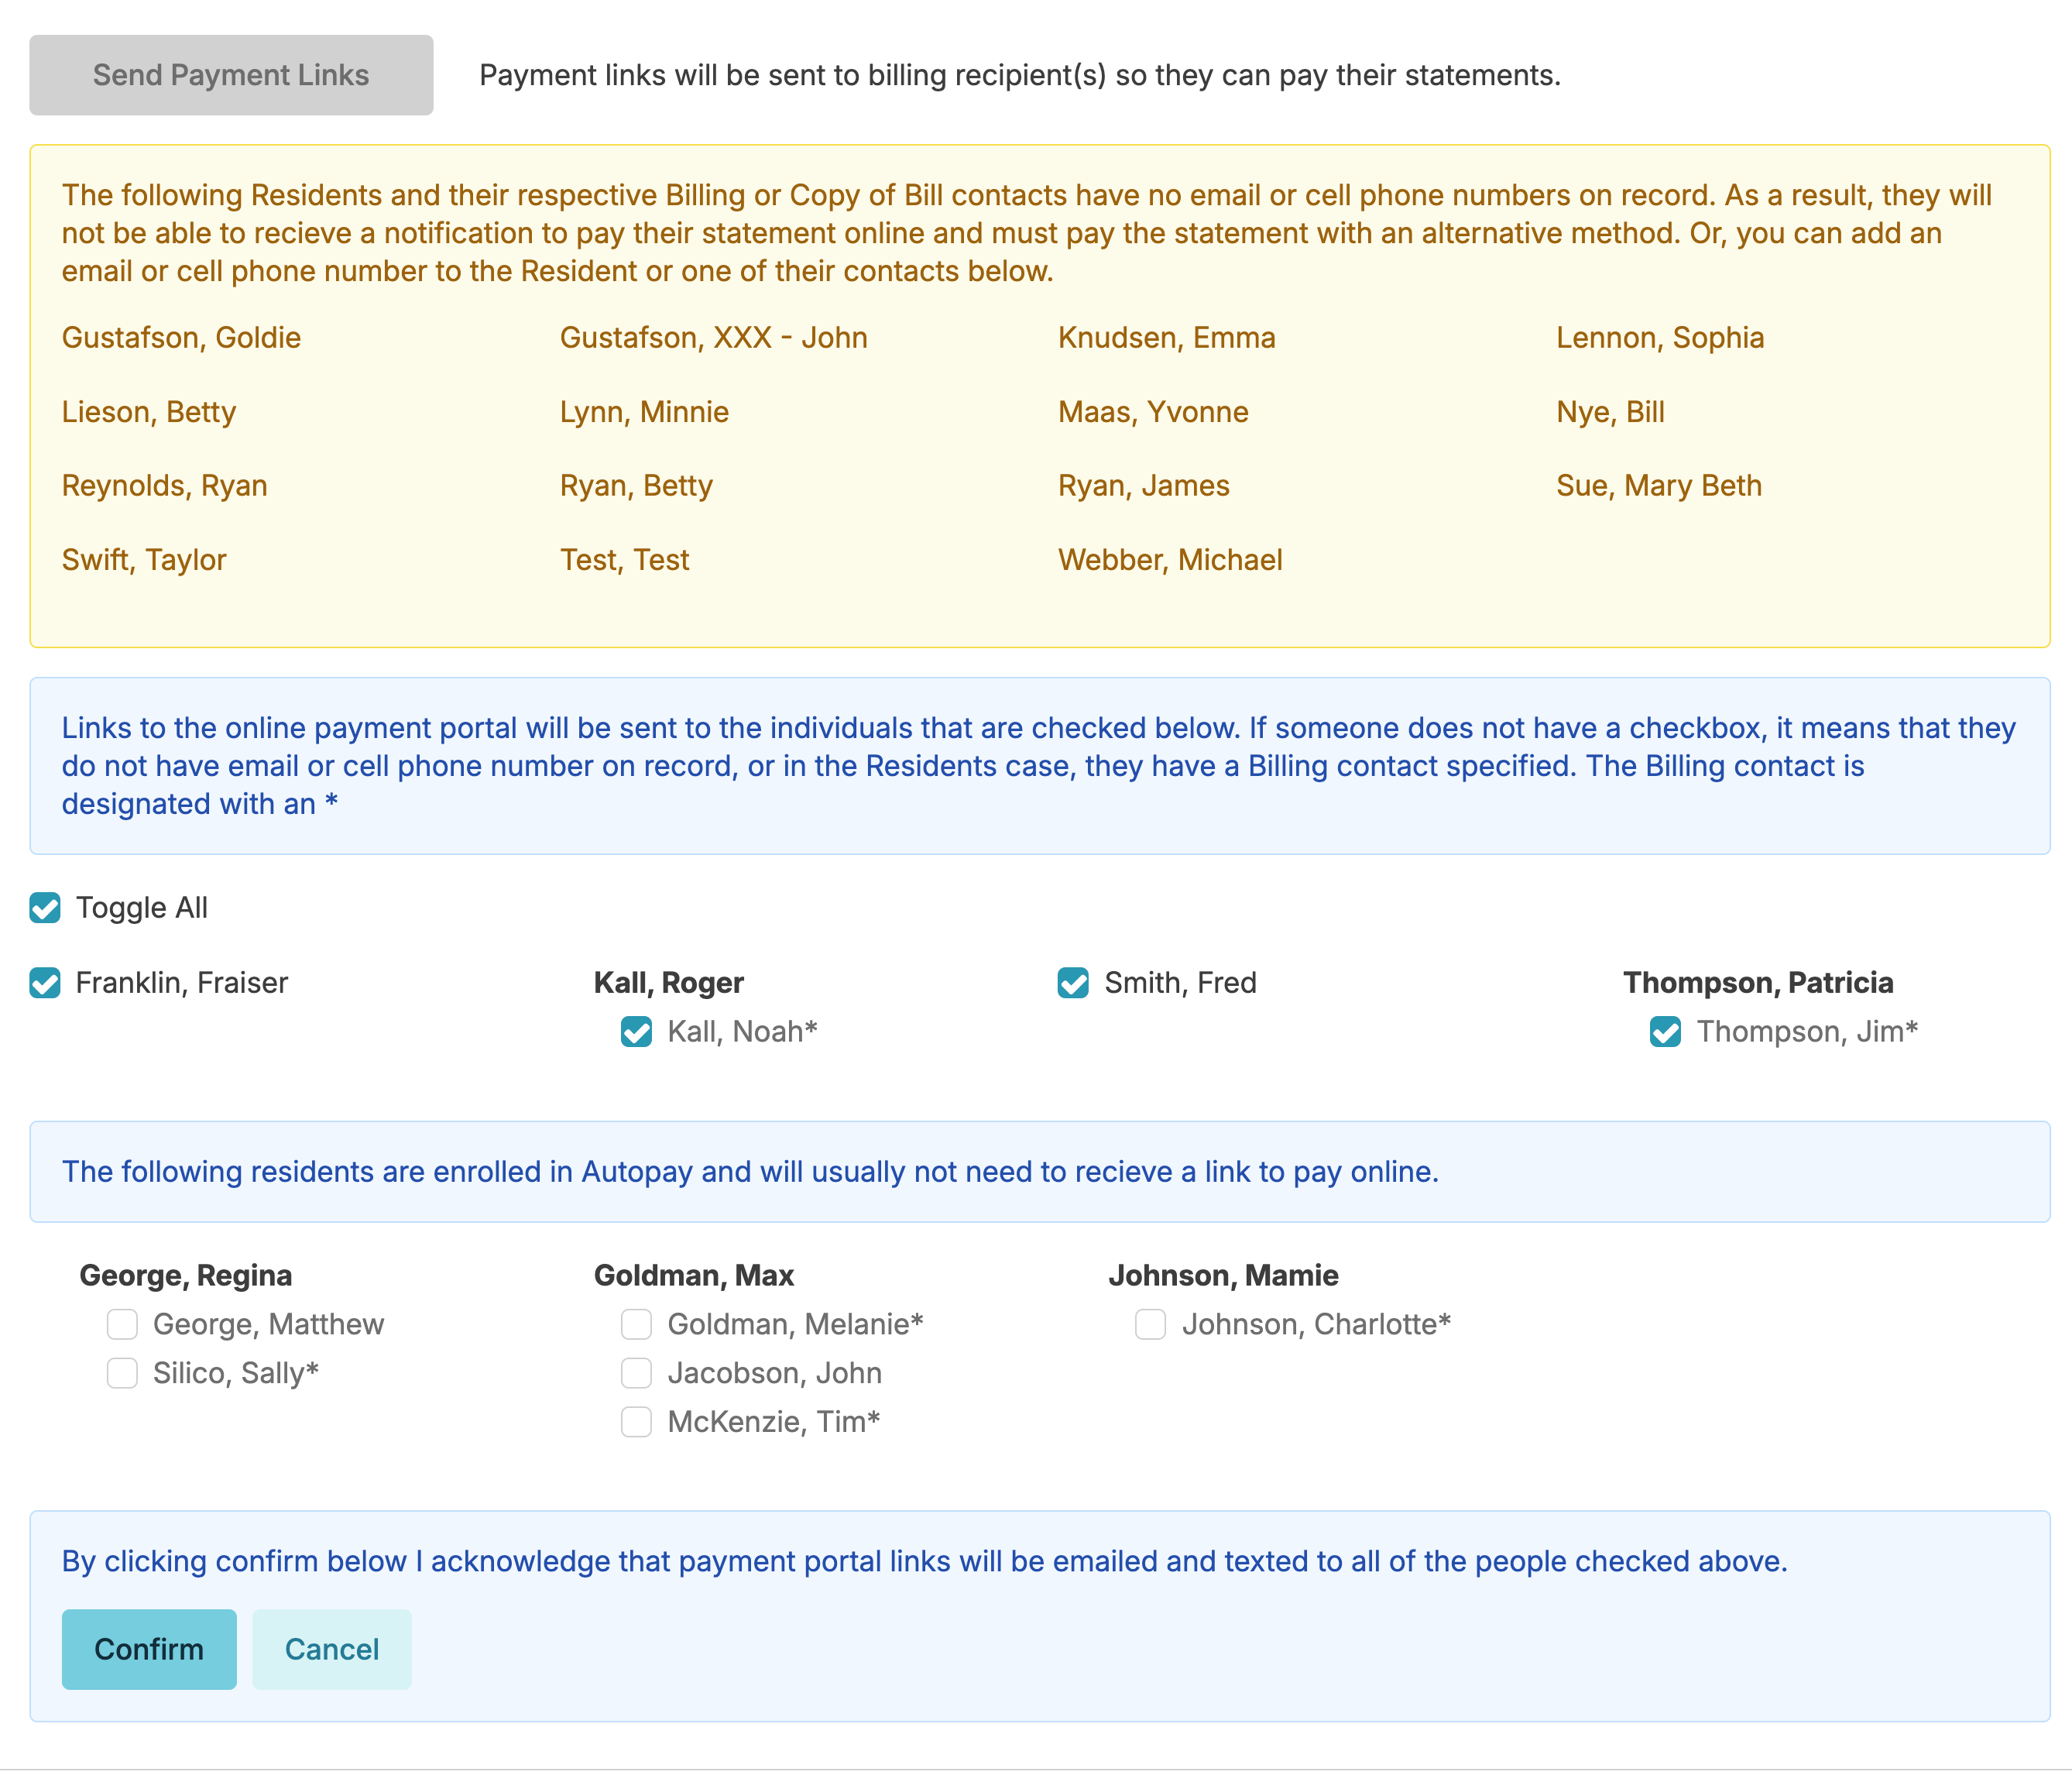
If you click Send Payment Links you will see a list of all residents and their billing contacts and can uncheck any residents who don't want a payment link sent. Autopay residents will not show up in this list but you will be able to view a list of those residents enrolled in Autopay.
Invoice - All
Creates a PDF of all invoices for all residents for you to print. Intended for:
- Campuses who do not use Residex Accounts Receivable (A/R).
- Campuses who only wish to print the CURRENT charges for an individual resident on their bill.
Statements - All
Creates a PDF of all statements for all residents for you to print. Intended for:
- Campuses who use Residex Accounts Receivable.
- Campuses who wish to show a residents prior balance, payments, adjustments, current charges, invoice total and new account balance on bill.
Memo Invoice
Creates a PDF of a Memo Invoice for one individual resident for you to print. Intended for:
- Creating an invoice for a newly admitted resident, or if a resident is discharged and needs an invoice outside of your normal billing cycle.
- For a Campus that does not use Residex Accounts Receivable.
Memo Statement
Creates a PDF of a Memo Statement for one individual resident for you to print. Intended for:
- A resident who adjustments entered, and a new beginning statement balance was needed.
- A resident who is moving out and the Campus wants to give a final invoice before all statements are processed for all other residents.
Invoice - Consolidated
Consolidated options will allow you to combine two residents' total charges into one invoice/statement. Residents who have the 'Share household with' option specified in their Billing profile will be consolidated together.
Note: You can add a company logo to Invoices or Statements by emailing a copy of your logo to billingsupport@residex.ai
7. Close Month
Once you click the close month button, you are locking the billing month down to maintain the integrity of your statements and financial reports. No further changes can be made to invoices directly without using the adjustment feature. If you have the configuration Strict Close turned on, once you Post, any adjustments you make will be automatically dated for the next billing cycle month. Post billed charges can be edited to the current billing cycle month if desired. If you have Posted but not Closed you can create Deposits for the current billing cycle Month. Once you Close the Month your deposits can only be dated for the Current Billing Cycle Month.
You are now ready to begin the billing process for the next month.