Table of Contents:
- About Services
- Entering a Service
- Editing & Rescheduling Services
- Mass Reschedule
- Service Sets
- Discontinuing Services
- Supervision of Treatments
- Advanced Service Scheduling
- As Needed (PRN) Services
About Services
Services are cares your staff will provide to the resident, along with all instructions and details required for charting. Services can be any work provided to or for a resident such as care services (escorts, bathing assistance, safety checks, etc), and housing services (housekeeping, laundry, etc).
A resident's services are accessible from Residents > Residents > select a resident profile > Services.

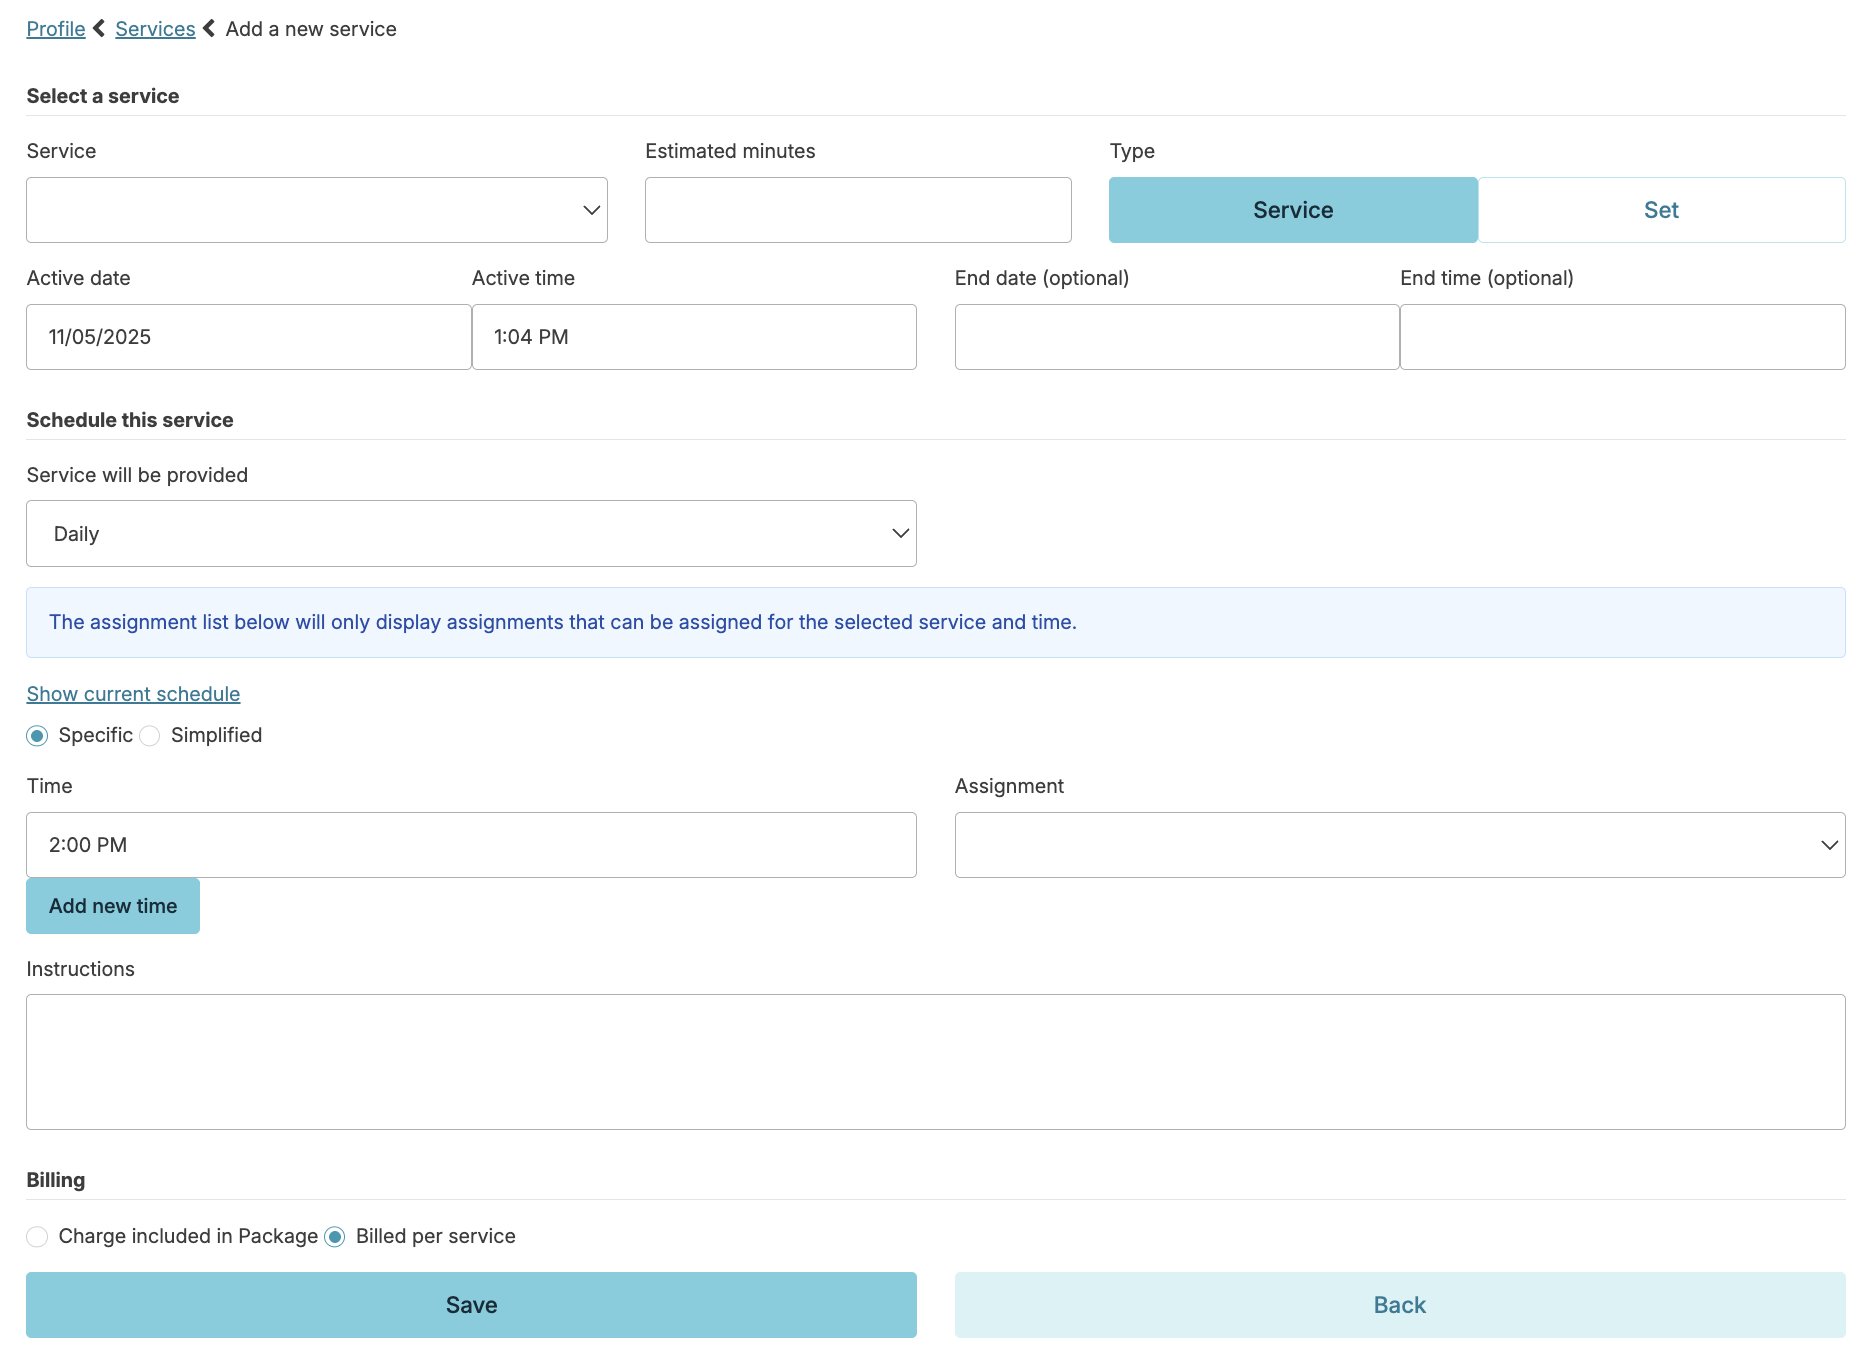
From the Services screen, you can add a new service by clicking the Add new service button. This will open the entry fields for you to complete and add the details for the service.
Service : Select the service you are scheduling from a global list of services customized for your organization
Estimated minutes: Estimated time it will take to provide this service once for this individual. A default value will appear for each service you select; you can override this as needed.
Schedule: Determine the active date and time (when the schedule will start), end date and time (if applicable), frequency service will be provided and what time the service will be provided. Be sure the active date and time falls before the desired first dose is scheduled. An active time that falls after the initial desired scheduled time, will prevent a medication from showing on the eMAR until the following scheduled occurrence.
Specific - Times allow you to schedule services for exact times. Scheduling a vital sign service at the exact same time as a med administration service will create a lock out from the eMAR until the vital sign is obtained and recorded.
Simplified - Times allow more generalized scheduling (AM, PM, Overnight, etc) for services that aren't time sensitive. It is possible to select the same time twice for a single service (but assign to different assignments) if you want two staff on hand for a single service.
Add new time - Will allow you to add additional times and assignments to the schedule (For Example: 8:00 AM, 12:00 PM, 4:00 PM and 8:00 PM)
Assignment - Will be the person or team responsible for charting the service. If your agency is using our 'Client Clock' feature, you will only see assignment options for assignments linked to the person you are scheduling the service for or assignments with no resident linked.
Instructions - Default instructions for your selected service will appear and will need to be individualized at this step.
Vital Sign and Meal Percentages Parameters
When entering a service to monitor a resident's vital signs or meal percentages, you will be prompted to enter values Alert if charted value below & Alert if charted value above.
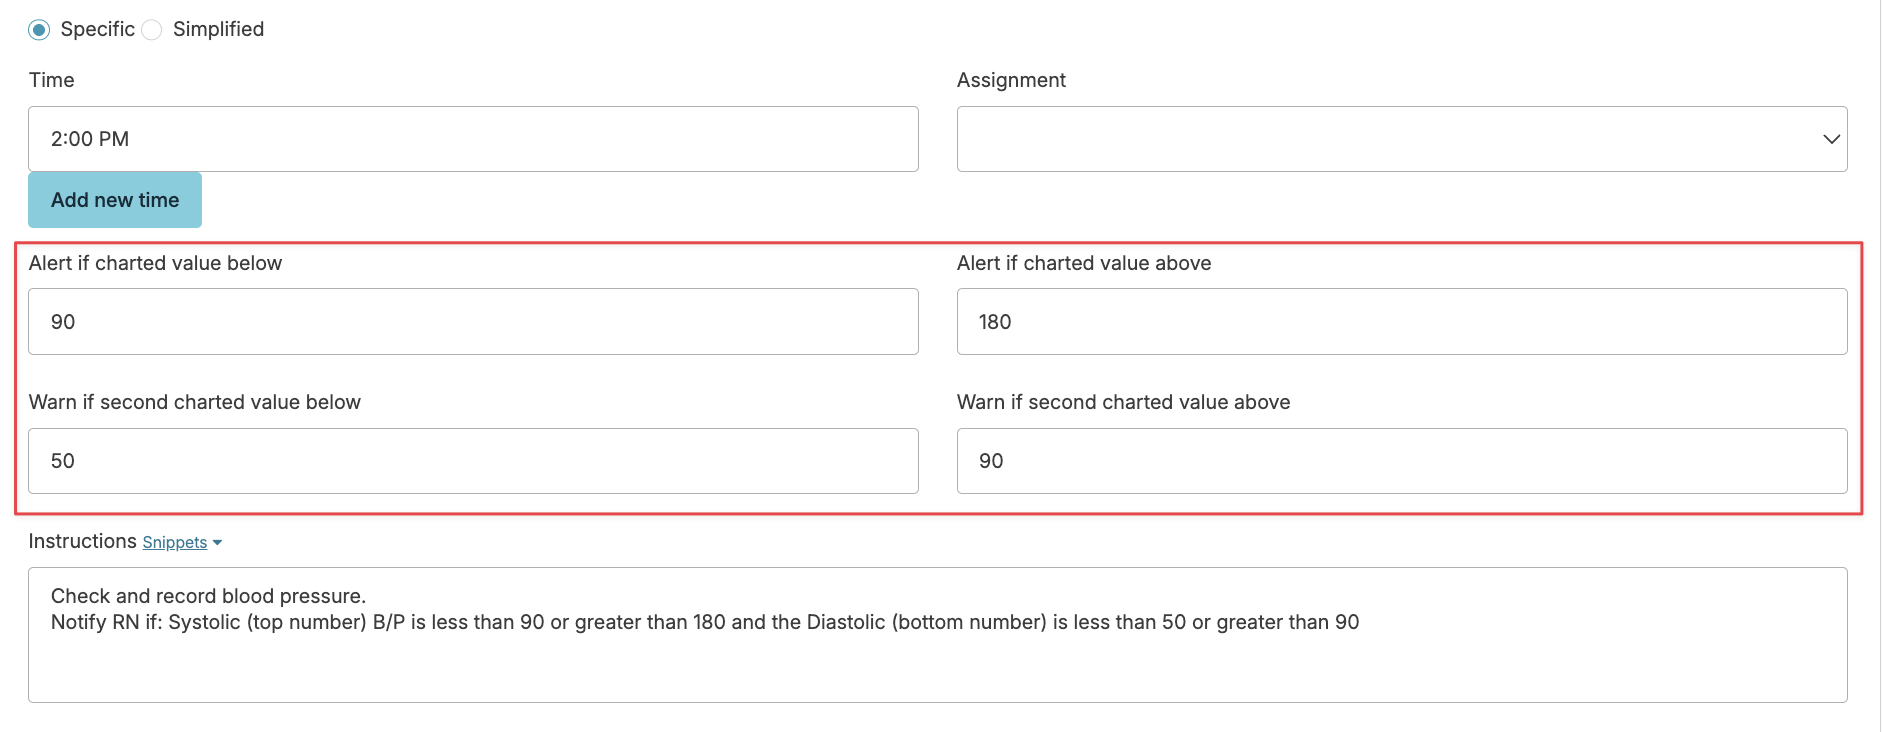
These are parameters for acceptable vital signs/meal percentages for this individual resident. If a caregiver charts a value below or above your specified parameters, nurses can be automatically notified by text message alerts, emails, login reports, etc... as specified by your settings.
- These fields are only relevant to vital sign monitoring services and meal percentages
- Default parameters for each vital sign or meal percentage service are set for your organization, but can be individualized when adding the service to the residents services list.
- We recommend you also direct caregivers with acceptable vital ranges and instructions in the Instructions field to make sure your bases are covered and you are giving clear direction to staff.
Once parameters are in place, when staff chart vital signs or meal %, they will be alerted if they attempt to enter values out of the acceptable range. You will want to direct staff as to what to do in these instances, within the service instructions.
Editing & Rescheduling Services
Select a service from a resident's Services screen.
- The Edit button will allow you to manage estimated minutes, service instructions, and billing configuration.
- The Reschedule button will allow you to change when a service is assigned.
- The Add Times button will allow you to add additional times and assignments to the schedule.
- The Hold button will put that service into an indefinite hold status. Services on hold will not appear on the Today screen for staff to chart. To make active again, simply click the Remove Hold button to resume. If a service is scheduled more than one time/day, you can put one, some, or all on hold as is needed.
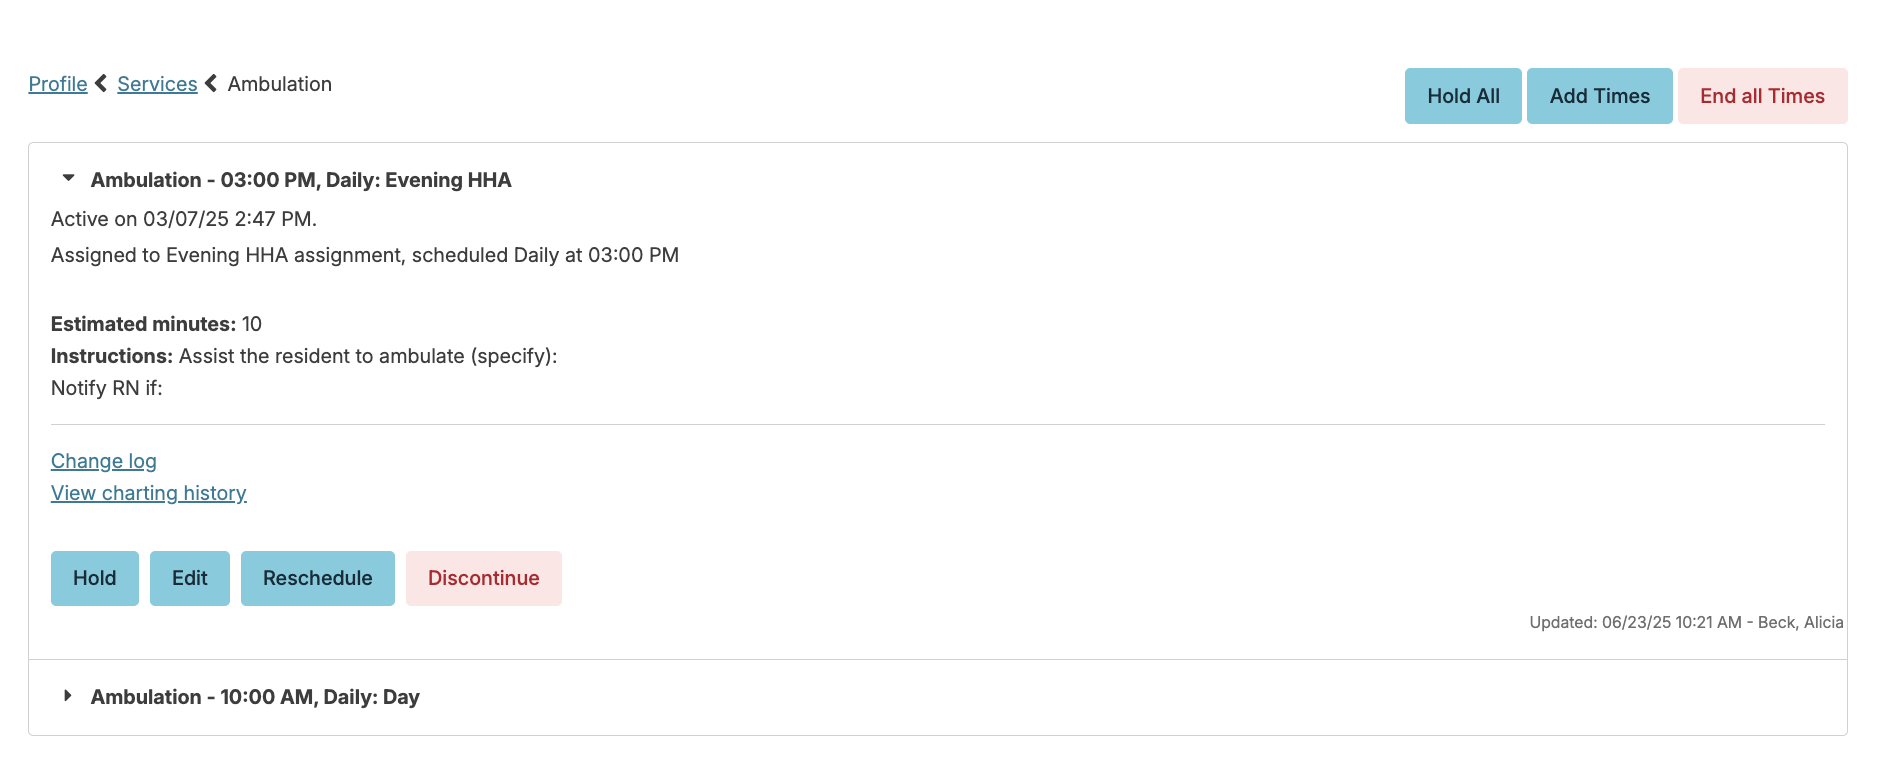
When changes are made either as edits or when rescheduling, Residex will track those changes. Edits to the service instructions are saved under Change log as seen below.
Service schedule history is visible under the Services > History tab.
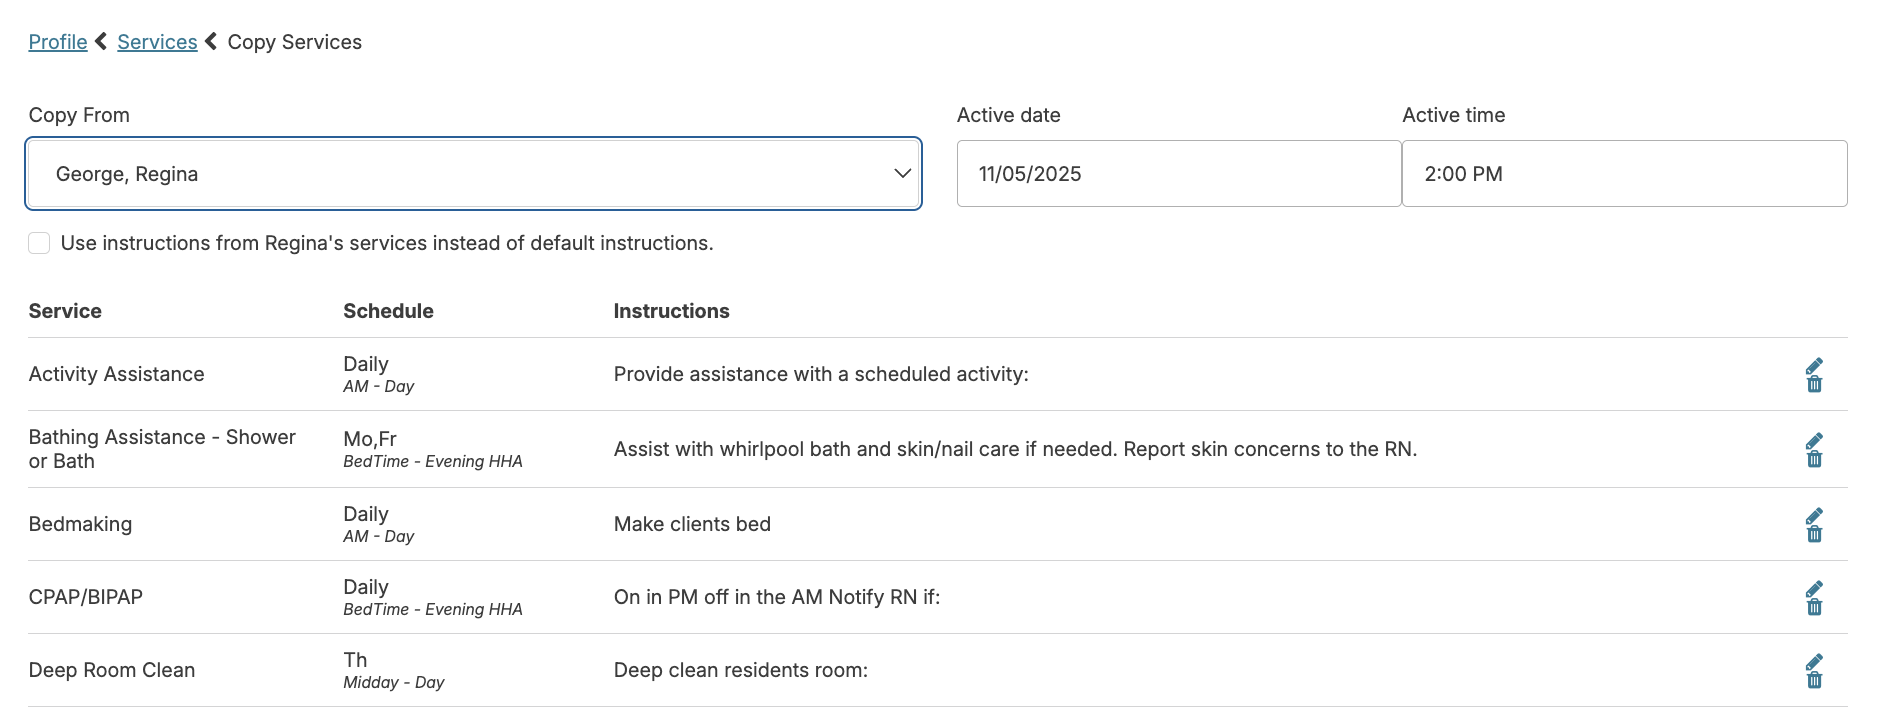
When entering services for a new resident, you can optionally select the Copy From Resident button. This allows you to copy active services from an existing resident or prospect (OR from a recently discharged resident to this new resident). You can select the option of copying those same service instructions or using the default service instructions from the Global Service List. Once selected, you can review, edit, and remove items as appropriate.
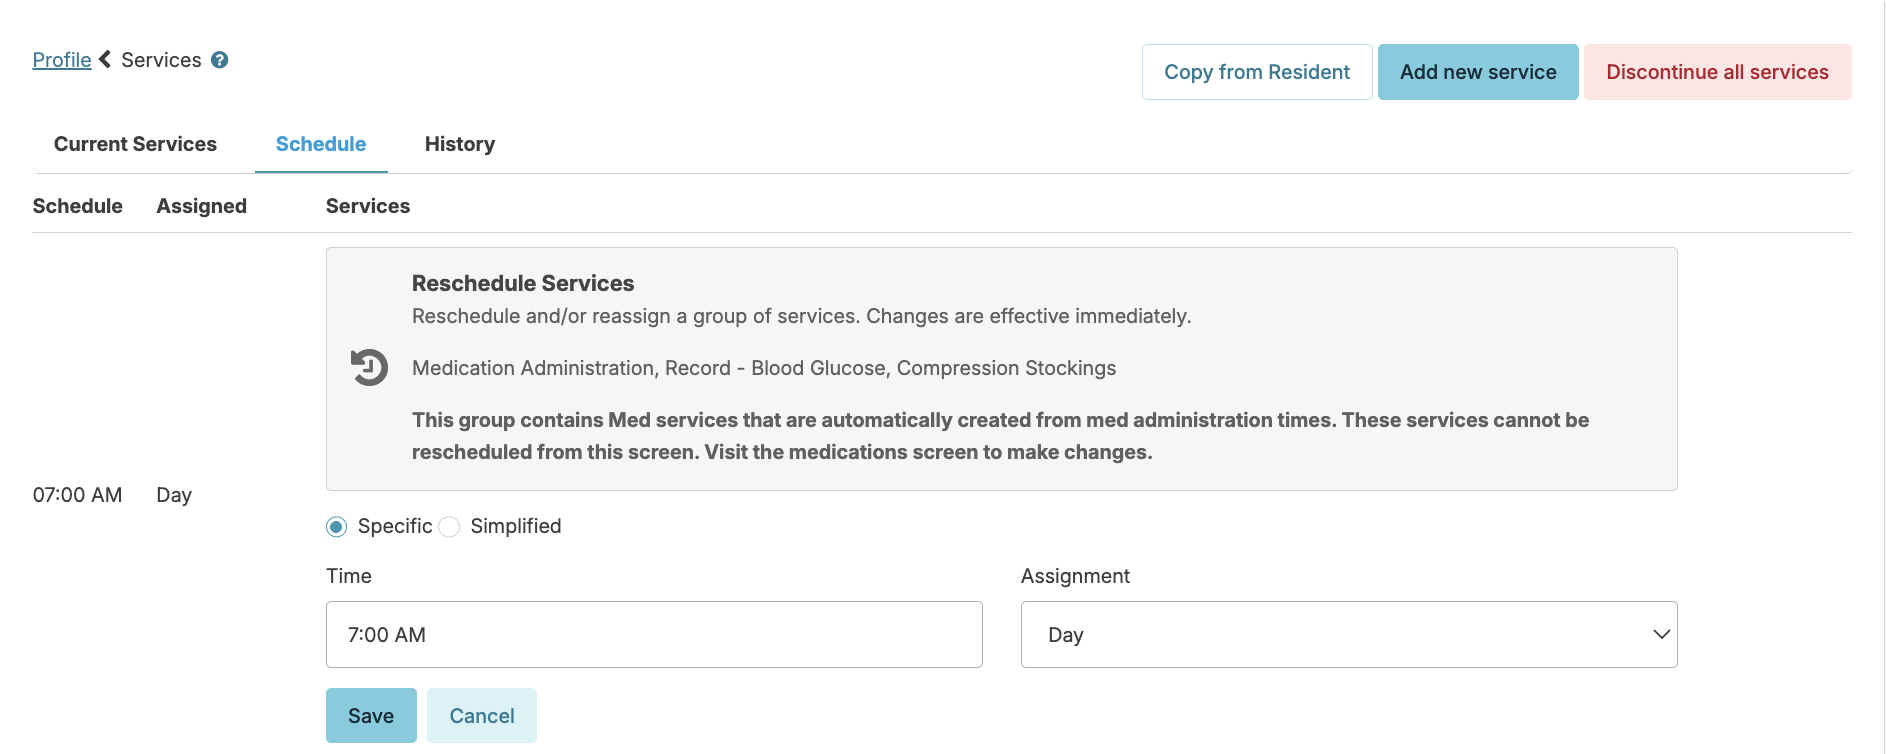
- From a resident's Services screen, select the Schedule tab. This screen will present all of a resident's services grouped by time and assignment, rather than service name.
- Click on the reschedule button next to any group to reschedule them to a new time, and/or reassign them to a different assignment. These changes in schedule are immediate. A history of changes are tracked in the Change Log for that service. Because medication administration services are autogenerated based on scheduled medications, you will need to complete this same process of rescheduling services for medications, in order to adjust the medication administration services.
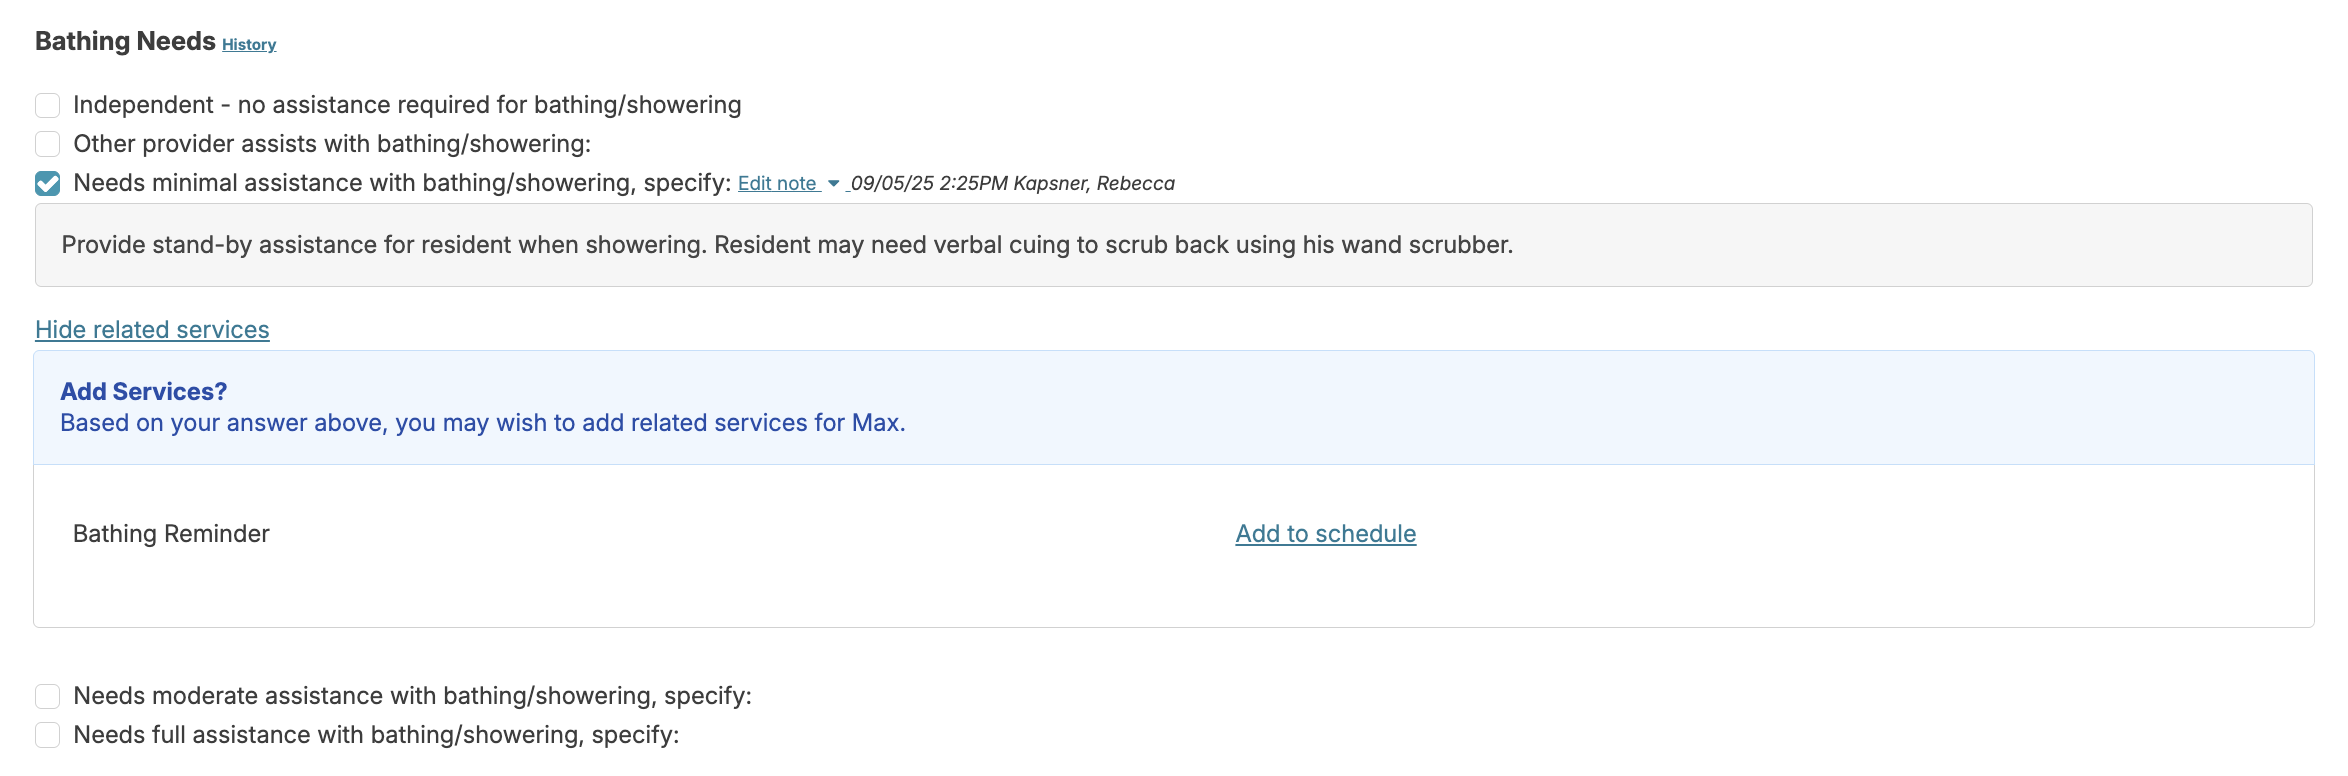
Services can be linked to assessment items, allowing the nurse to add, edit, or end services while performing an assessment. This can ensure your assessment and Services list are in sync. Click on the link Show Related Services to view the linked services. Select Add to schedule to schedule a service or Already Scheduled to make modifications to an existing service.
Service sets are groups of services you can assign all at once. If you have standard services you provide for all residents or certain groups of services you wish to assign regularly, a service set can speed up the process.
- From a resident's profile > Services > Add new service
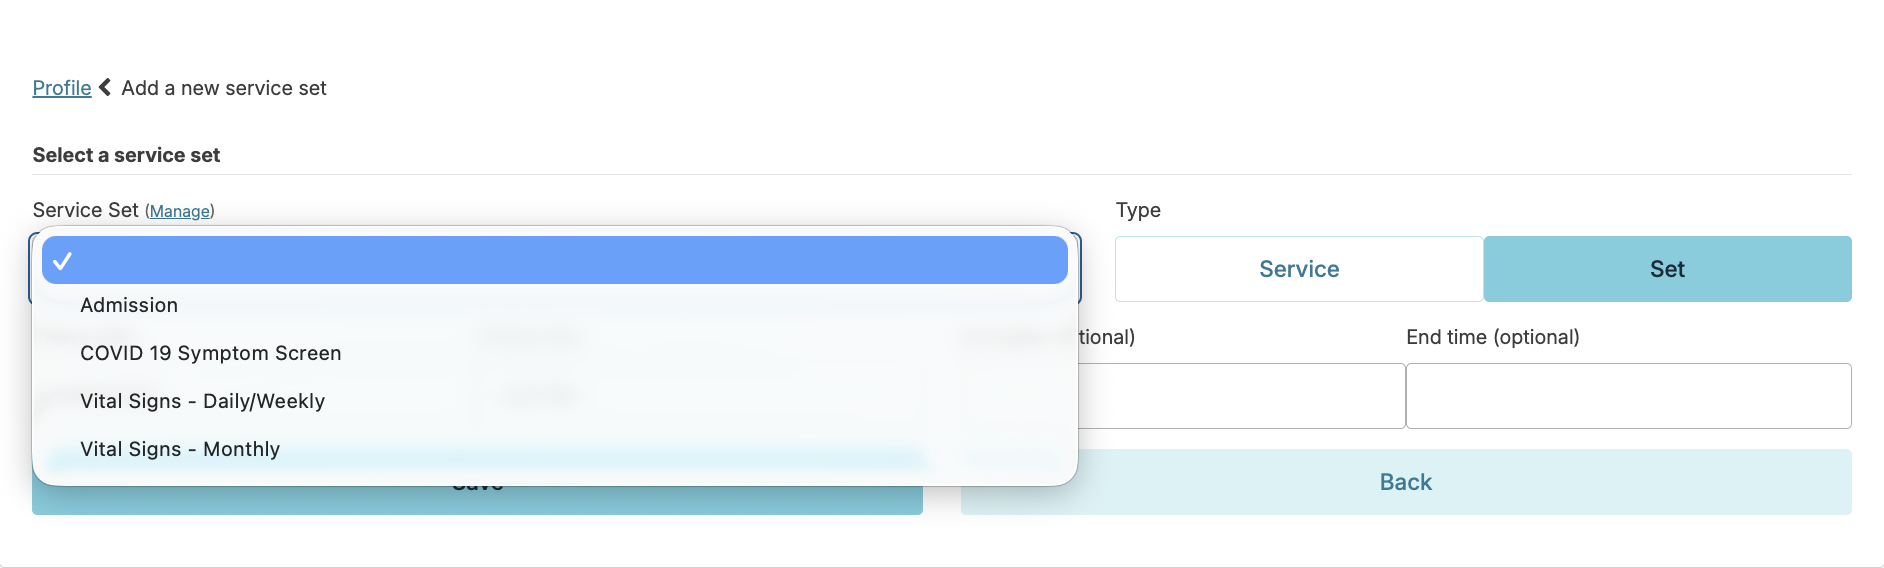
- Select the Set button
- From the Service Set dropdown, select the desired set
- Schedule the first service that appears and select the assignment. These times and assignments will populate to all other services.
- Make any additional edits needed and click Save.
Users with the Administrator (Role 411) or the Administrator Assistant (Role 410) can create, edit and delete service sets. To add a new service set, navigate to:
- Admin > Service Sets > New Service Set
- Enter the service set Name and Description
- Click Add Service to add each desired service to the list
- Click Save
To edit a service set, navigate to Admin > Service Sets > click the blue pencil to the right of the service set you wish to edit. You can add new services to the set or remove services from the set. You cannot edit existing service information.
Changes made will apply for future use only. Updates to previously entered resident service sets will need to be done manually for each resident.
Discontinuing Services
This guide provides step-by-step instructions for discontinuing resident services in Residex. Services can be discontinued by service, service time, or all services at once, depending on the resident's care needs.
When a resident is discharged, all services automatically stop appearing on the Today screen and do not need to be manually discontinued.
Discontinue a Single Service Scheduled Once a Day
- Navigate to the resident's services screen
- Click on the service you want to discontinue
- Click Discontinue
- Enter the date the service is to be discontinued: Yesterday's date will be set by default. If you want the service performed today and then end, change the Last date of service to today's date.
- Optionally enter Reason service is being discontinued
- Click "Confirm"
Discontinue a Service Scheduled More Than Once a Day
When a service is scheduled multiple times per day, you can end specific times by navigating to the service
- Click the "End all Times" option
- Edit the Last date of service if needed
- Optionally enter a Reason service is being ended
- Uncheck any times you do NOT want to discontinue
- Click "Confirm"
Discontinue All Services
⚠️ CAUTION: This action cannot be undone. If done in error, you will need to re-enter or restart all services.
To discontinue all services, navigate to the resident Services screen:
- Click the "Discontinue all services" button
- Select the reason for discontinuing all services
- Click "Confirm"
Best Practices
Documentation
- Always provide a reason when discontinuing services for proper documentation
- Review service lists regularly to ensure accuracy
- Keep care plans updated when services are discontinued
Timing Considerations
- Yesterday's date default: Use when service should have ended yesterday
- Today's date: Use when service should be performed today and then end
- Future dates: Can be set for planned service discontinuation
Quality Assurance
- Double-check which services are being discontinued before confirming
- For multiple-daily services, verify which specific times are being ended
- Use the "Discontinue all services" option with extreme caution
Troubleshooting services
Common Issues
- Service still appearing: Check if the discontinuation date is set correctly
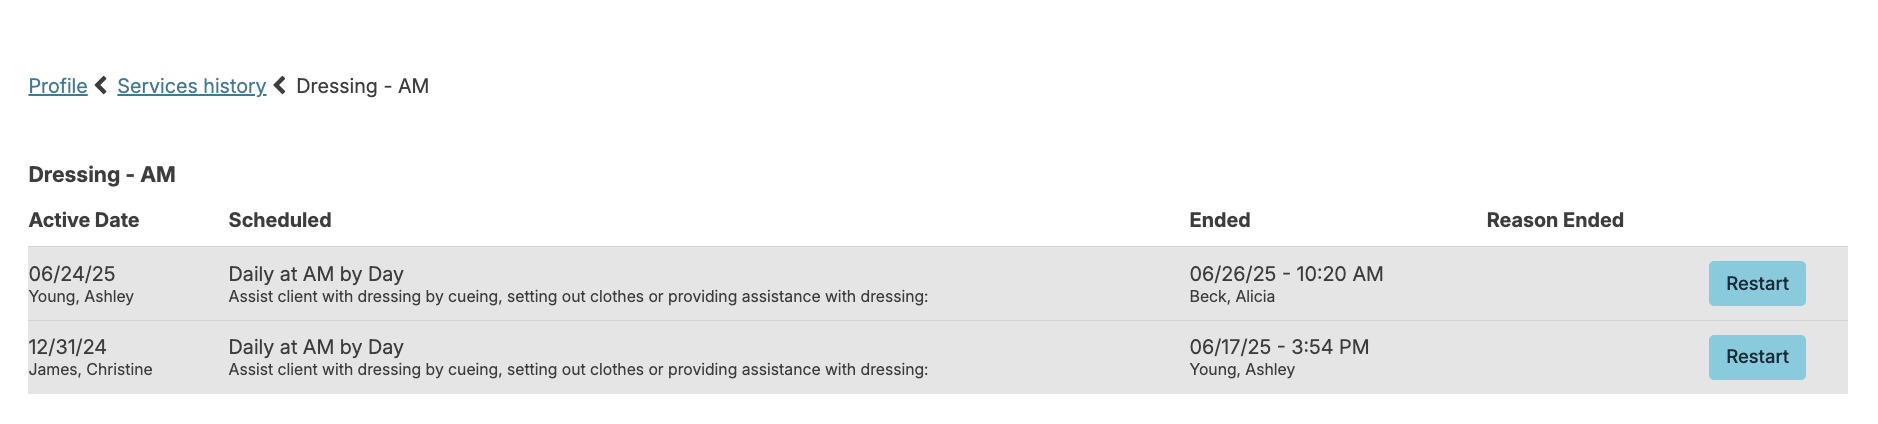
- Wrong service discontinued: You can restart a service from the Services > History screen.
Supervision of Treatments
While some resident services are related to activities of daily living (bathing, dressing), others might be considered treatments ordered by a physician or primary care provider (e.g. oxygen or CPAP/BiPap management, vitals monitoring, therapeutic exercises, etc...). Linking treatment services to a supervision services can allow the nurse to supervise and document the effectiveness of those treatments.
Note: Supervision services are different than staff supervisions. Supervision services evaluate how effective a treatment is for a resident, whereas staff supervisions are supervising staff perform their job duties.
Enter a Treatment and Supervision
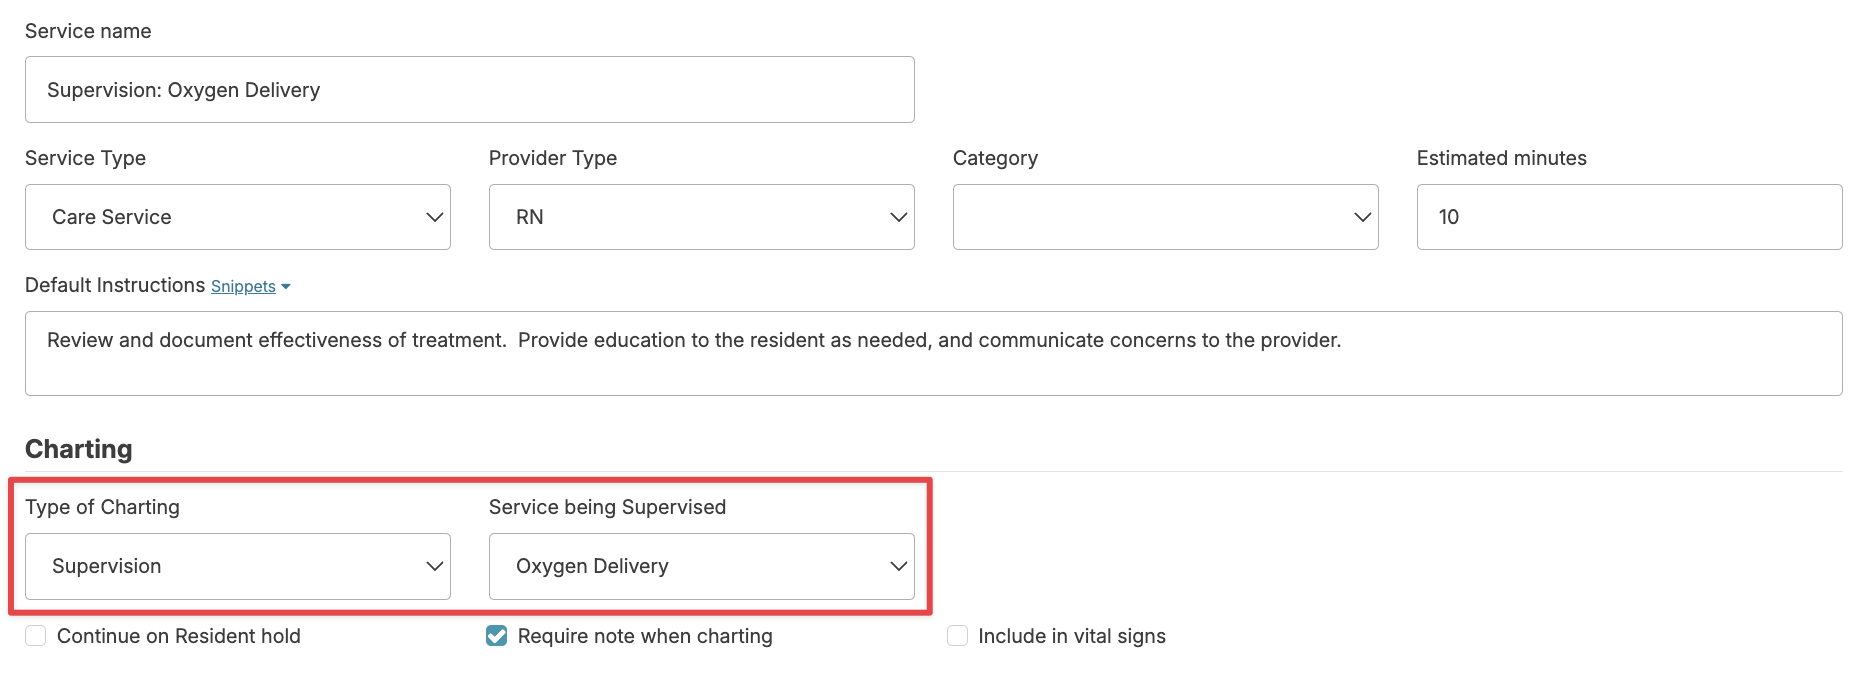
Treatments and Supervisions are first setup in the Admin > Global Service list. The treatment itself (such as Oxygen Delivery) will have a Type of Charting specified as Standard. A second service is created (Supervision: Oxygen Deliver) and will have a Type of Charting specified as Supervision, linked to the treatment itself.
From the resident's profile > Services > Add New Service, select a treatment service. As you add the necessary details, you'll notice a blue banner at the bottom of the service reminding you that this might be considered a treatment. Click the box available to automatically be taken to the associated supervision service so this too can be added.

Note: just because the service itself is scheduled daily or more often, the supervision need only be done at a frequency appropriate for the condition of the resident - weekly, every 14 days, or less often, based on nurse discretion or per your state requirements.
Both the staff scheduled to provide the treatment and the nurse scheduled to perform the supervision will receive reminders to do those from the Today screen on the given day. Nurses can add a service note and mark it complete. The report Individual Treatment and Therapy Plan will show all planned treatments for a resident. Service recap reports will demonstrate that both the treatment and the supervision of that treatment are being completed.
Blood Pressure Monitoring Example
When a provider orders daily blood pressure checks:
1. Schedule the service: Set up "Record - Blood Pressure" as a daily service
Assign to AM or PM provider based on preferred check time
2. Add supervision (if required): Assign "Supervision: Record - Blood Pressure" to the RN
Frequency depends on provider's orders or facility policy (weekly, biweekly, etc.)
RN responsibilities include:
- Reviewing readings for acceptable ranges
- Identifying need for medication adjustments
- Determining when to update the provider
Note: For routine vital signs monitoring (facility policy, not provider-ordered), supervision services are not required.
Additional Treatment Services
Some examples of other provider-ordered treatments include:
- Compression therapy: Stockings, ACE wraps, braces
- Respiratory support: Oxygen therapy management
- Wound care: Dressing changes and wound monitoring
- Other interventions: Any provider-ordered symptom management or treatment protocols
Each service can be scheduled with appropriate staff assignments and supervision levels based on your facility's policies and provider orders.
Advanced Service Scheduling
Behavioral Symptom Management
Manage Behavior services are created and customized in the Global Service and allow you to develop an individualized behavior plan and view outcomes of behavior management.
Add a Behavior Service
Navigate to the resident profile > Services > Add new service and select the appropriate Manage Behavior service.
Add service instructions helpful to staff in managing that behavior, these instructions will be your behavior 'Plan'. We recommend including:
- What the behavior 'looks like' for the individual (not in general)
- Any triggers particular to this individual
- Suggested interventions that have been known to help for this individual
- When a supervisor should be notified
Assign the service to each shift, allowing you to track the behavior 24/7.
Documenting Behaviors
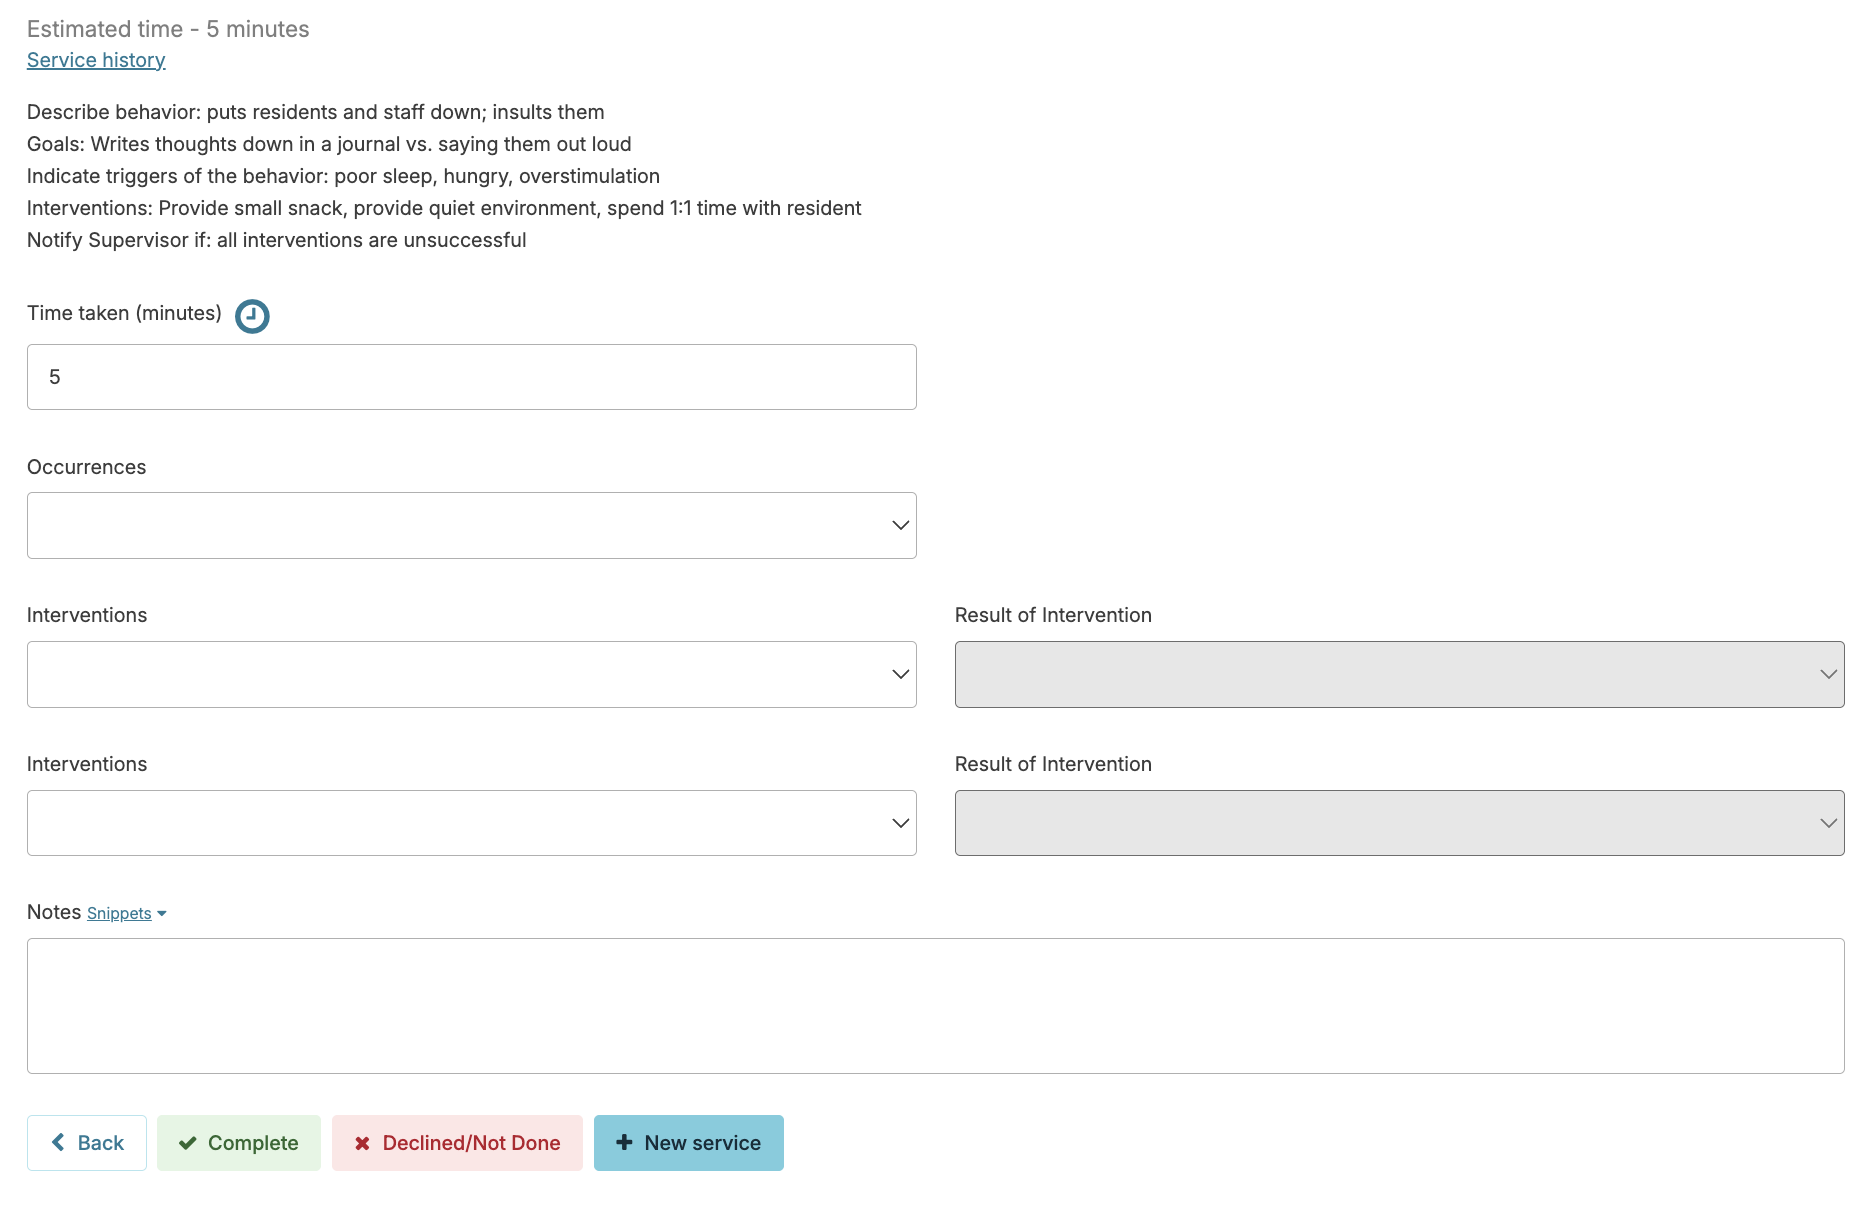
At the end of their shift, staff will document the Manage Behavior service by completing the following details:
- Time spent during that shift in managing the behavior
- Number of occurrences of the behavior during shift
- Highest Intensity (Mild, Moderate, or Severe) of the behavior during shift
- Interventions specific to that behavior (Up to two)
- Success (if any) of those interventions (Up to two)
- A note field allowing any additional information (additional interventions, details of interventions, etc.)
Editing Behavior Service Intervention Subsets
This guide explains how to customize intervention options and result options for behavior services in Residex.
Accessing Behavior Service Settings
Accessing Behavior Service Settings
- Navigate to Global Services
- Select any current Manage Behavior service
- Click the blue manage icon next to the intervention subset you want to edit
Editing an Intervention Subset
Once you've clicked on a subset (e.g., Agitation), you'll see two main sections:
Intervention Options
This section allows you to manage the intervention choices available to staff when documenting behavior services.
- Add Option – Click to add a new intervention option to the dropdown menu
- Edit Option (blue pencil icon) – Click to:
- Edit the text of an existing option
- Rearrange the order options appear in the dropdown by changing the numbers on the left side
⚠️ Important: Changing a current option will affect historical data. Check the box to confirm you understand this impact before clicking Save.
Result Options
This section allows you to manage the outcome choices staff can select when charting the results of an intervention.
- Add Option – Click to add a new result option to the dropdown menu
- Edit Option (blue pencil icon) – Click to:
- Edit the text of an existing option
- Rearrange the order options appear in the dropdown by changing the numbers on the left side
⚠️ Important: Changing a current option will affect historical data. Check the box to confirm you understand this impact before clicking Save.
Best Practices
- Review existing options before making changes to avoid unintended impacts on historical data
- When reordering, use sequential numbers (1, 2, 3, etc.) for clarity
- Test changes with staff to ensure dropdown options make sense in real-world charting scenarios
Adding a New Behavior Service Intervention Subset
This guide explains how to create a custom intervention subset for behavior services in Residex, including intervention options and result options.
Step 1: Create the New Subset
- Navigate to Global Services
- Select Behavior service
- Click the blue link next to "Intervention Subset"
- Click Add New Subset
- Enter a Subset Description (e.g., "Anxiety," "Wandering," "Refusal")
- Click Save
Step 2: Add Intervention Options
Once your subset is saved, locate it in the list and click on it to open the configuration dropdown.
Adding Intervention Options:
- Under Intervention Options, click Add Option
- Enter the Sort Order (the number determines the order options appear in the dropdown when charting)
- Example: 1, 2, 3, etc.
- Enter the Intervention text (e.g., "Redirect to activity," "One-on-one conversation")
- Click Save
- Repeat this process until you have added all intervention options you want available for this subset
Step 3: Add Result Options
Adding Result Options:
- Under Result Options, click Add Option
- Enter the Sort Order (the number determines the order options appear in the dropdown when charting)
- Example: 1, 2, 3, etc.
- Enter the Result text (e.g., "Behavior resolved," "Partially effective," "No change")
- Click Save
- Repeat this process until you have added all result options you want available for this subset
Step 4: Verify Your Setup
Once you have completed the above steps, your new intervention subset will appear in the Intervention Subset dropdown when setting up a new behavior service on the Global Service list.
Note: When setting up a new behavior service, the Type of Charting should be set to Behavior to see the intervention subset options.
Tips for Success
- Use clear, concise language for intervention and result options
- Number your sort orders sequentially (1, 2, 3, etc.) for easy management
- Consider the most common interventions and results your staff will need to document
- Test the new subset with staff to ensure options are practical and easy to use
Behavior Reporting
The report Behavior Plan will display your plan for managing the behavior. Behavior History - Resident shows the completed behavior charting, providing you insight into frequency of occurrence, time spent, interventions that seem to work, etc.....
As Needed (PRN) Services
Provider's may order as needed (PRN) services or treatments for clients. Examples might include PRN oxygen use, suctioning, dressing changes, or occasional services such as transportation or case management responsibilities.
Adding a PRN Service
When adding the service or service set, select PRN (As Needed) from the Services will be provided dropdown.
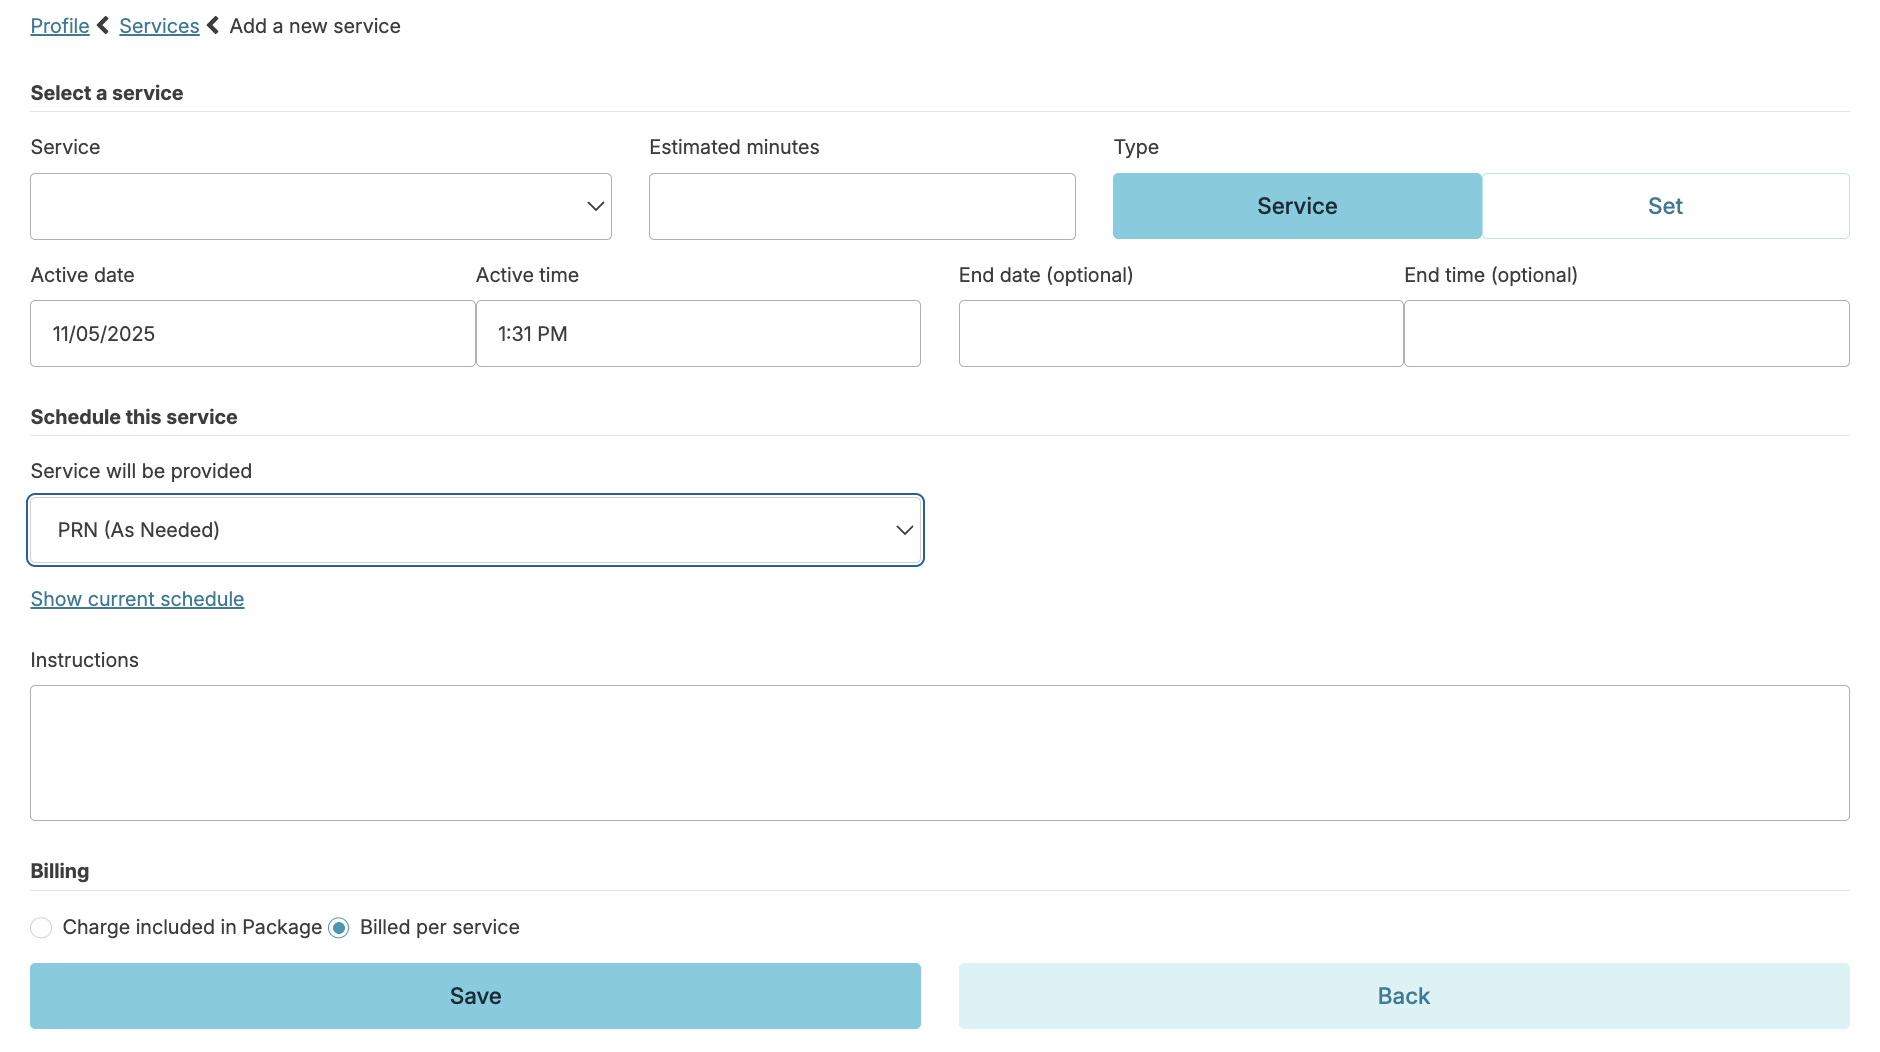
PRN services will appear at the bottom of the current service list. They will also appear on Provider Orders, Provider Contacts, Agreements, and other key documents.

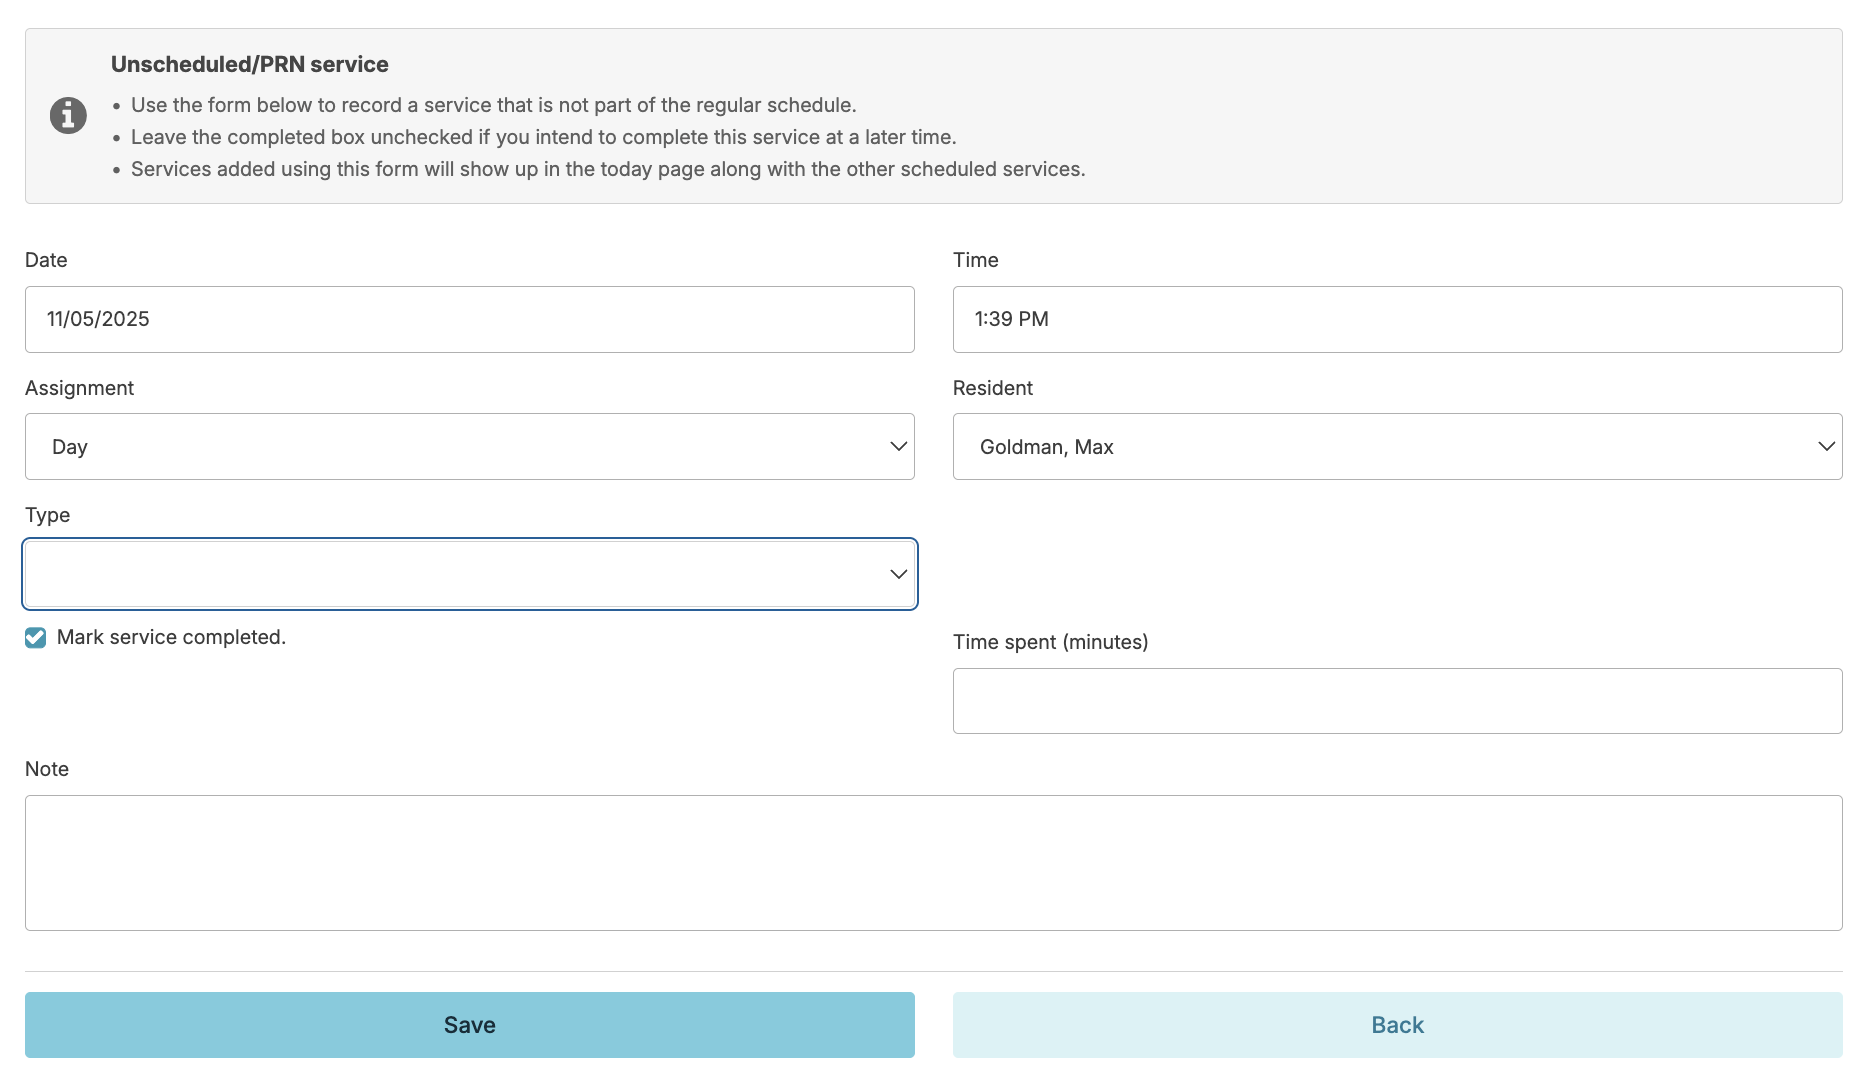
Documenting a PRN Service
PRN services are documented as an Unscheduled/PRN service. The PRN services will appear at the top of the list for that resident and be noted as a PRN. Documented PRN services will appear on all associated service recap reports.