Table of Contents:
Key things to know about the A/R Process:
- Deposits: one or more Payments - typically a batch of multiple payments that match up with bank deposits.
- Payment: a single Payment (cash, check, credit card, etc) is applied to one or more of a resident's specific Charges.
- Charges: Each monthly resident statement/invoice is composed of one or more Charges (rent, home care services, housing services, packages, etc) which are generated during the billing process.
Recording a Deposit
To record funds select Billing > Process Billing > Accounts Receivable. This will take you to the Receive Payments screen.
Individual payments are recorded in batches as part of a 'deposit.'
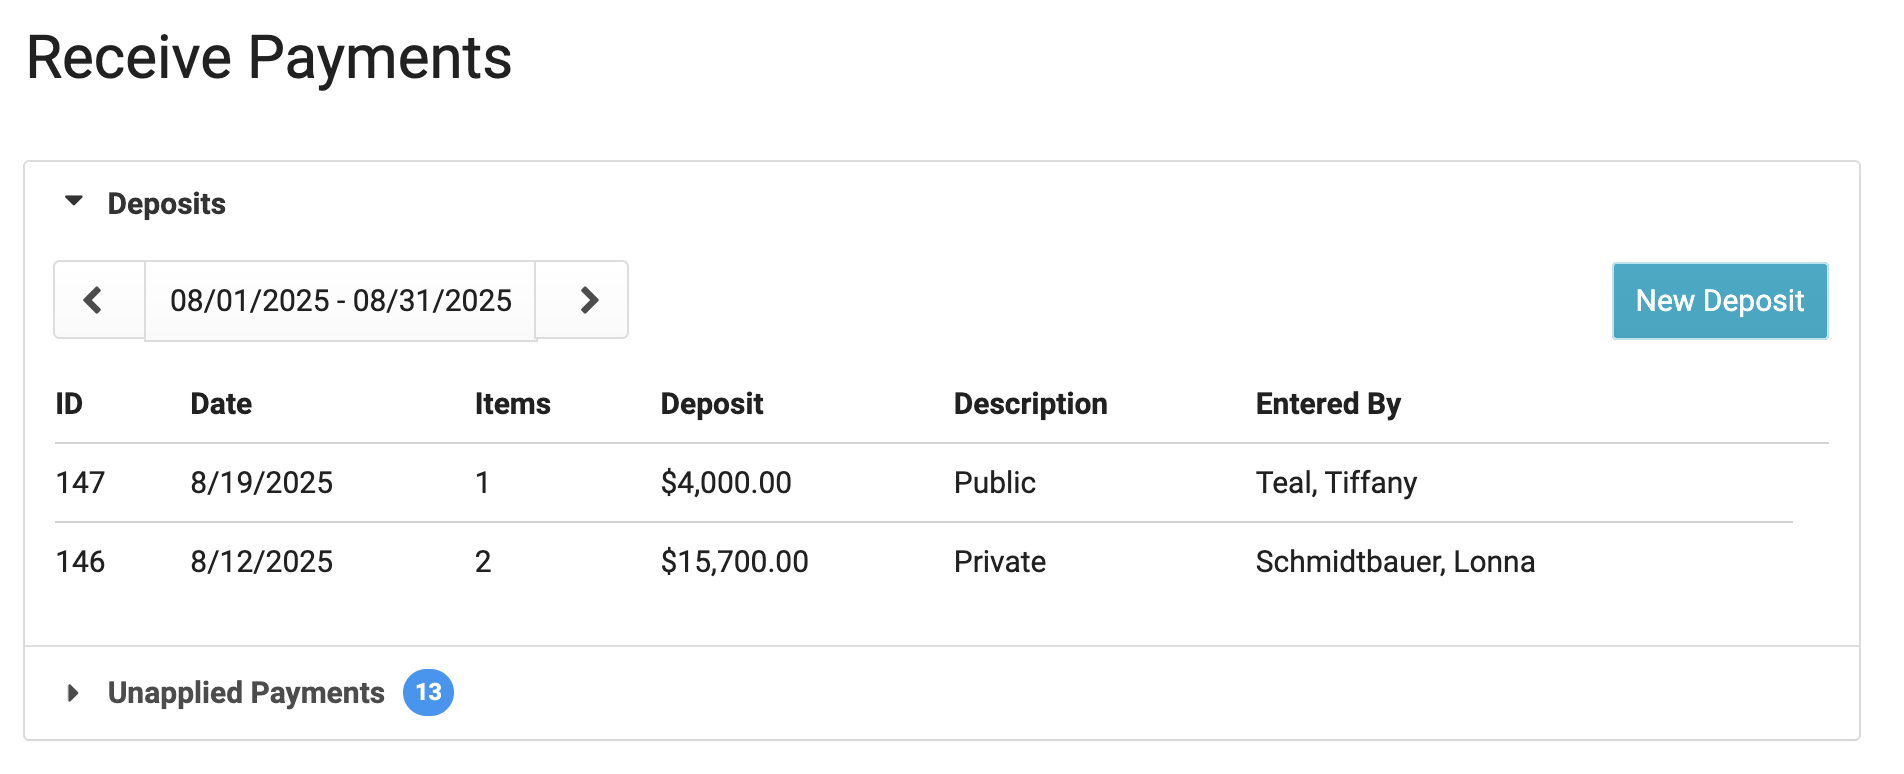
A Deposit with an item count of 0 can be deleted, if needed.
Start a Deposit
- Press the New Deposit button to begin a new deposit
- Specify the Deposit Date and Deposit Description (Optional)
- Click Save.
- You will be taken to the Deposit screen, where you can record as many payments as you need as a batch / single bank deposit. You can also add Other Receipts here.
- Press the Add Payment button - this will take you to a screen where you can record payment details.
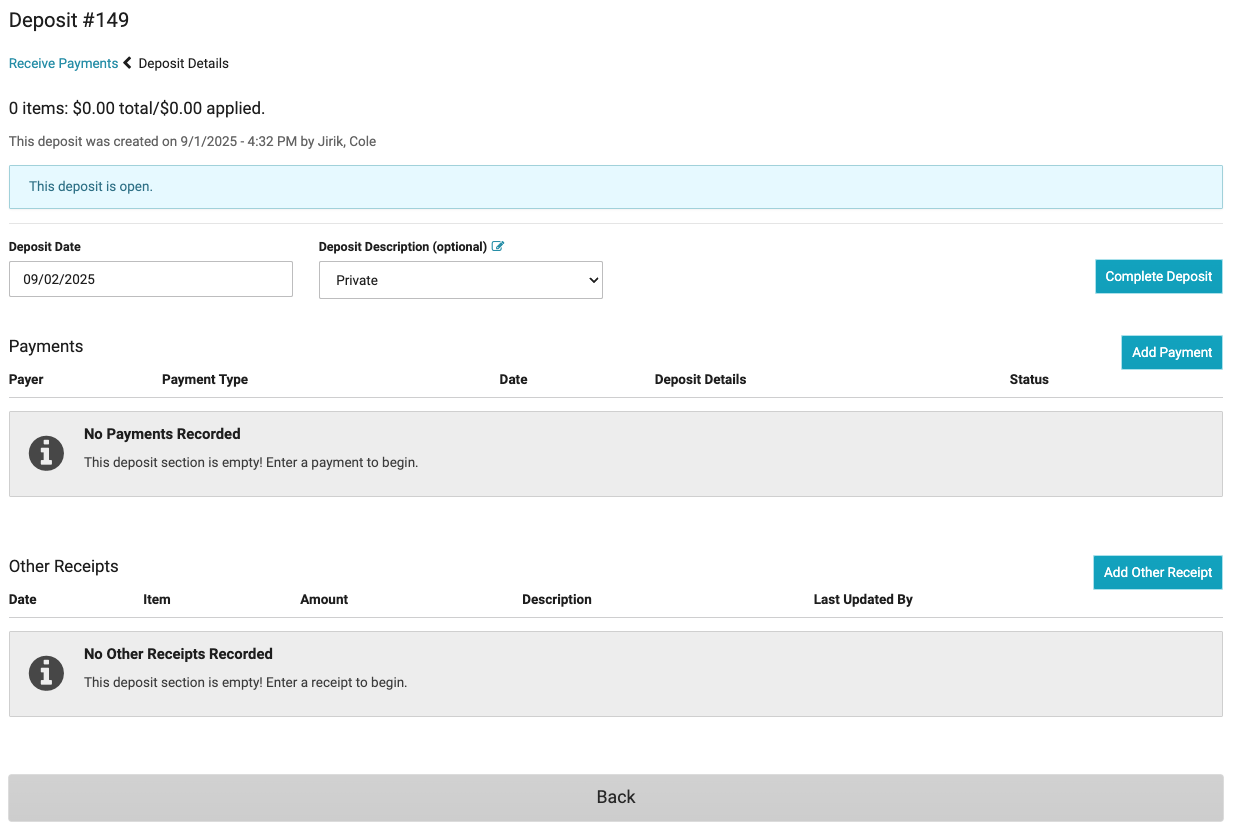
Repeat the below process of entering AND applying payments for all of the payments included in your batch/Deposit. When done, press the Complete Deposit button.
Adding a Payment to a Deposit (Private & Non-private)
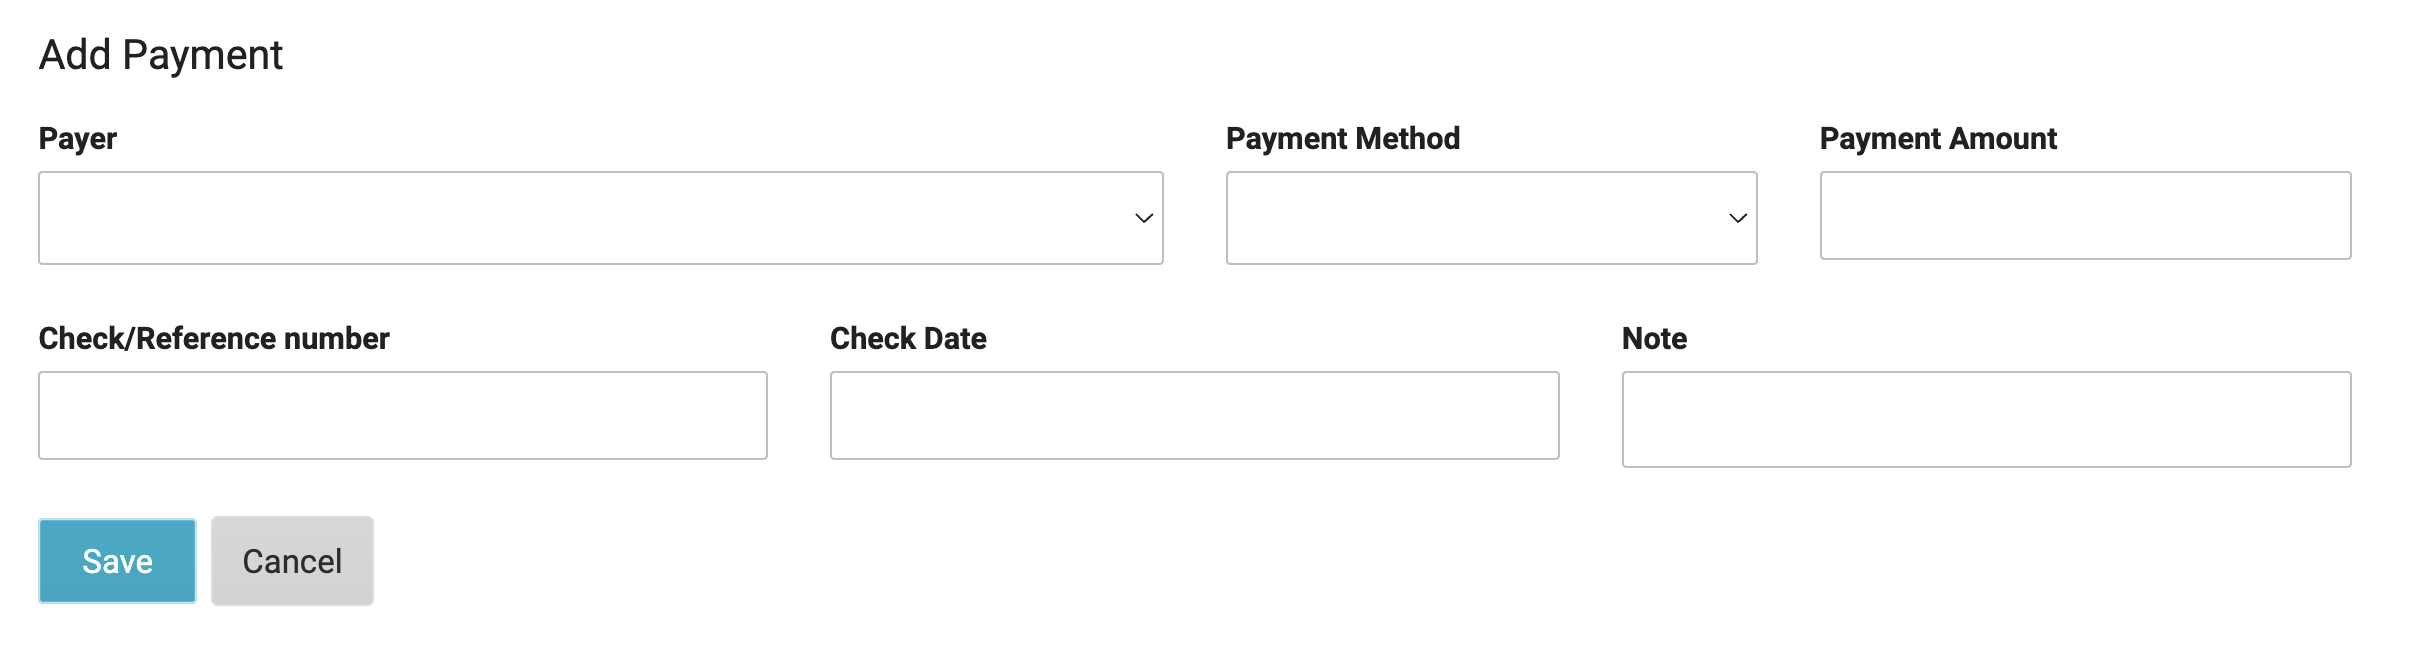
- For the Payer field: for PRIVATE PAY payments, select a resident name.
- For NON-PRIVATE PAY payments, select the appropriate Payer (e.g. Elderly Waiver, GRG, Alternative Care Grant, CADI, etc); a second Resident field will appear to specify whom the payment is for.
- Record the rest of the payment details: Payment Method, Payment Amount, Check/Reference number, Check Date, and an optional Note - press Save when complete.
Note: Payments can be added to active residents even if an invoice/statement has not been created. The money entered will be considered "unapplied" and will not be able to be applied to an invoice/statement until invoices are posted and charges for this resident have been created.
Applying a Payment as part of the Deposit Process
You can then apply the payment toward specific line items of the specified resident's invoices (each a payment can specifically be applied toward any specific previous charge, e.g. rent only, or cares-only, etc. or can be applied in part to multiple charges.)
Alternatively if you prefer, you can leave the payment unapplied temporarily, and process through applying payments later en masse.
After you have completed the process of entering AND applying payments for all of the payments included in your batch / Deposit, press the Complete Deposit button. You will be alerted if there are open batches as you leave.
Applying Payments
You may find it suits your workflow best to enter all Payments for a Deposit first, waiting to apply payments to charge lines as a separate process.
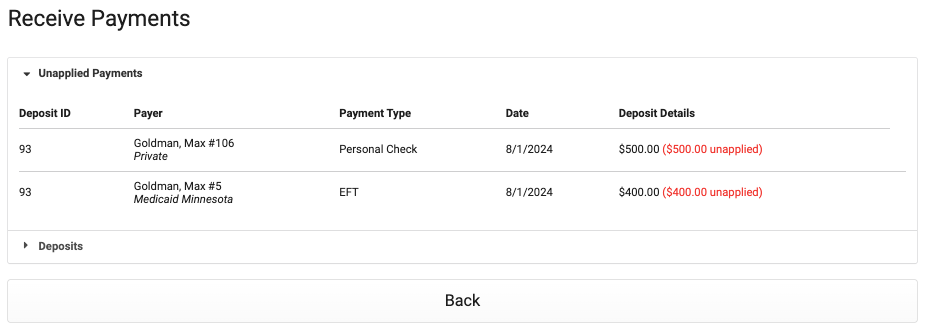
- From the Billing > Process Billing > Accounts Receivable screen, select the Unapplied payments drop down tab to view ALL unapplied Payments from all Deposits to quickly go through them, OR from the Deposits drop down tab, click on Deposits individually.
- Click on any Payment to apply it
- Specify amounts from the payment to apply to individual any charge line(s). When the entire amount of the payment has been applied to different charge lines, press Save and return to the previous screen.
Note: If a resident overpays an invoice, you can enter the full payment amount, and apply a partial amount to a current invoice. The remaining payment balance will show as a credit on the next month's invoice, and will be able to be applied at that time.
Negative Payments - Take Backs
If a payment is a "take back" or did not go through due to insufficient funds, it should be entered as a negative payment. When you receive a remittance from the state in which money was taken back and a different amount was paid, these should be entered as two separate transactions.
To enter a negative payment:
- Within a deposit, click Add Payment
- Select the payer (For example, Elderly Waiver or the resident name)
- If selecting an "Other" non-private payer, select the resident
- Select the payment method
- Enter the amount as a negative value (for example, -156.00)
- Optionally enter the Check/Reference number, check date, and/or note
- Click Save — you will then be prompted to apply the payment to an invoice
- Select the invoice originally paid with the previous payment, or the date of the charges on the remittance
- Click Apply by the charge line, then click Save
Unapplying Payments
If a payment is applied to the wrong invoice or to an invoice that needs to be unposted, you can unapply the payment. This process removes the payment application without deleting the payment itself.
To unapply a payment:
- Navigate to Billing Process > Accounts Receivable
- Click on the Deposit, then select the payment that was entered
- Review the invoice dates where the payment is currently applied
- Choose one of the following options:
- Click Unapply on a specific line to remove the payment from that invoice only
- Click Unapply All to remove the payment from all invoices at once
- The payment will remain in your system and can be reapplied to the correct invoice as needed.
Other Receipts
Other Receipts are funds you receive that are not to be applied to Charges that appear on resident invoices, often used for general reimbursement for non-residential accounts, recording security deposit payments, etc. Other Receipts:
-
May be associated with a resident name, but are not required to be.
-
Are NOT displayed on resident statements or account overviews.
-
WILL appear in other reporting, including Total Cash Receipts & Total Bank Deposits
-
May be deleted as long as the month they have been recorded in has not been Closed.
-
Select Billing > Process Billing > Accounts Receivable
-
Select the New Deposit tab
-
Enter Deposit Date and Save
-
Press Add Other Receipts
-
Enter details of the funds you are receiving: Received Date, Payment Method, Amount, Type and GL Code are required, everything else is optional. Press Save when finished.
-
When all receipts for specified deposit date have been entered, select Complete Deposit.
Note: To view deposit history run the report Total Cash Receipts
Certificate of Rent Paid - From Payments and Adjustments
When using Residex accounts receivable, Residex gathers data that can be used to prepare your CRP (Certificate of Rent Paid). You can print this data by navigating to:
- Fax/Print > Reports
- Search for CRP > Select the appropriate report (For example, Certificate of Rent Paid - By Resident)
Note: If you do not see CRP reports, a user with Supervisor (Role 13) can ‘Manage report availability and permissions.’
Invoice Summary - One Charge Type - Date Range
An important reminder: The Certificate of Rent Paid (CRP) reports are based on payments and adjustments to rent charges.
If the Certificate of Rent Paid - By Resident is not working correctly and you use Residex accounts receivable, it is likely due to one or more of the following:
- A credit charge entered instead of an adjustment to a rent credit
- An adjustment applied to the wrong charge line
- The payment not being received or applied within the date range
If this is the case, you may want to use the Invoice Summary - One Charge Type - Date Range report.
- Search for the report
- Select the date range
- Select the charge type: Rent
This report will show all charge lines (not payments or adjustments) within that date range. If you use Residex accounts receivable, this report should only be used if the CRP report is not working for one of the reasons above.