Table of Contents:
Your prospects
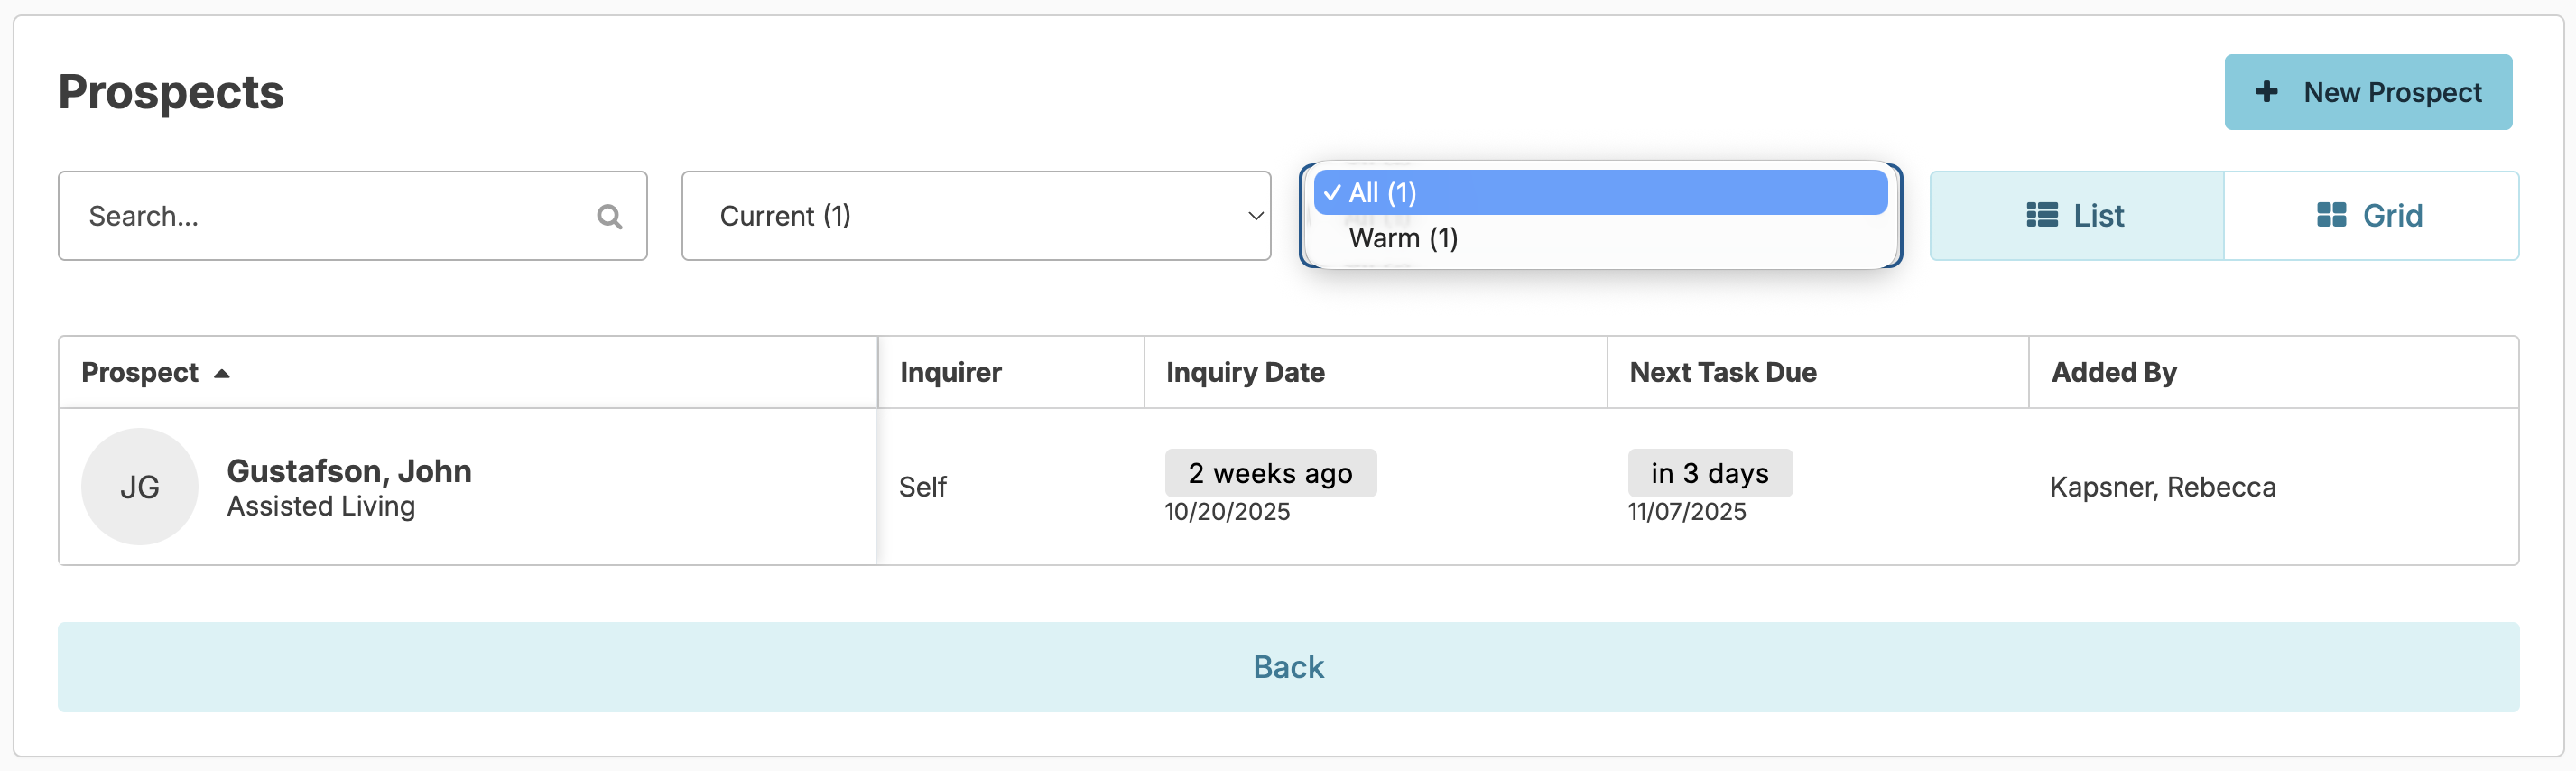
You can view your list of prospects by navigating to Residents > Prospects.
Your list of prospects can be displayed in either a Grid or List view. Additionally, you can click the column headers to change the sort order or use the All dropdown to filter by Interest Level (Hot, Warm, Cold).
You can enter a new prospect by pressing the + New Prospect button and filling out the form that appears.
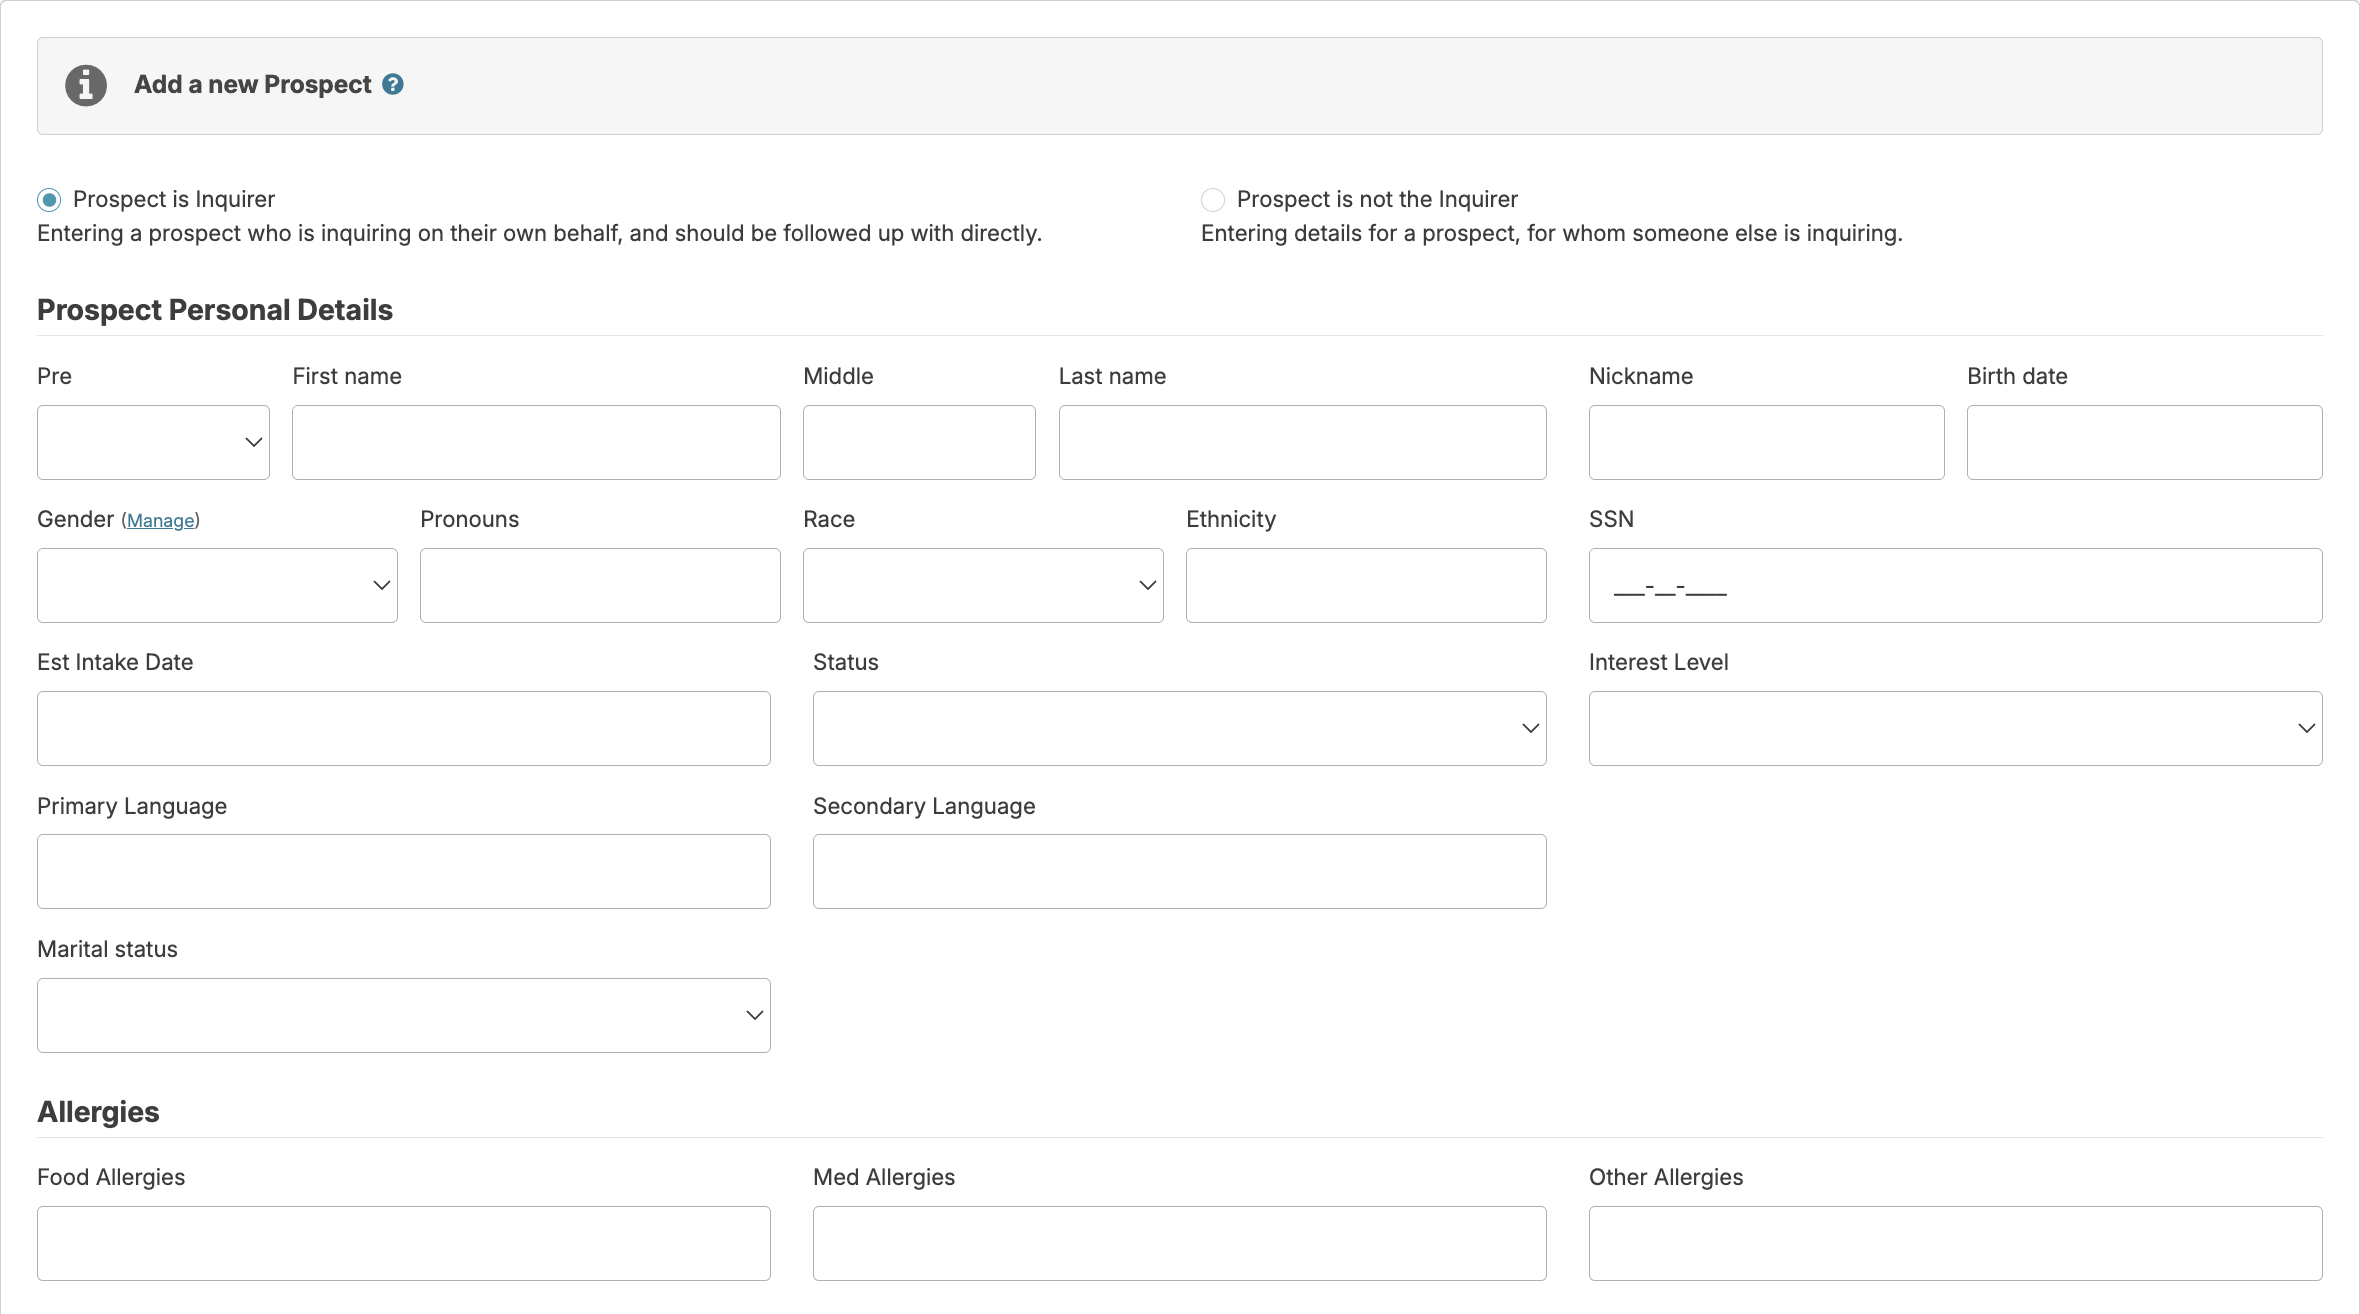
If the Prospect is the primary contact, you will be prompted to enter prospect information. If the Prospect is not the primary contact, you will be prompted to enter the inquirer information. Not all fields are required.
- Status: This list is customizable for your organization, & is used to identify where a prospect is in the decision-making process (Active Lead, Wait List, Lost).
- Interest Level: This list is customizable for your organization and is used to identify the level of interest a prospect has for moving into your facility.
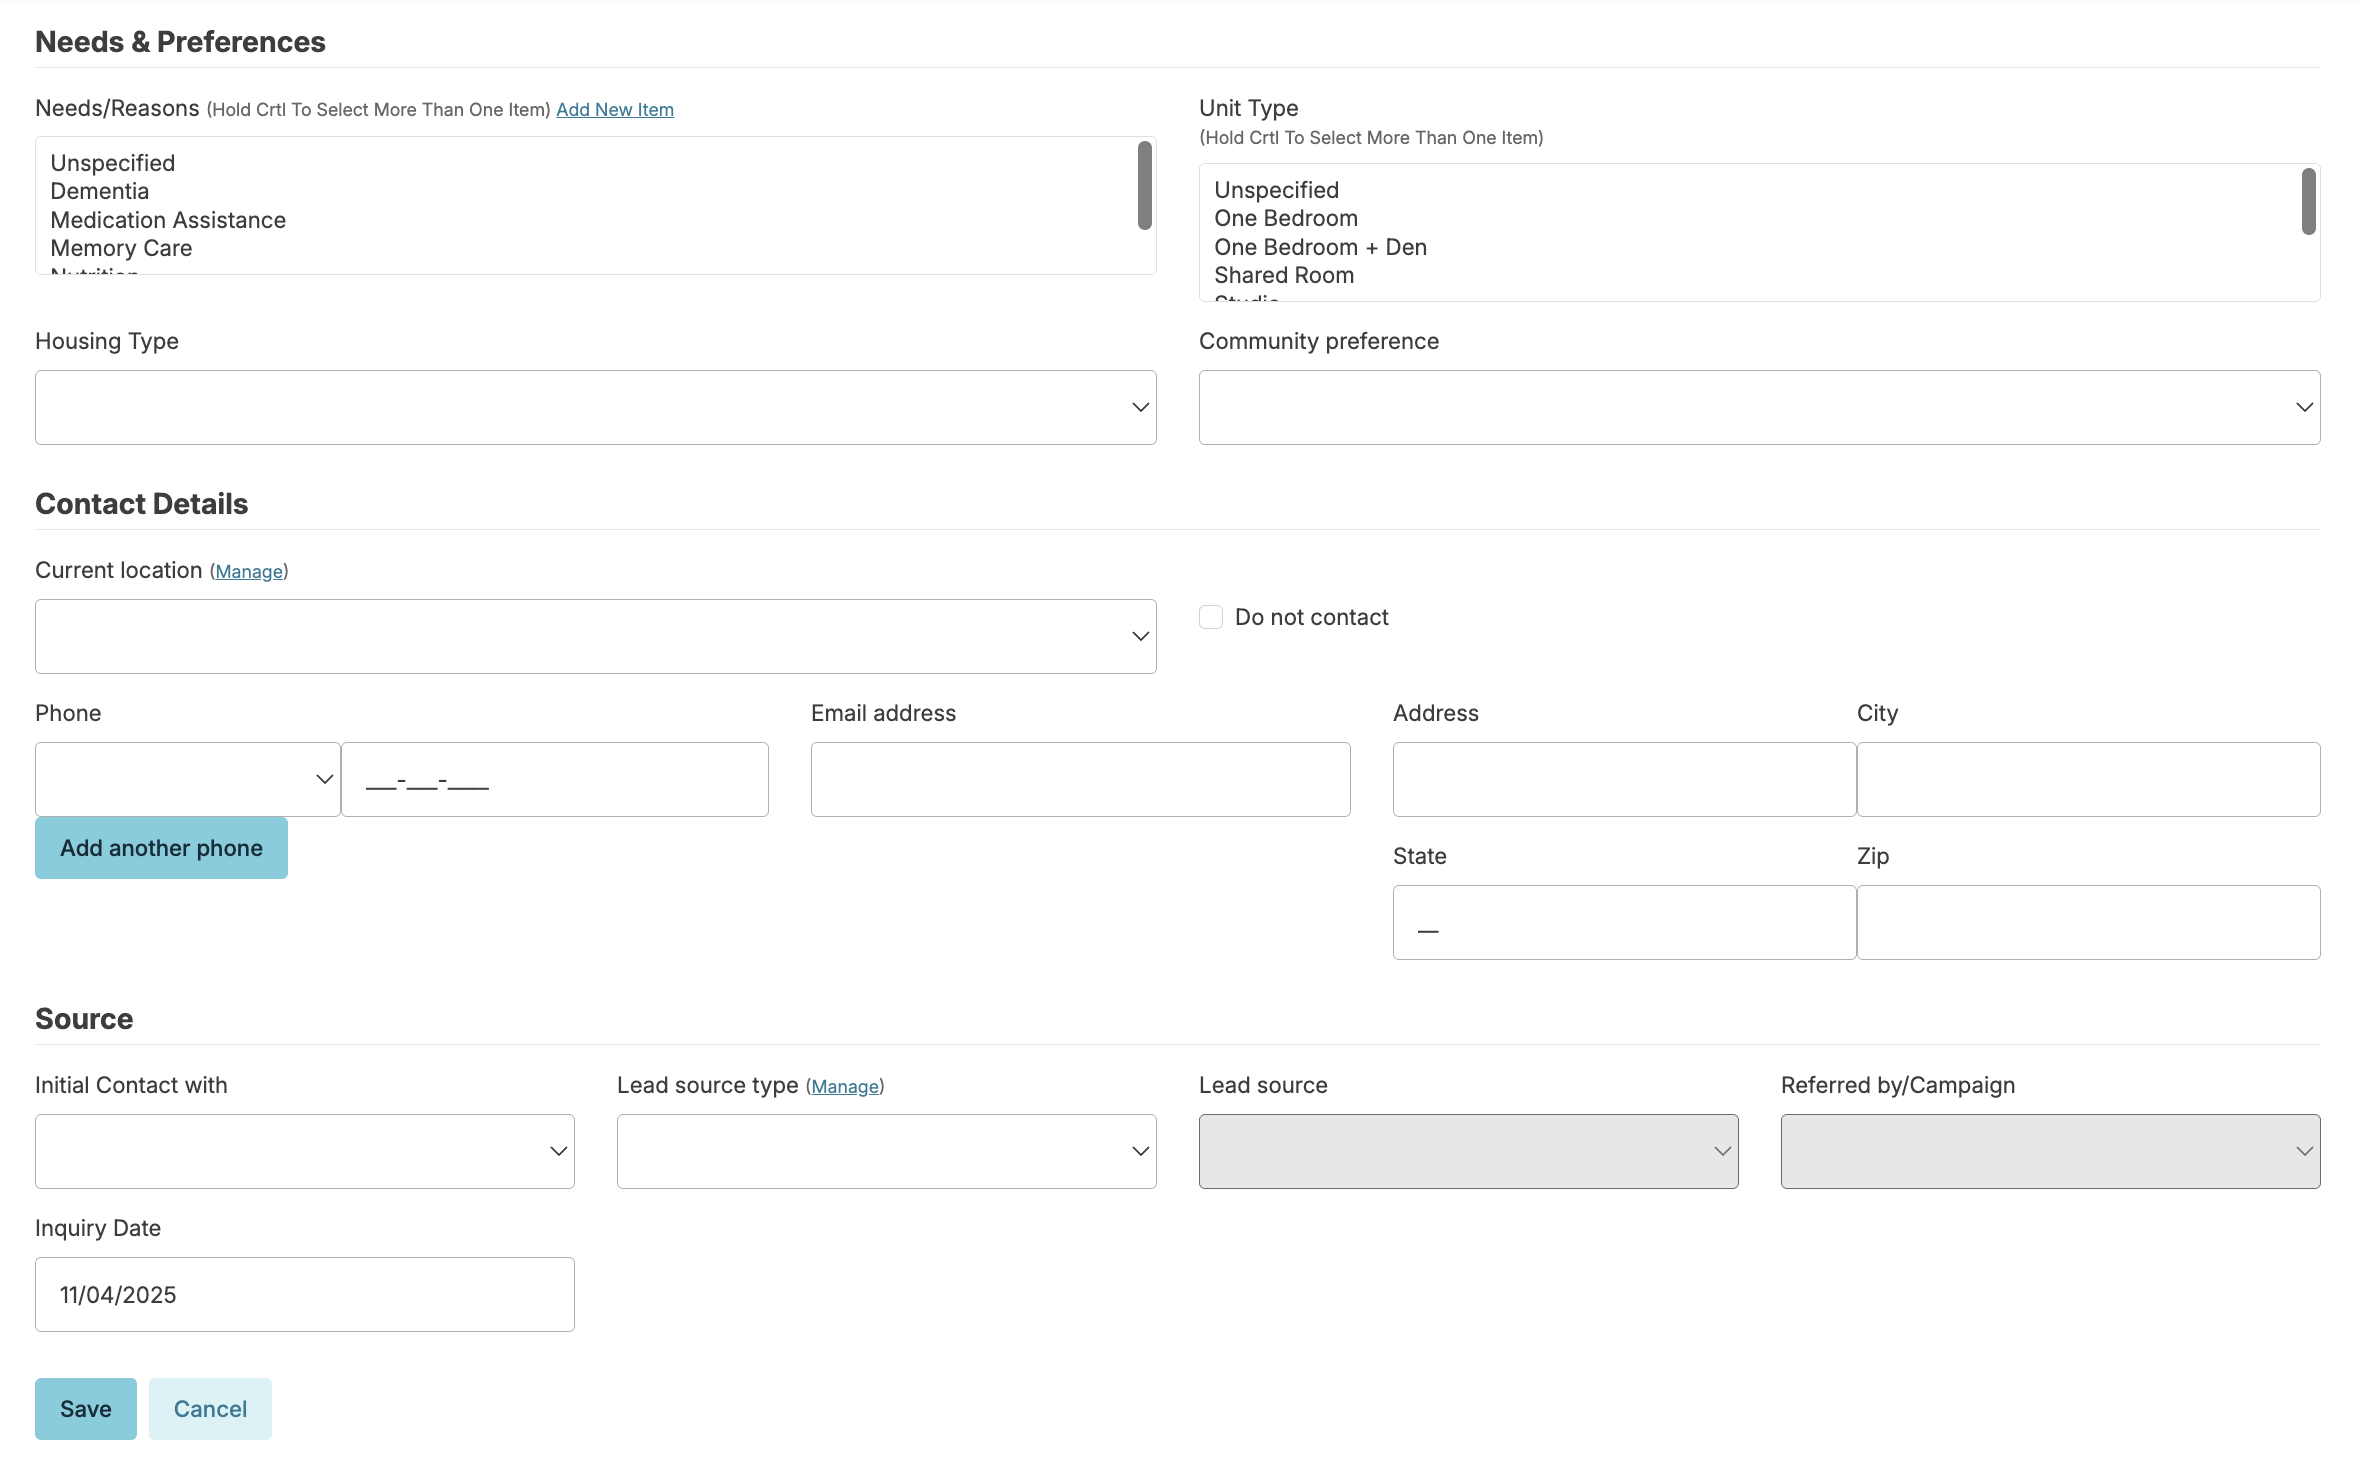
- Needs & Preferences: Why is this individual seeking care?
- Unit Type: Does this prospect have any particular preferences for a type of room?
- Housing Type: what type of care would be most suited for the client (ex. assisted living, memory care)?
- Community Preference: Does your Campus have multiple different communities? If so, has the prospect expressed a need/preference for one of them?
- Lead Source: This is a general description of how the prospect discovered you or first contacted you. For example, a hospital could be a lead source.
- Referred by/Campaign: Individual or campaign that referred the prospect to you, if any are entered.
When you have entered as much information as you can, press the Save button. You can return and update the record later as you learn more about the individual's needs.
Change Campus
Organizations with multiple campuses may enter a prospective client for one campus, but then choose to transfer to another. Navigate to the prospect's profile and select the Change campus button beneath their profile picture. Select the campus to which you would like to transfer them.
If services have already been added for the prospect, the services will reassign to either an Assignment of the same name in the new campus (if there is one) or to the 'Default Assignment', allowing you to update to the correct assignment once admitted.
Prospect Toolbar
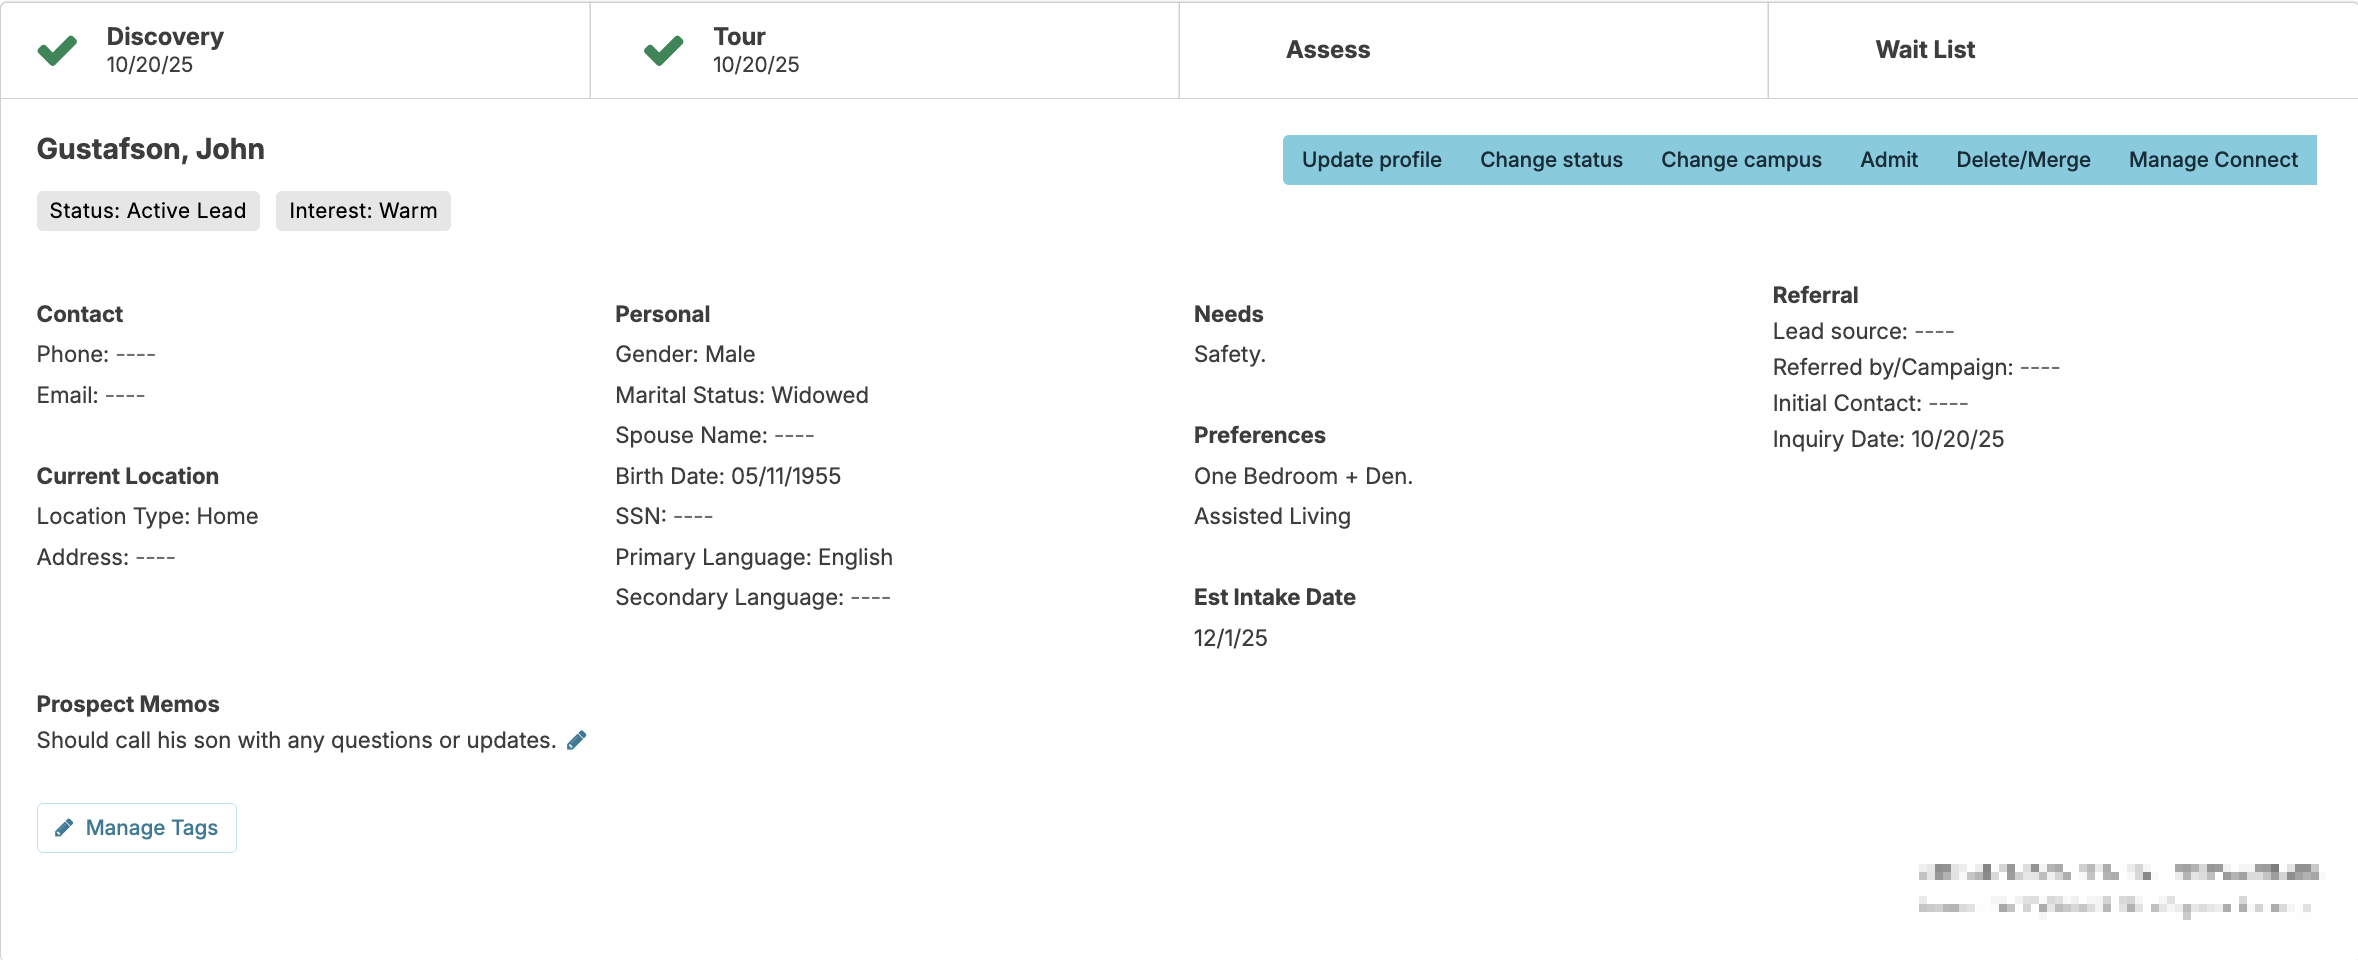
The Progress Tool Bar allows you to easily see what processes have been completed for a prospect.

The Progress Tool Bar options will display the dates of completion based on the following criteria.
Discovery - Completion of any task
Tour - Completion of a CRM Tour task
Assess - Completion of an Assessment
Wait List - Change of prospect status to 'Wait list'
Prospect Contacts
As with a resident, you can enter a list of contacts for each prospect. These are typically family members who may act as decision-makers for the prospect. To enter a contact, select the Contacts section of a prospect's profile, and press the Add a new contact button.
When entering a contact, you will have the option to specify the roles they play for the prospect.
Primary Contact identifies if the prospect will be their own decision maker and the main point of contact, or if it will be a family member.
Legal relationships can be outlined as well (ex. POA, Guarantor, Resident Trust, Lease signer).
Prospect Resources
You can enter the prospective resident's Resource Professionals, Organizations, or Health Plans.
Prospect Notes
The note field located in the prospect profile allows you to add key statements or observations. Notes entered here will be included as a note type if the prospect becomes a resident.
Note: This field name is customizable. Most clients prefer "Prospect Memo". This field is NOT to be used to track prospect tasks, but rather small snippets of prospect information. For example, "Prospect John has a new great-grandson."
Tags
Prospect tags offer a quick way to apply a label or 'tag' to a prospect that allows quick, easy reference, but also allows you to create helpful reports based upon those tags. For instance, a tag such as 'newsletter' for prospects who should receive the company newsletter which allows you to create a list for mailing newsletters to prospects.
To add an existing tag to a resident, navigate to the resident profile > Manage Tags and select from the available tags, or users with 410 or 411 roles can click Add New Tag to create a new one. Associated reports in the Prospects category include 'Prospects by Tag'.
Update Profile/Change Status
- At any time, you can click on a Prospect profile and update any other information on the prospect by pressing the Update Profile button.
- You can Press the Change Status button on a prospect's profile to update them (e.g. change someone from 'Active Lead' or 'Wait List') or to mark them as a lost (closed) prospect and take them out of your active list of prospects.
- To Add, Edit, Delete, reasons a Prospect has been marked: closed, Lost, No Interest, a user needs Administrator Role 411
Delete/Merge Prospect
To delete a prospect entered in error, from the prospect profile, click the Delete/Merge button > Confirm.
Alternatively, to merge a prospect entered in error, click the Delete/Merge button > enter target prospect > confirm.
Merging a prospect will copy the following information to the target prospect:
Assessments
- If the target prospect already has assessment information, none of the assessments will be copied over.
- If the target has no assessment information, ALL assessment information will be copied over.
Contacts
- All contacts will be copied over the the target prospect, and all primary contacts will remain intact.
Diagnoses
- If the target prospect already had a primary diagnosis, that diagnosis will remain primary.
- If the target prospect does not have any diagnoses and the prospect being removed does, all diagnoses will be copied over, including the primary diagnosis.
Resources
- If the target prospect already has a primary resource professional, that resource will remain primary.
- If the target prospect does not have any resource professionals and the prospect being removed does, all resource professionals will be copied over, including the primary.
- If the target prospect has the same health plan (Prime West, BCBS, etc.) as the prospect being removed, the health details (Policy #, etc.) of the target prospect will remain, and the details of the prospect being removed will not copy over.
- All other organizations will be copied over to the target prospect.
Service
- All currently scheduled services will be copied over to the target prospect.
Tags
- All tags will be copied over to the target prospect.
Tasks
- All closed and open tasks will be copied over to the target prospect.
Documents
- All documents will be copied over to the target prospect.
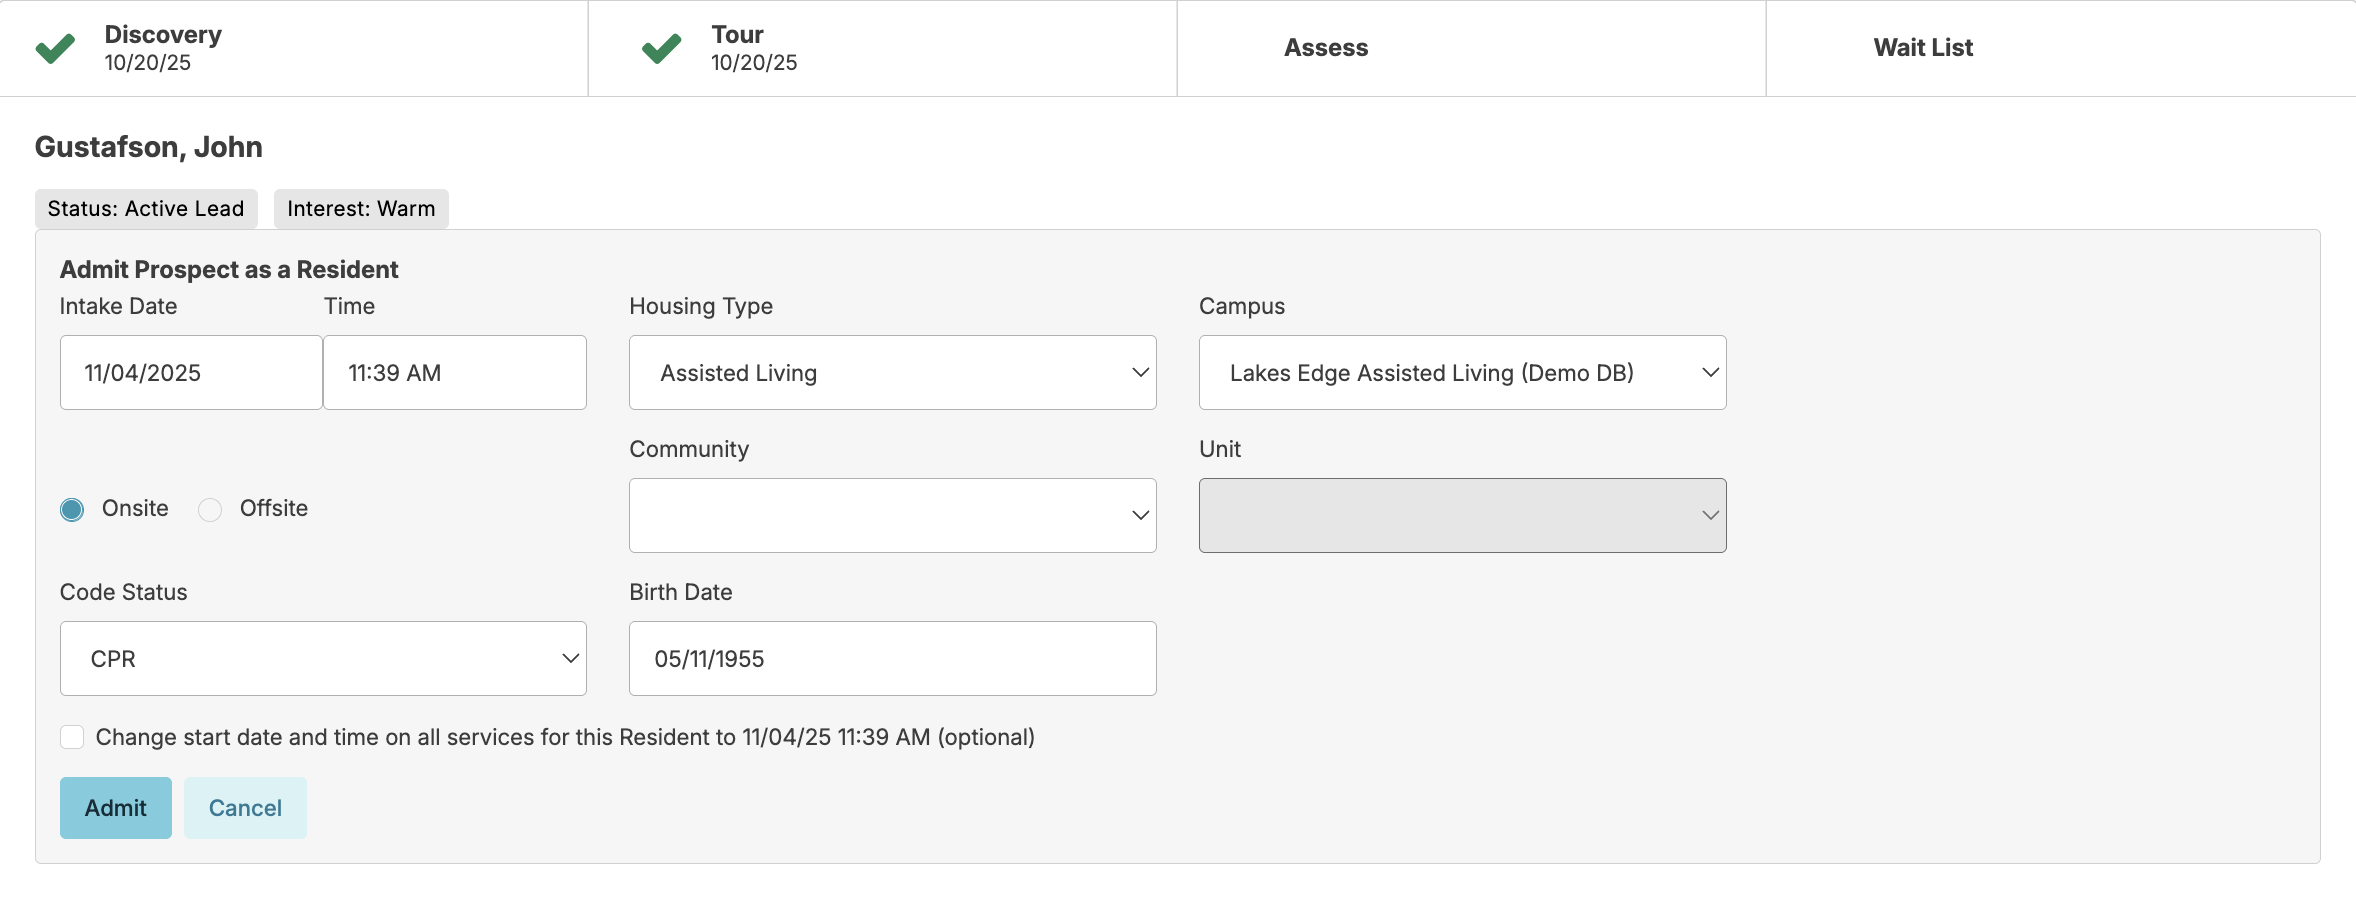
Admit a Prospect as a Resident
- You can convert a prospect to a resident by pressing the Admit button on the prospect profile. Once done, a resident record will be created and will pull over all the data entered about the prospect into the resident record, such as any profile details, scanned documents, pre-admission assessments, tasks, and contact lists. When clicking the Admit button, you will also be able to choose if you'd like to have all services start at the same date and time as intake, by checking the box Change start date and time on all services for this resident to [date/time].
Rollback to Prospect
Sometimes prospects are admitted early but then don't arrive as planned. Users with the Prospects (Role 52) are able to convert the discharged resident back to a Prospect. There are 4 pre-requisites:
- The resident must be discharged
- The resident must have no billing pending
- The resident must have no charted services
- The resident must have previously been a Prospect in Residex
If prerequisites have been met, simply click Rollback to Prospect that appears as a button beneath their picture.
Pre-Admission Assessments
Once a prospect has been entered in Residex, a nurse can conduct a pre-admission assessment to determine the appropriateness of a prospect.
Prospect list
You can view your list of prospects based on the task schedule, and see at a glance which prospects you have scheduled tasks for, if those follow-ups are late, coming today or in the new future, or if no tasks have been scheduled at all.
Completed tasks can influence reporting. For instance, our reporting can give you ratios of actual resident move-ins vs Tours ('tour' tasks completed), to get an idea of how effective your marketing efforts are, or they can otherwise provide summaries of your marketing tasks to improve your understanding of your outreach process.
Standard vs. Advanced Lead Tracking
Overview
Residex offers two levels of lead source tracking for prospects. The right approach depends on how much detail your community needs to measure marketing performance and referral attribution.
|
Feature |
Standard |
Advanced |
|
Setup location |
Lead Source option list via Manage |
Resource types & resources |
|
Structure |
Single flat list |
Two-level hierarchy (type → resource) |
|
Reporting detail |
Source-level only |
Broken down by type and specific resource |
|
Best for |
Smaller communities needing basic tracking |
Communities measuring multi-channel marketing ROI |
Standard Lead Tracking
Standard lead tracking uses a simple, flat list of lead source labels. When a prospect is added to Residex, a caregiver selects the applicable source from this list. The list is managed centrally and shared across the community.
How to add or edit lead sources
- Open a Prospect Profile or add a new Prospect
- Navigate to the the Lead Source option list in Residex.
- Click Manage to open the list editor.
- Use New Type to add or the pencil to edit values as needed (e.g., “Referral – Family,” “Walk-in,” “Online Search”).
- Save changes. New options appear immediately in the prospect record.

|
When to use standard tracking: This approach works well for communities that do not run multi-channel marketing campaigns and simply need a quick way to capture how a prospect first heard about the community. |
Advanced Lead Tracking
Advanced lead tracking introduces a two-level structure: a resource type (the marketing category) and one or more resources beneath it (the specific source within that category). This enables granular reporting by category and resource.
Example structure
Advertising – Digital
- Company website
- Google Ads
Advertising – Standard
- Newspaper
- Event mailing
- Billboard
How to add a resource type and resources
- Go to Residents > Resources
- Click New Organization
- Under the Type click Manage (if the type you need is not listed)
- Use Add Type to create a new resource type (e.g., “Advertising – Digital”).
- You may want to name the type starting with a key word such as Advertising or Marketing so the lead types sort together
- After adding the new type, click Back
- Under New Organization, select the Type (Example: Advertising - Digital)
- Enter the Name (e.g., “Facebook,” “Company website”).
- Repeat for each marketing type and resource you want to track.
- When entering a prospect, select the applicable resource type and then the specific resource.
|
When to use advanced tracking: Recommended for communities running paid advertising across multiple channels, or any operator that needs to measure which specific marketing investments are generating move-ins. |
Updating a Prospect Lead Source
- Select Residents > Prospects
- Select a Prospect to open the profile
- Navigate to the Lead source type field
- If the lead source says [Resource] it would use the Advanced Tracking feature that would allow selecting the specific Lead source
- A report such as Prospect Referral Summary will show both the Lead source type and Lead source when entered
