Here we will review the things you will see as you log into Residex and how to navigate through the system.
Time Clock
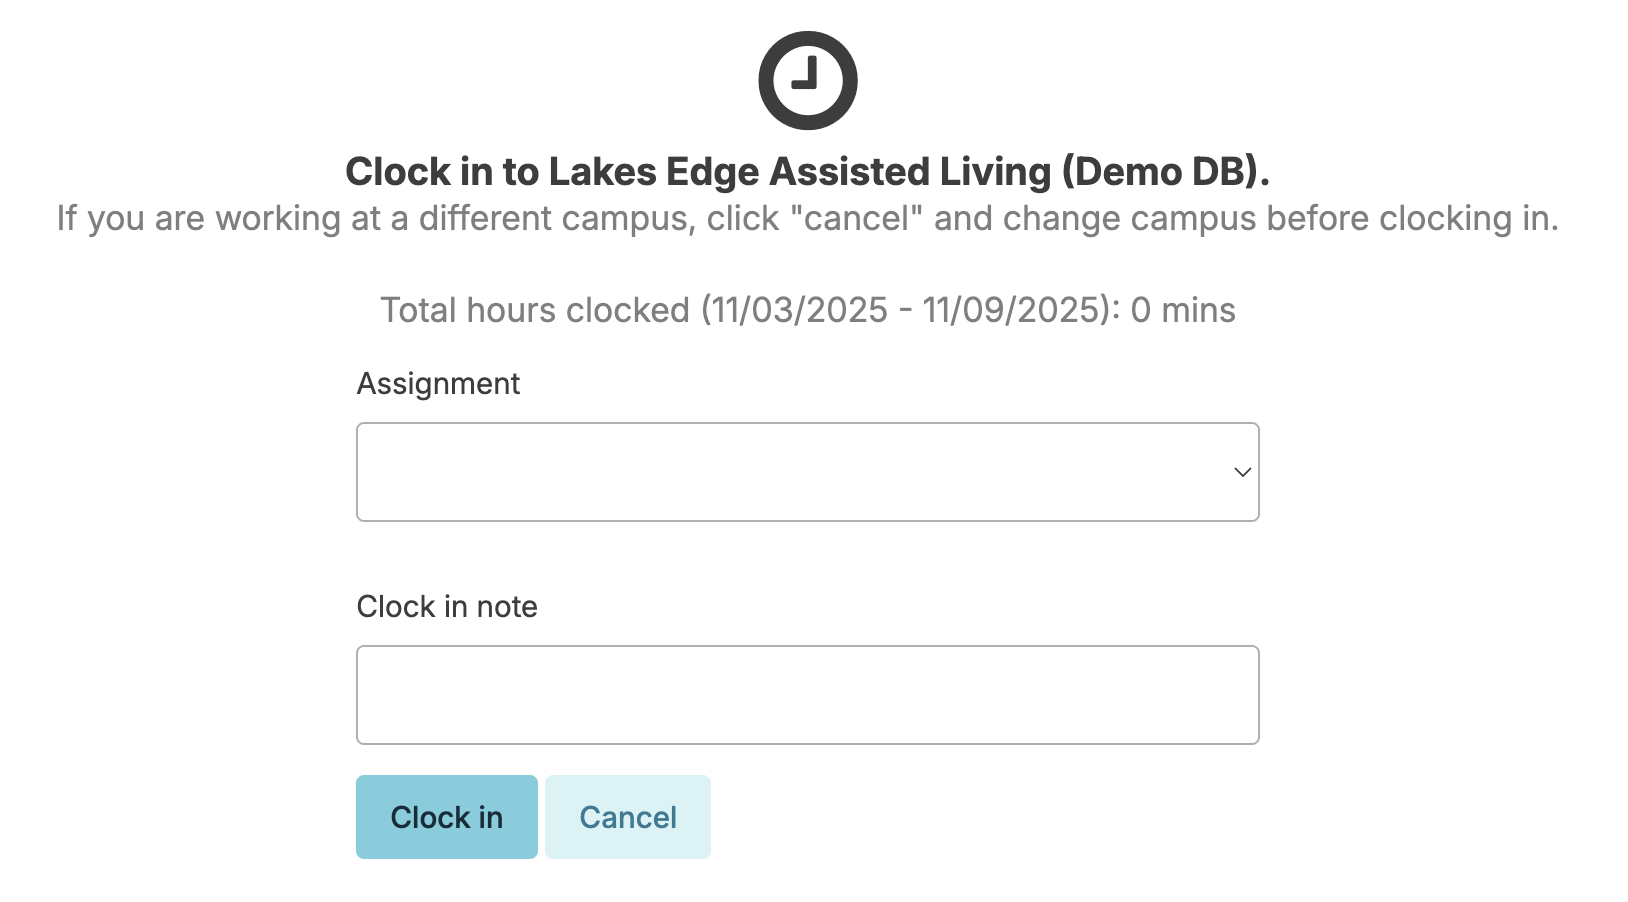
If your organization is using the Residex Time Clock, the first thing you will see when you log in is the clock in screen.
Clock In
- After you log in, select the *Assignment** (shift) you are working.
- A clock in note can optionally be recorded, but may be mandatory if you are clocking in too early or late for your shift.
Clock Out
- Hover over your name in the upper right corner.
- Click Clock out
The Time Clock feature can be disabled for provider types that are salaried or do not track specific hours worked. Navigate to:
- Admin > Provider Types
- Uncheck any provider types that do not need to clock in/out.
Dashboard-Login Report
If your facility does not have the time clock feature, the first thing you see as you log in may be the Dashboard: Login Report. The Dashboard: Login Report summarizes things that may need to be addressed at your facility. These screens can be customized for your organization and your role. This page explains how to manage the Dashboard.
Alternative dashboards are available and contain a predetermined group of reports. You do not have the option of selecting reports for inclusion, but you can deactivate a report (which prevents its inclusion in the dashboard) and also set which provider types can view each type of dashboard.
To view additional dashboards, click on the Dashboard dropdown and switch from Login Report to any alternative dashboard you would like to view.
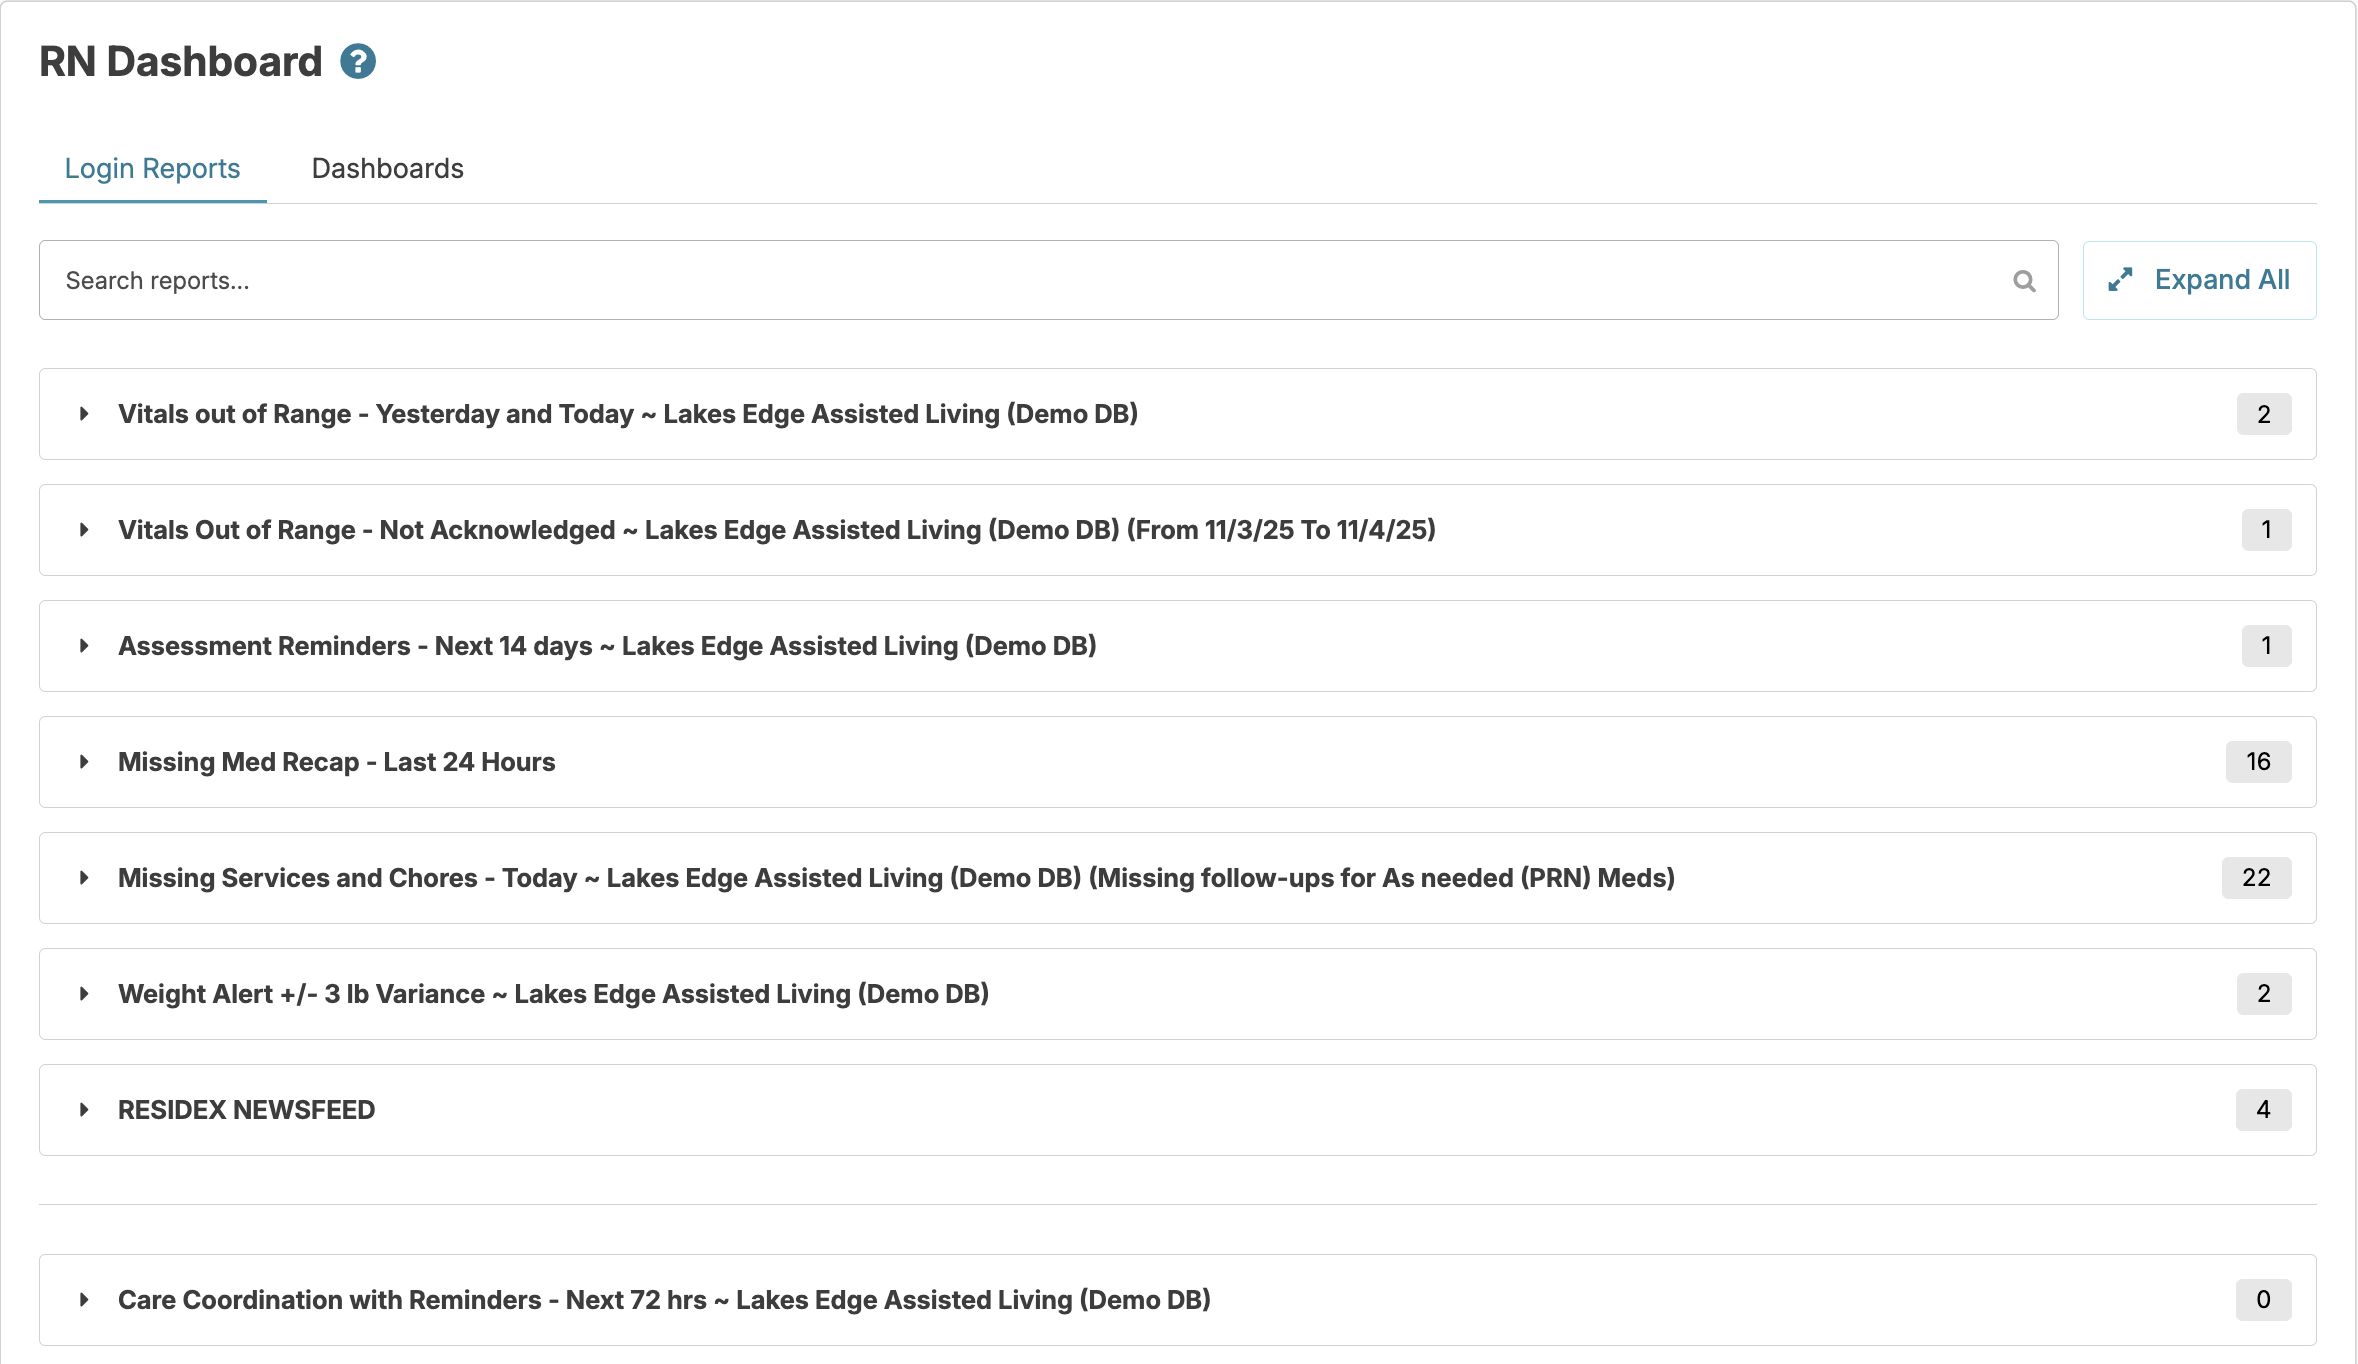
The blue flags will indicate the number of items in the list. View the data, then select Done at the bottom of the screen to move on to the Today screen.
Today Screen
The Today screen is where you and your team can see and chart the day's scheduled work (services, medication administration, chores, etc.). To begin charting, select an Assignment.
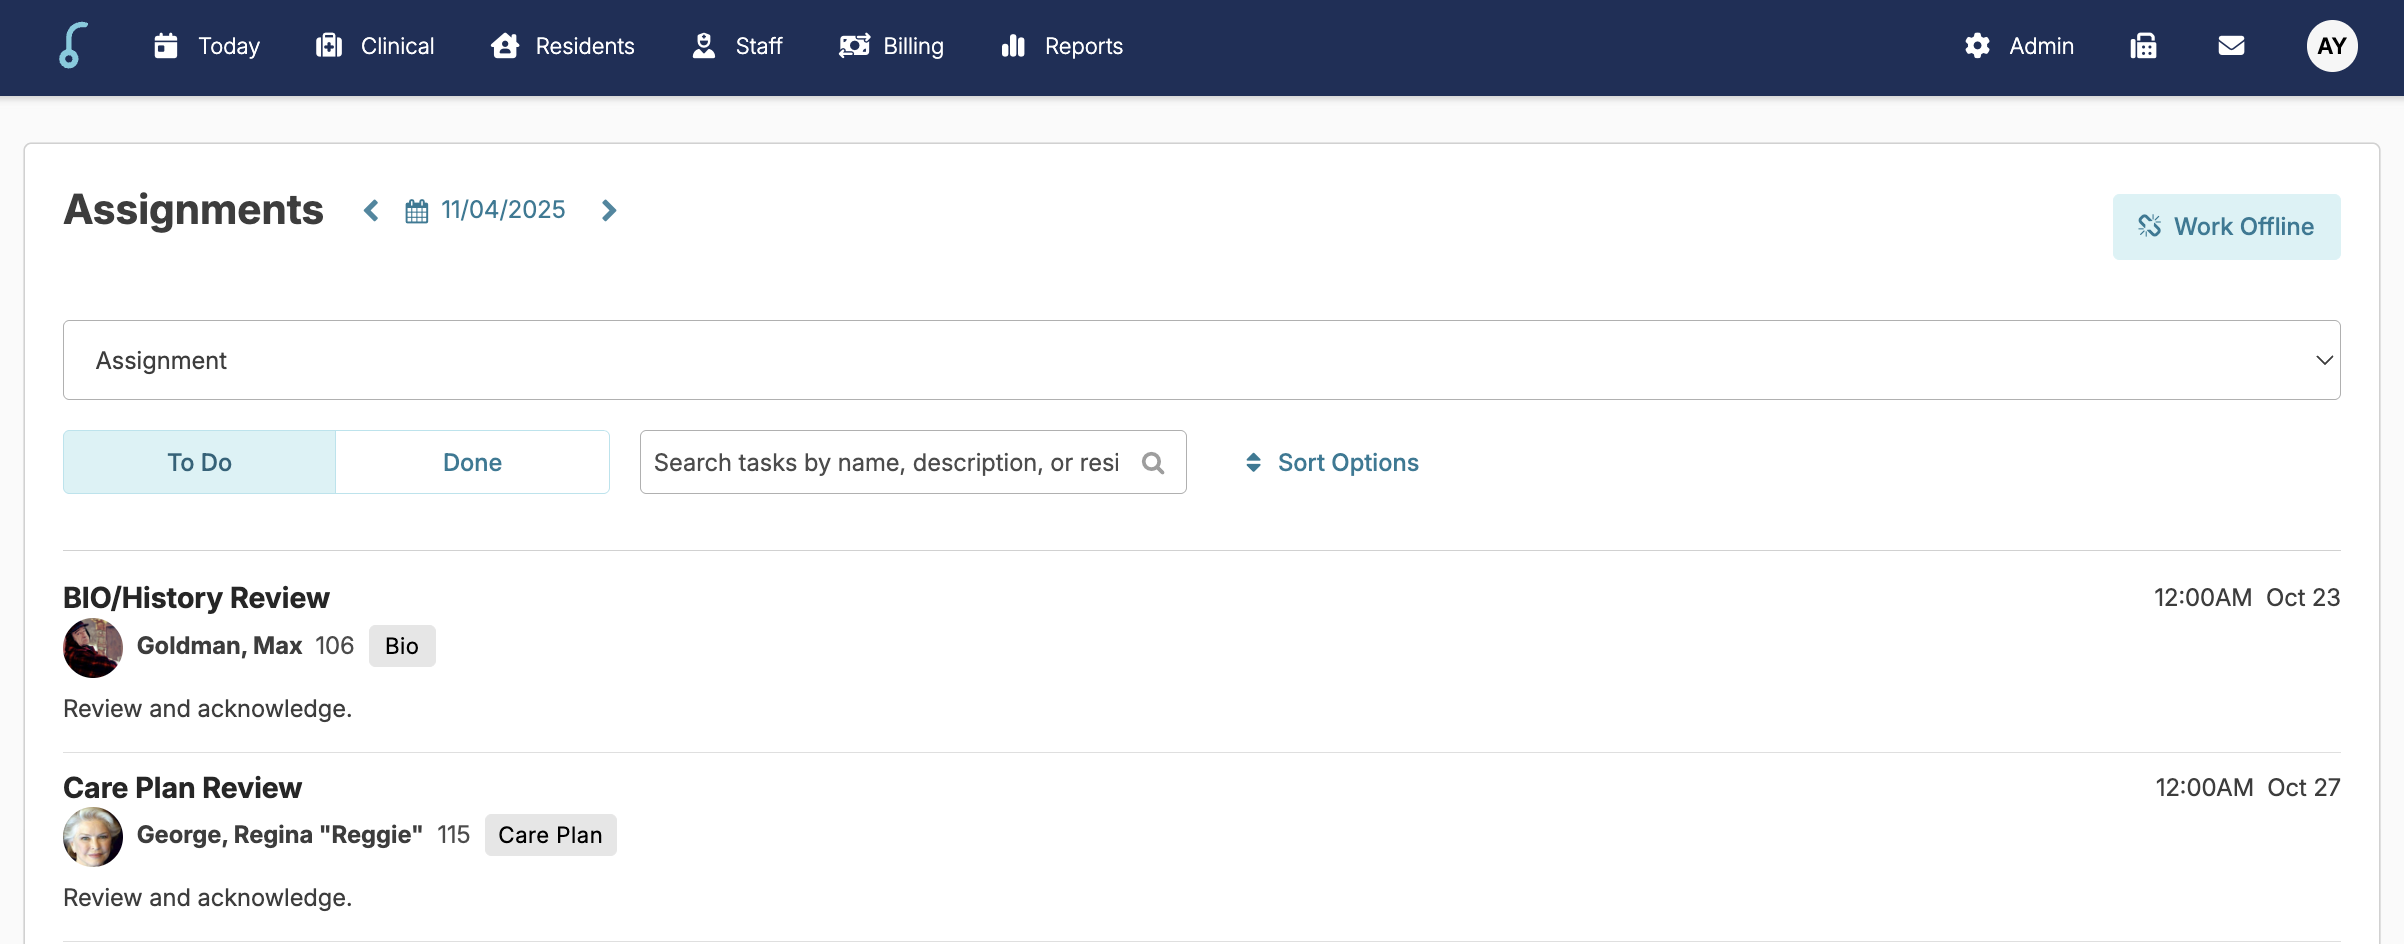
Navigation Bar

The navigation bar at the top of the screen will show different options depending on your permission level.
- Residents Is where data for Residents, Staff, Prospects, Contacts, and Resources are managed.
- Clinical: The home of Assessments, Incidents, and medication management, and more.
- Today: Where staff find their scheduled assignments.
- Reports: Home to generating reports, exporting data, and electronically sending and receiving faxes, if applicable. You can also return to the Dashboard here.
- User's Name: Here a user can sign out, manage their personal settings, access support, and switch to other campuses or facilities.
- Billing: Home to billing configurations, charge entries, and accounts receivable, if applicable.
Switch Campuses or Databases
If your organization has multiple locations (campuses), you may need to switch between these locations as your permissions allow.
To switch to a different campus or database:
- Hover over your name in the upper right corner to view the dropdown menu
- The dropdown menu will show the campus you are currently viewing beneath your name
- Click on the campus name to view the campus Information screen
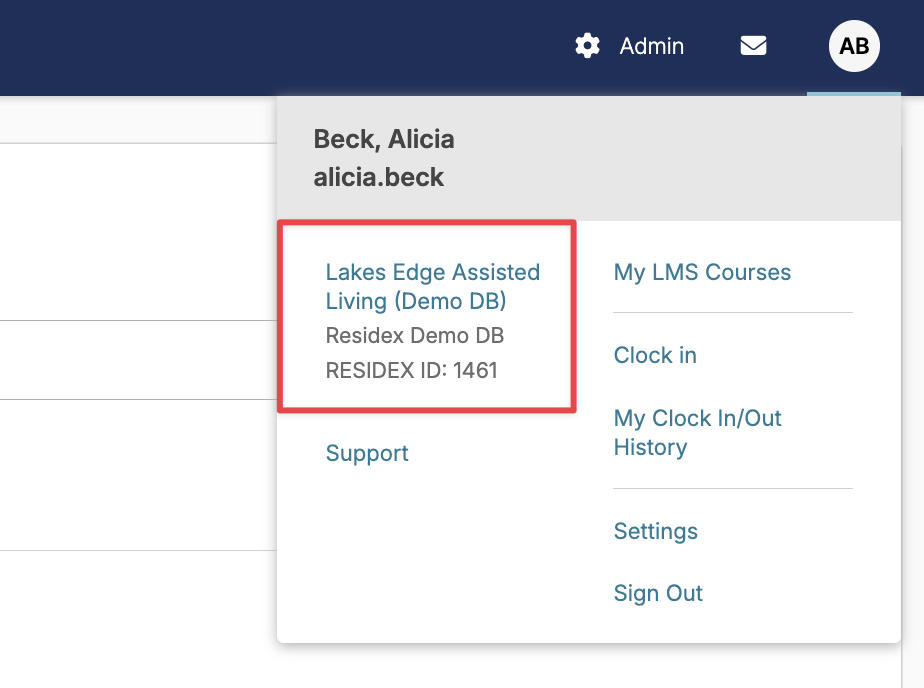
- Choose from the Facility dropdown to switch to a different database
- Choose from the Campus dropdown to switch to a different campus within a database.
Only campuses or databases you have permission to access will be displayed.
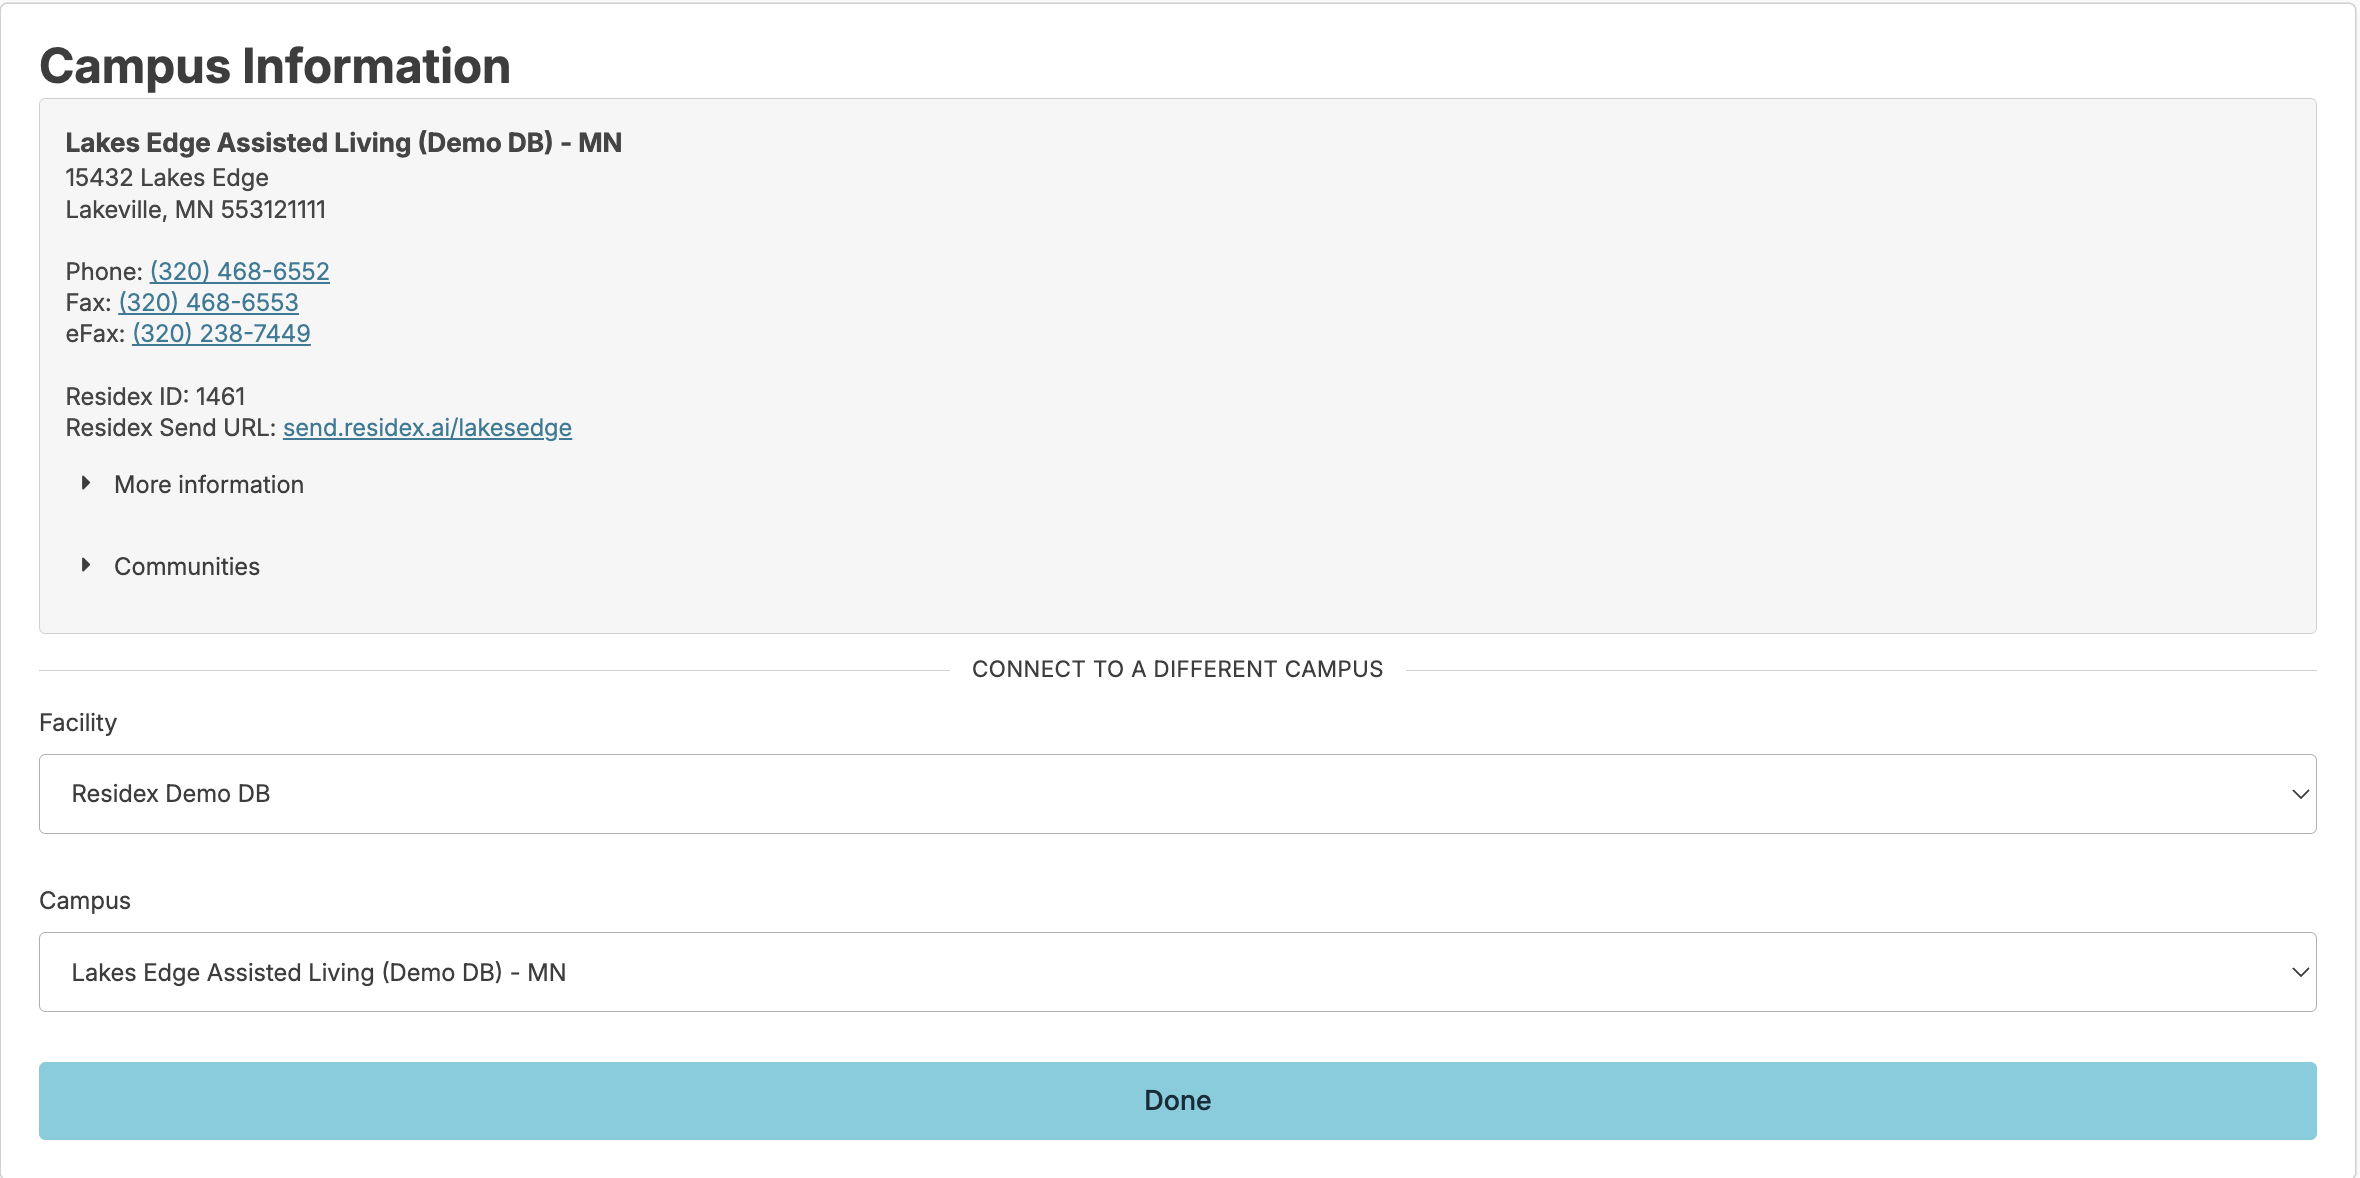
Note: The campus Information screen will display the name, address, phone number, and fax number for your facility but will also include important campus-specific instructions, such as how to reach a supervisor after hours. This information can be edited by navigating to Admin > Edit Campus and editing the campus Info field.
Snap Messages
Snap Messages are a secure, internal communication tool. Some features of Snap Messages include:
- Messaging other Residex users in your facility directly from the software
- Group messaging
- A secure communication method to discuss protected health information, such as resident names, needs, health care concerns, etc.
- Messages delete over time. Settings specific to your facility determine how long your messages will stay before auto-deleting. This can be configured to delete after one week, two weeks read/four weeks unread, three months, or never.
- Integrating with other elements of Residex, helping you to streamline your work.
Sending Messages
To send a snap message, you can navigate to the envelope icon at the top right of your screen.
- Specify if the message is to be sent to a group of provider types, selected individuals, or select the Toggle all and send to all individuals listed
- Enter a subject, a message, and click Send
Any notes entered when charting a service, medication, or note, etc., can be sent as a snap message:
- Check the box "Send as a snap message."
- Click Complete or Decline/Not Done.
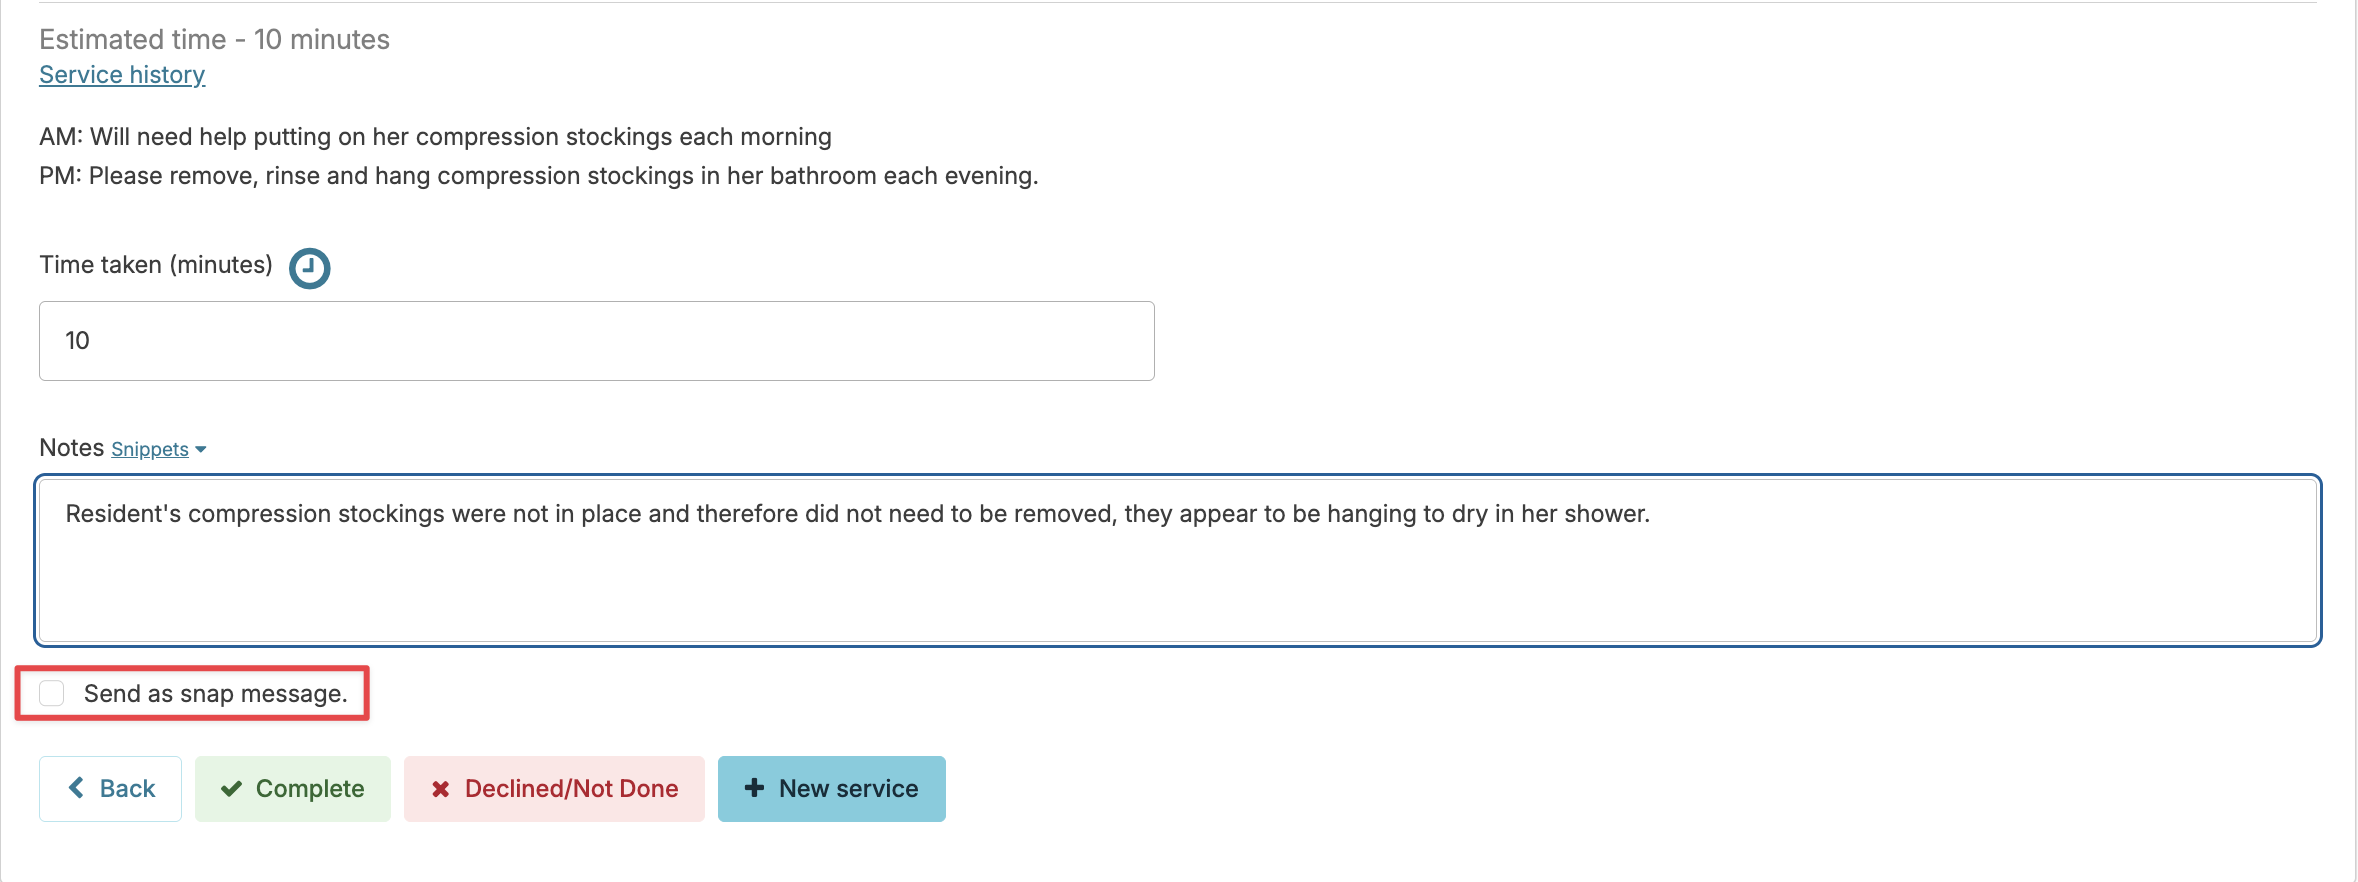
- You will now be on the snap messaging screen with the charted information copied into the subject and body of your message.
- Select the message recipients.
- Note: Messages sent to provider type groups will only reach staff members with profiles in the same campus where the message originates, regardless of their access permissions. If a staff member whose profile is not in that campus needs to be included in the message, they can be individually selected as a recipient.
- Edit the subject and body of the snap message as desired. The original charting for the service will be saved to the resident record, and any additional text added to the snap message will not be a part of the permanent record.
- Click Send when your message is completed.
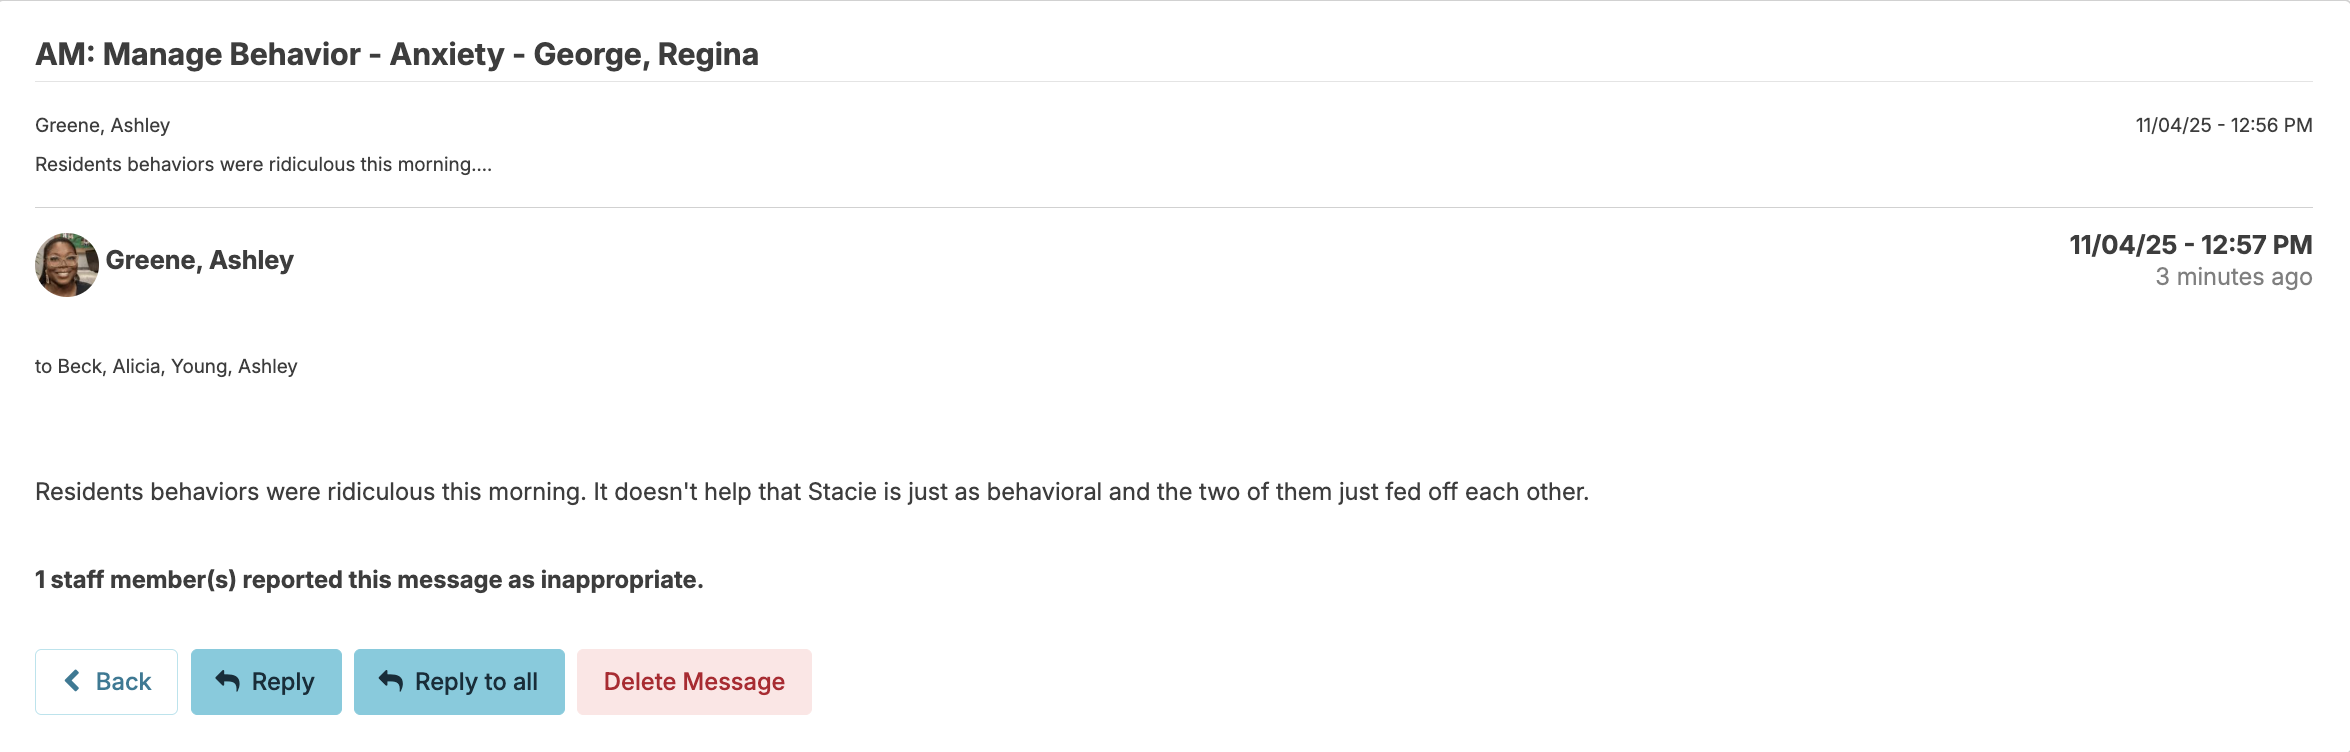
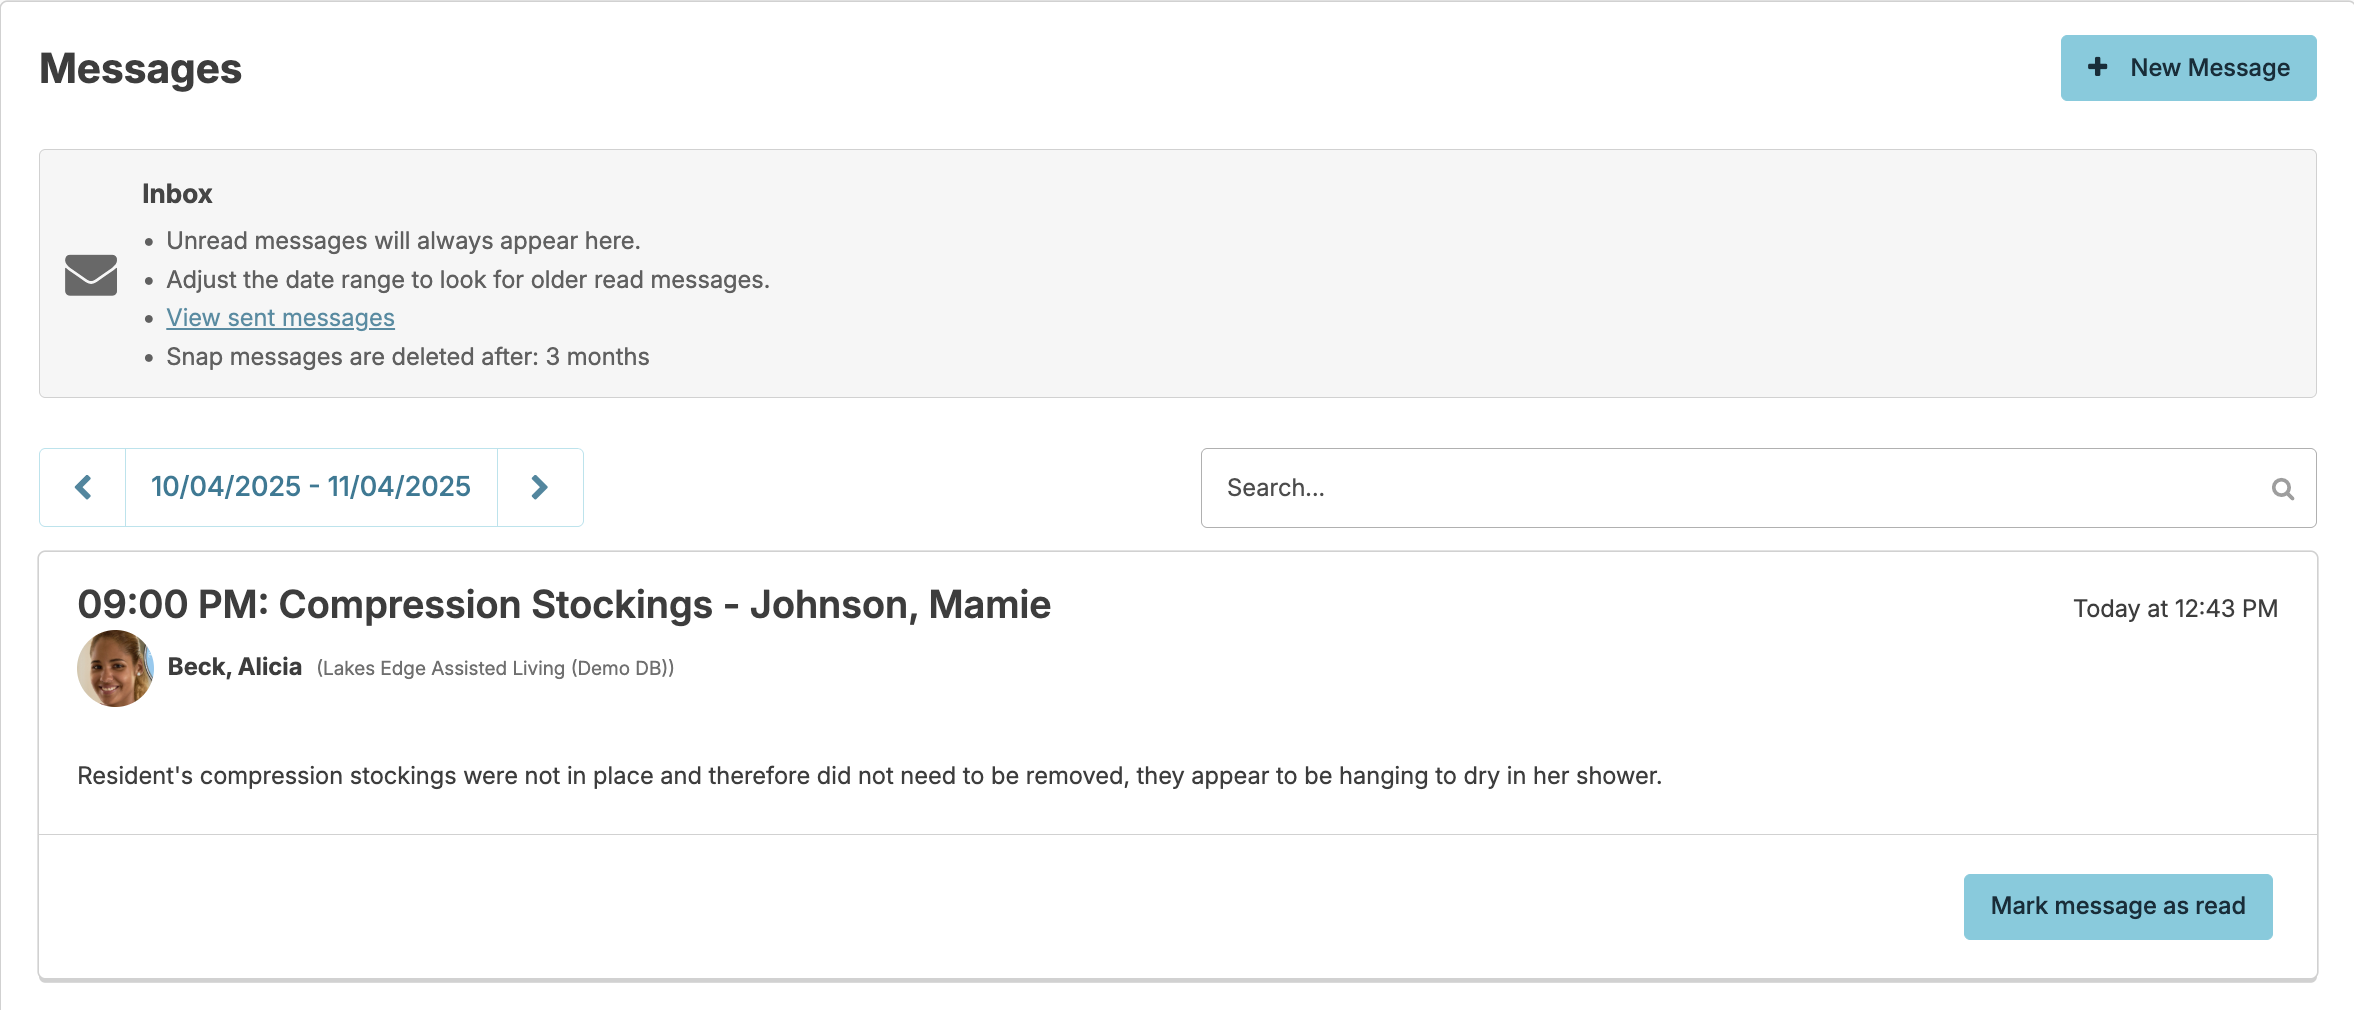
Receiving Messages
Users will be prompted to read and review messages they receive in Residex. When a message is sent, the recipient will be notified with a red alert on the lower right corner of their Residex screen. You may snooze the notification for a few minutes at a time. The alert will otherwise persist until the message is read. To read the message, just click on Messages.

You may also view your messages (read and unread) by navigating to the envelope icon next to your name in the upper right corner.
To turn off notifications for a message, click Mark message as read.
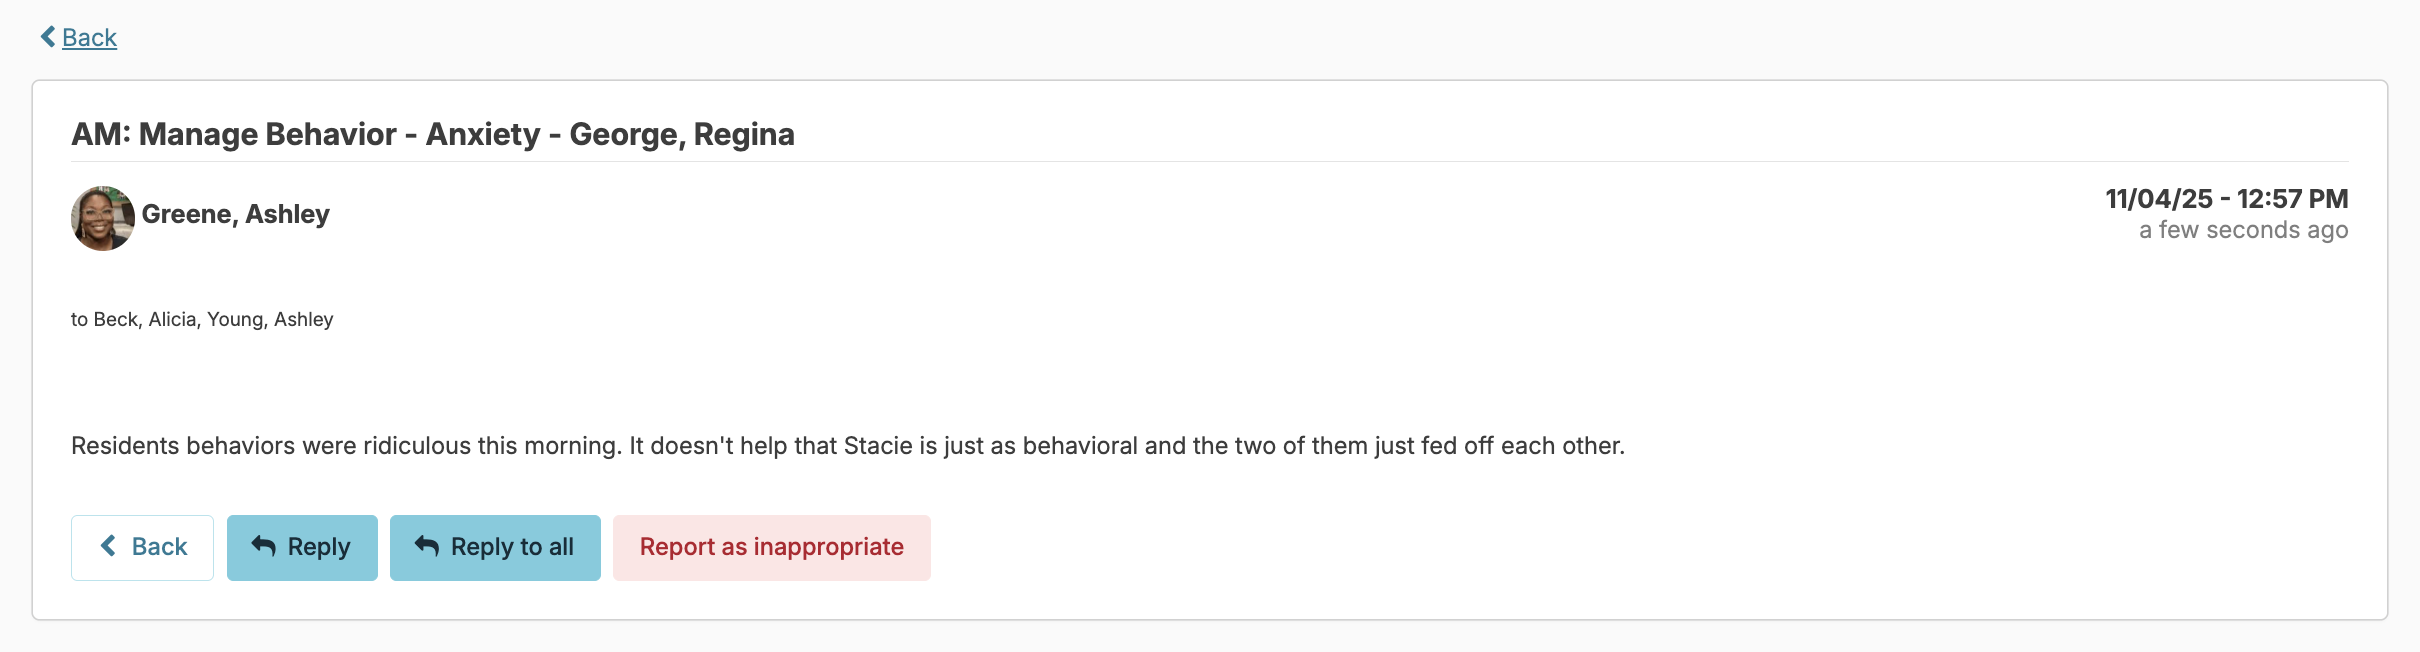
To reply to the message, you can click anywhere else on the message and press the Reply or Reply to all button.
Delete a Snap Message
Users with Administrator (Role 411) or Administrator Assistant (Role 410) have the ability to delete a snap message.
Any user who does not have the Administrator (Role 411) or Administrator Assistant (Role 410) can report a snap message as inappropriate by selecting the Report as inappropriate button from the message itself.
A user with Administrator (Role 411) or Administrator Assistant (Role 410) will see this message in their inbox with a Reports flag.

A user with Administrator (Role 411) or Administrator (Role 410) will simply have the Delete button. Deleting the message here will delete the message from any and all recipients of the snap message.