Table of Contents:
- Campus Billing Setup
- Client Billing and Finance Setup
- Test Before Export
- Export
- Test Account Setup
- Test Account Login
Campus Billing Setup
Verify the Campus Billing Contact is Selected
The billing contact is the person the clearing house will contact if there are any questions on the submitted claims.
Navigate to:
- Billing > Billing Configuration
- Select the Billing Contact from the option list
❗️Staff with Billing (Role 4) will display as an option in the Billing Contact drop down list. This staff member must also have a phone number listed on the staff profile screen before billing is exported.
Additional Campus Billing Information
The Campus Tax ID and the NPI or UMPI number is required.
- Enter/verify the Campus Tax ID is entered correctly
- Enter/verify the NPI or UMPI number is entered correctly
- When finished press save
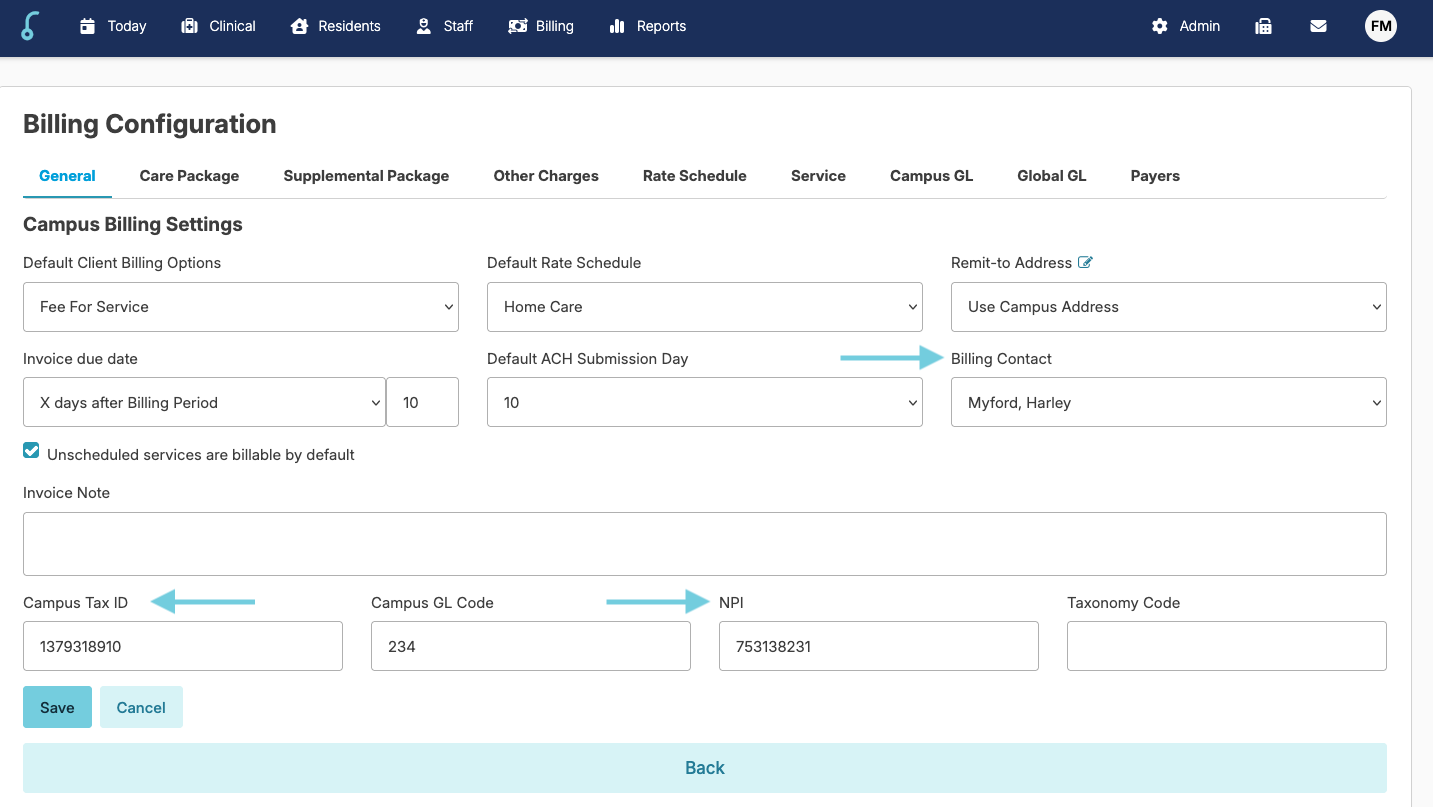
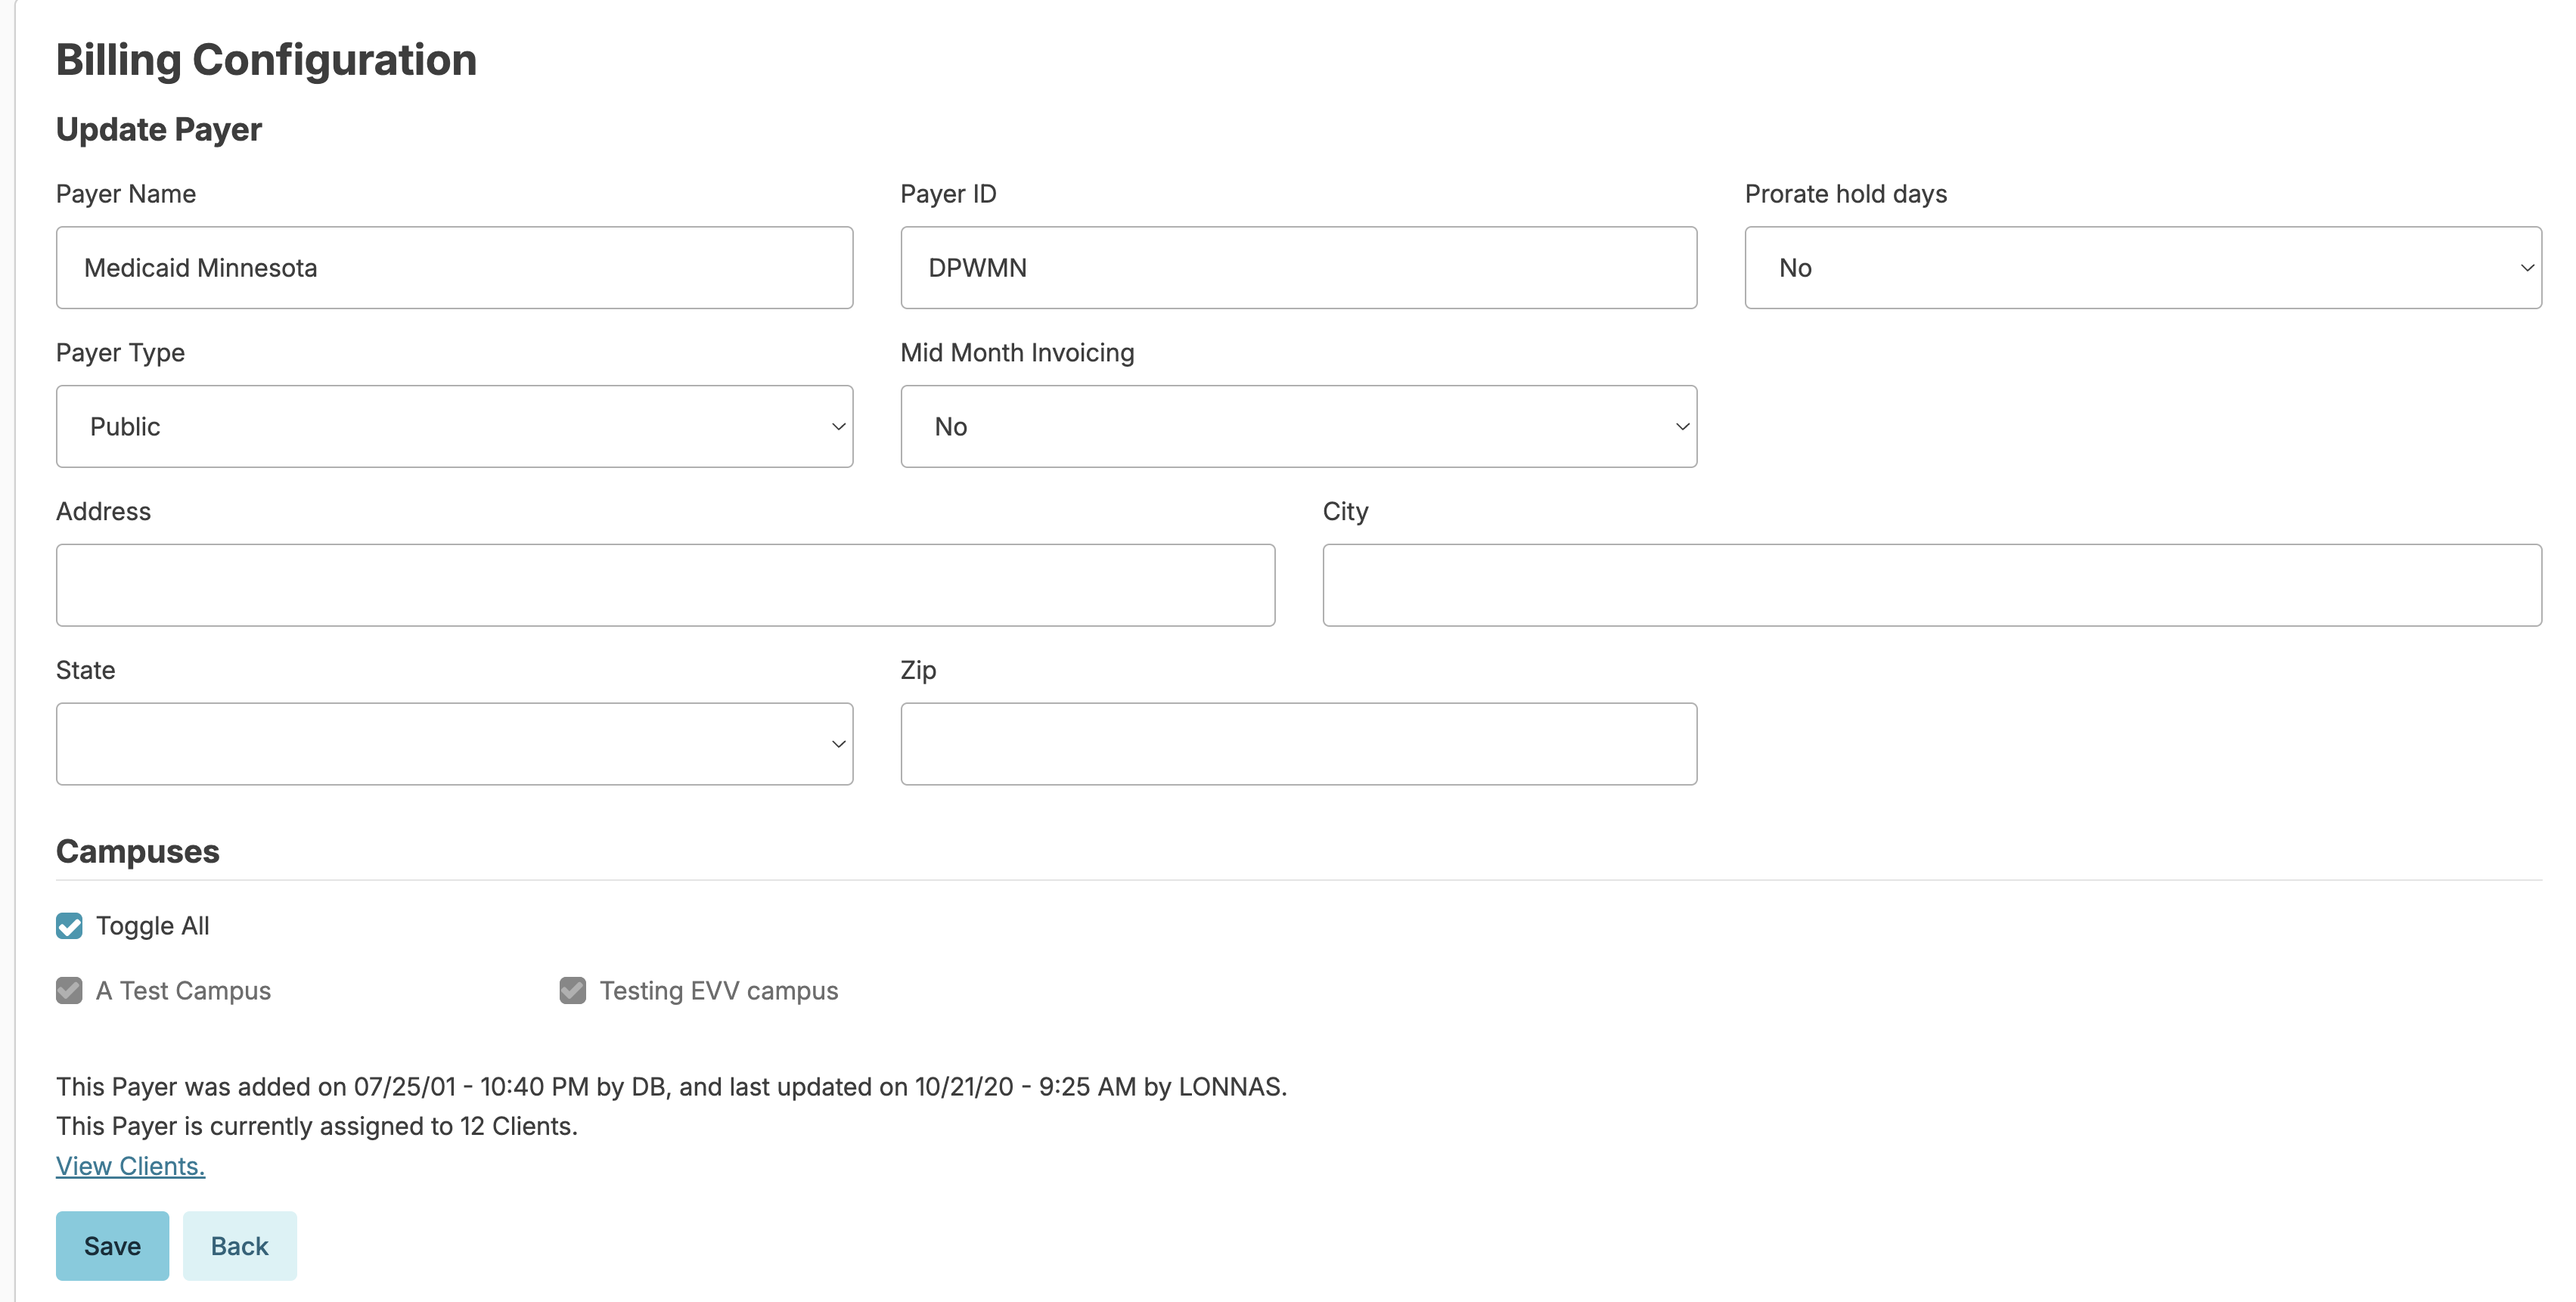
Payers Information
- Under Billing Configuration > click the Payers tab
- On the list of the payers, click one of the payers
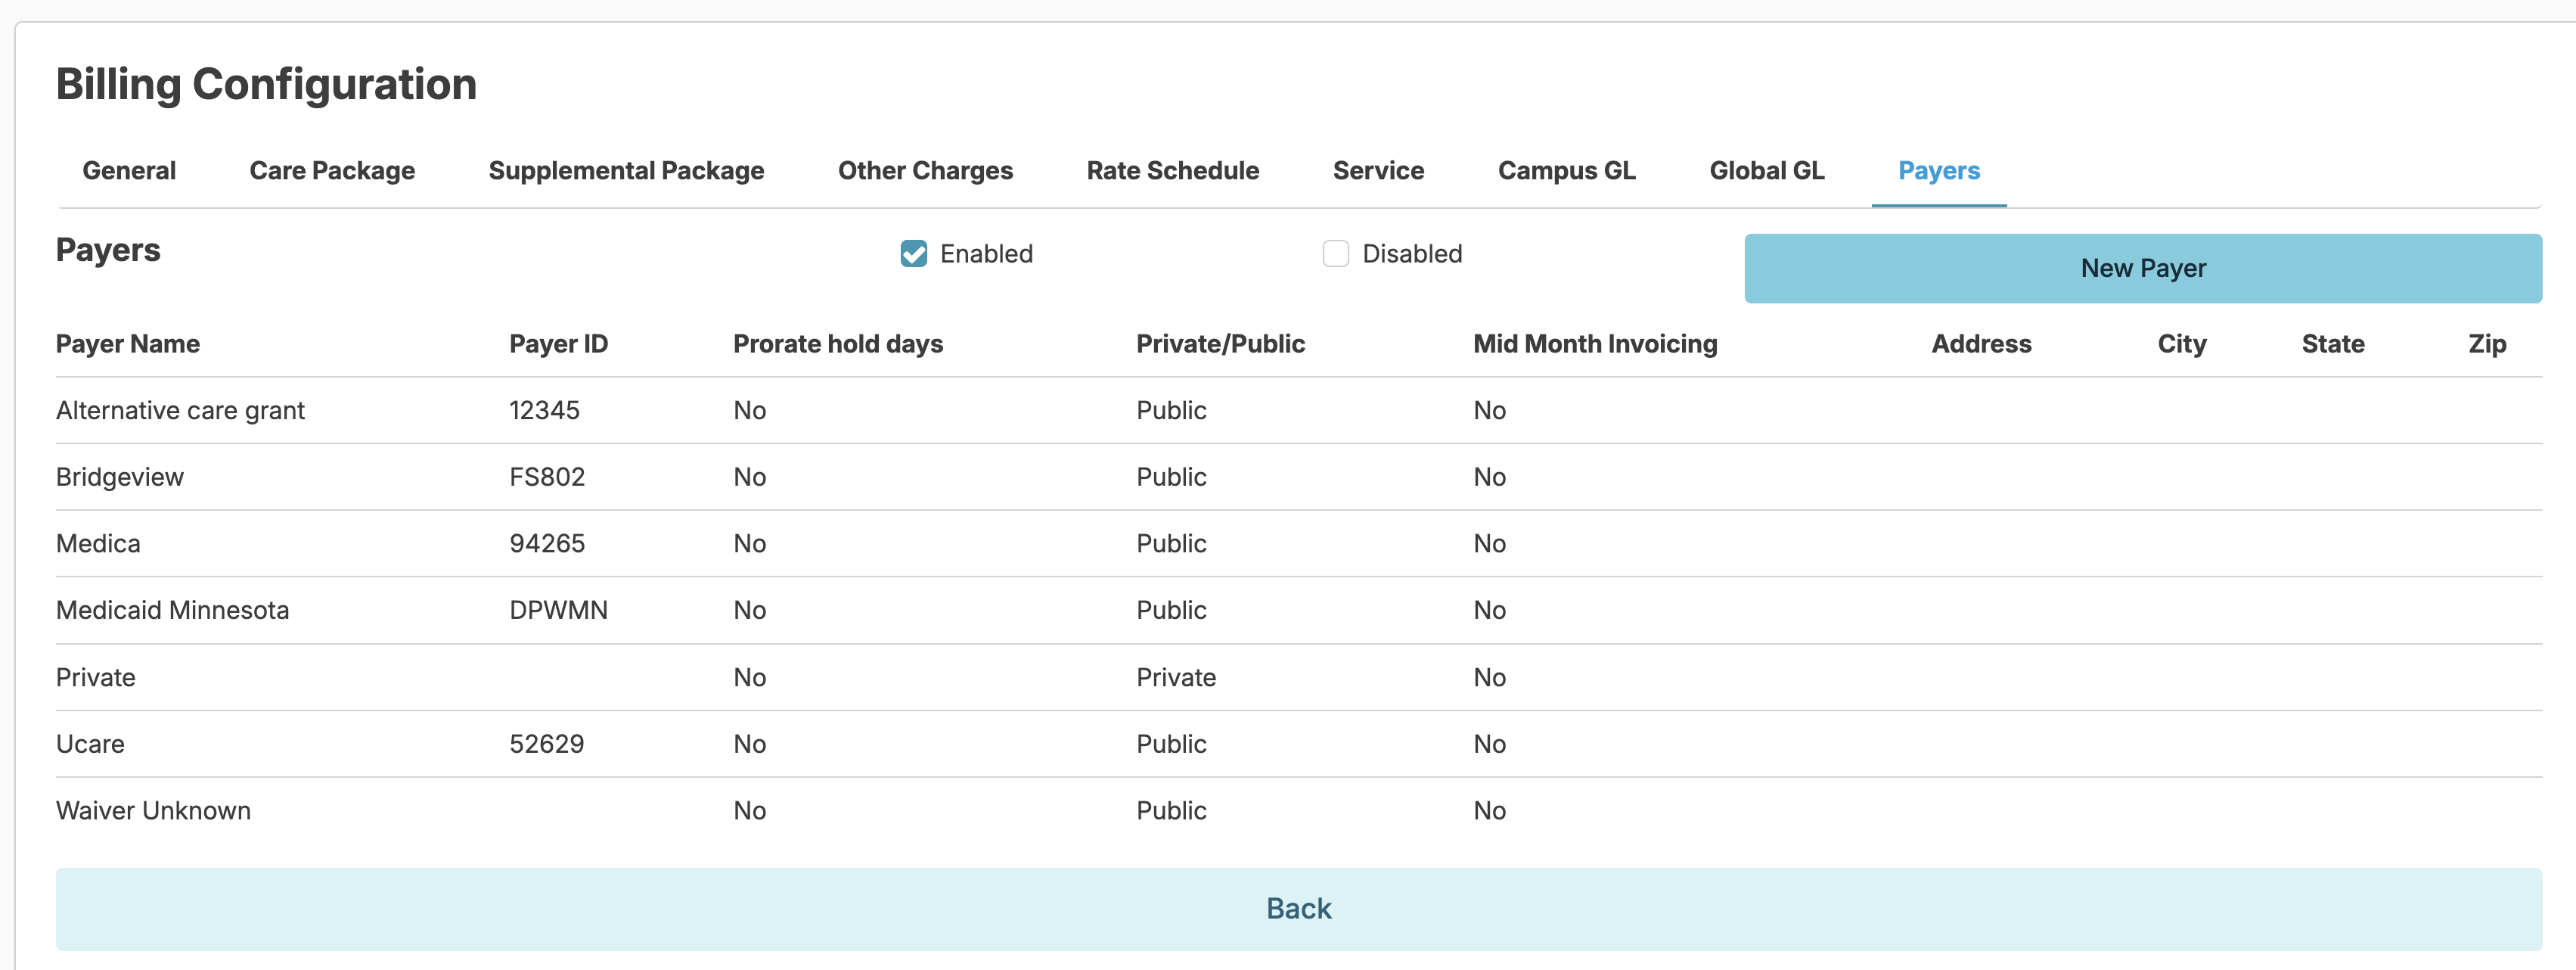
- Add or edit the payer address and press Save
Client Billing and Finance Setup
Client Billing & Finance Information:
The next step is to enter the client's payer information. This information will be taken directly from the Service Agreement given by the county. Navigate to Residents > Clients. Select a client, and the profile will open. Click on Billing & Finance.
Payers Tab:
- Under Billing & Finances, click Payers
- Click Add Payer
- When a non-private payer is selected, additional fields will appear
- This information can be entered using the Service Agreement as indicated below
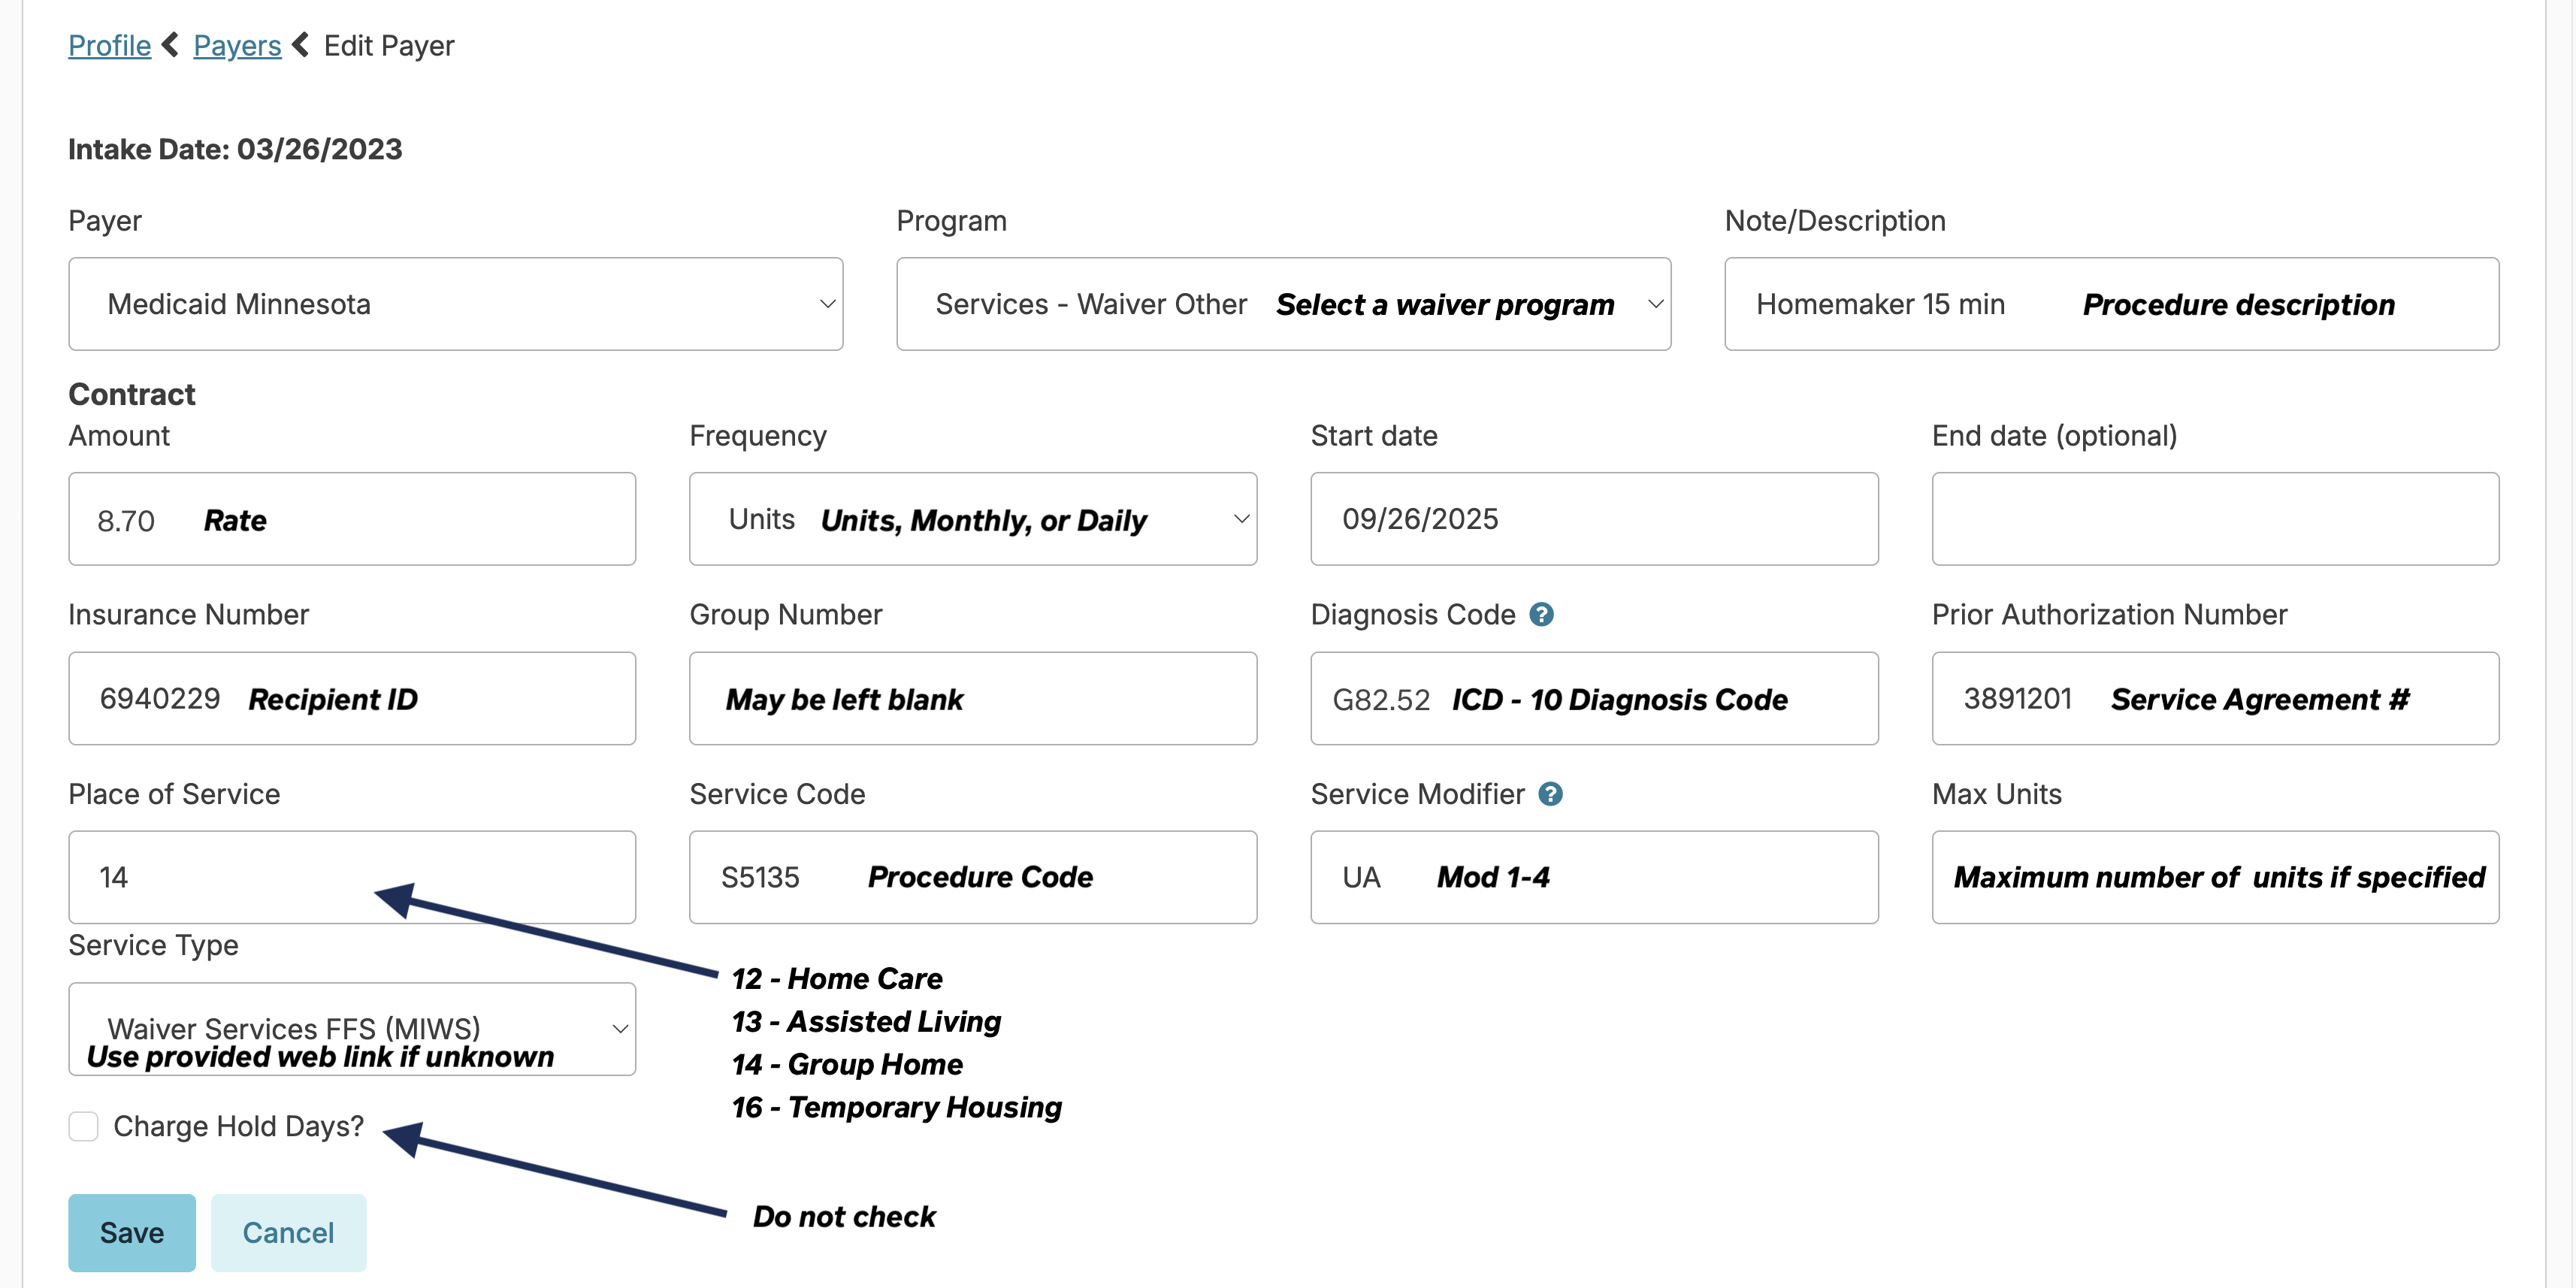
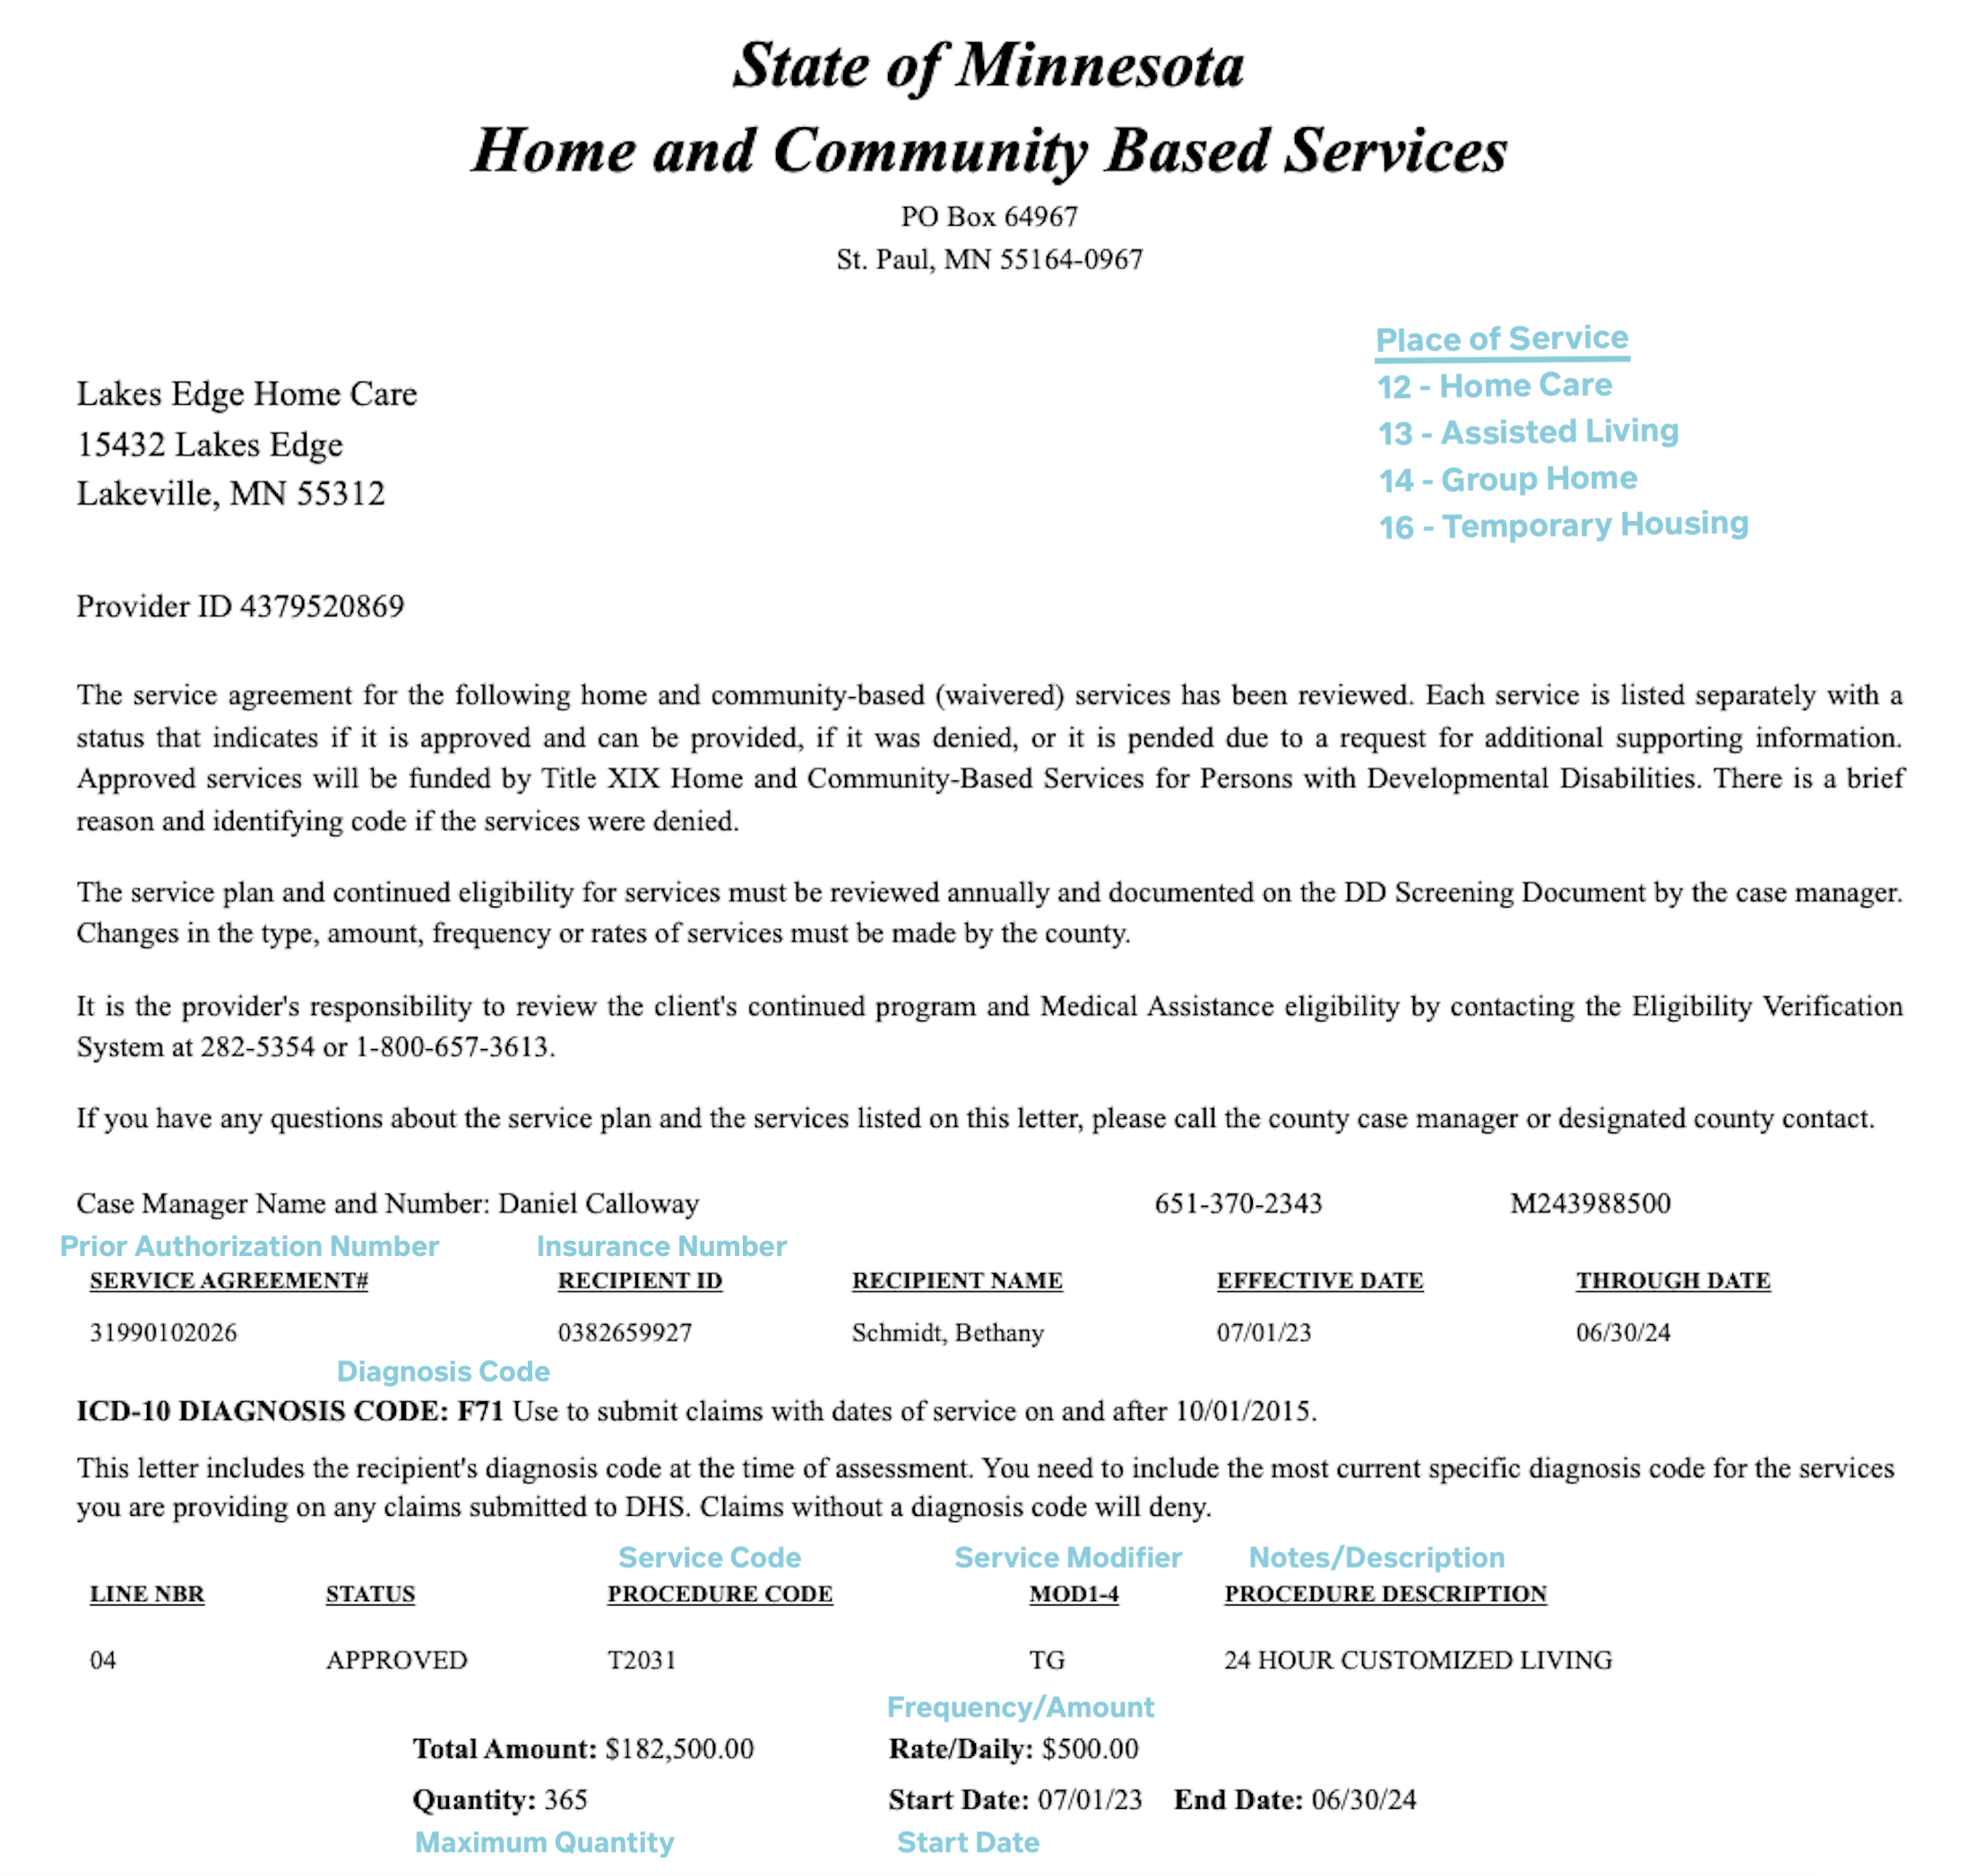
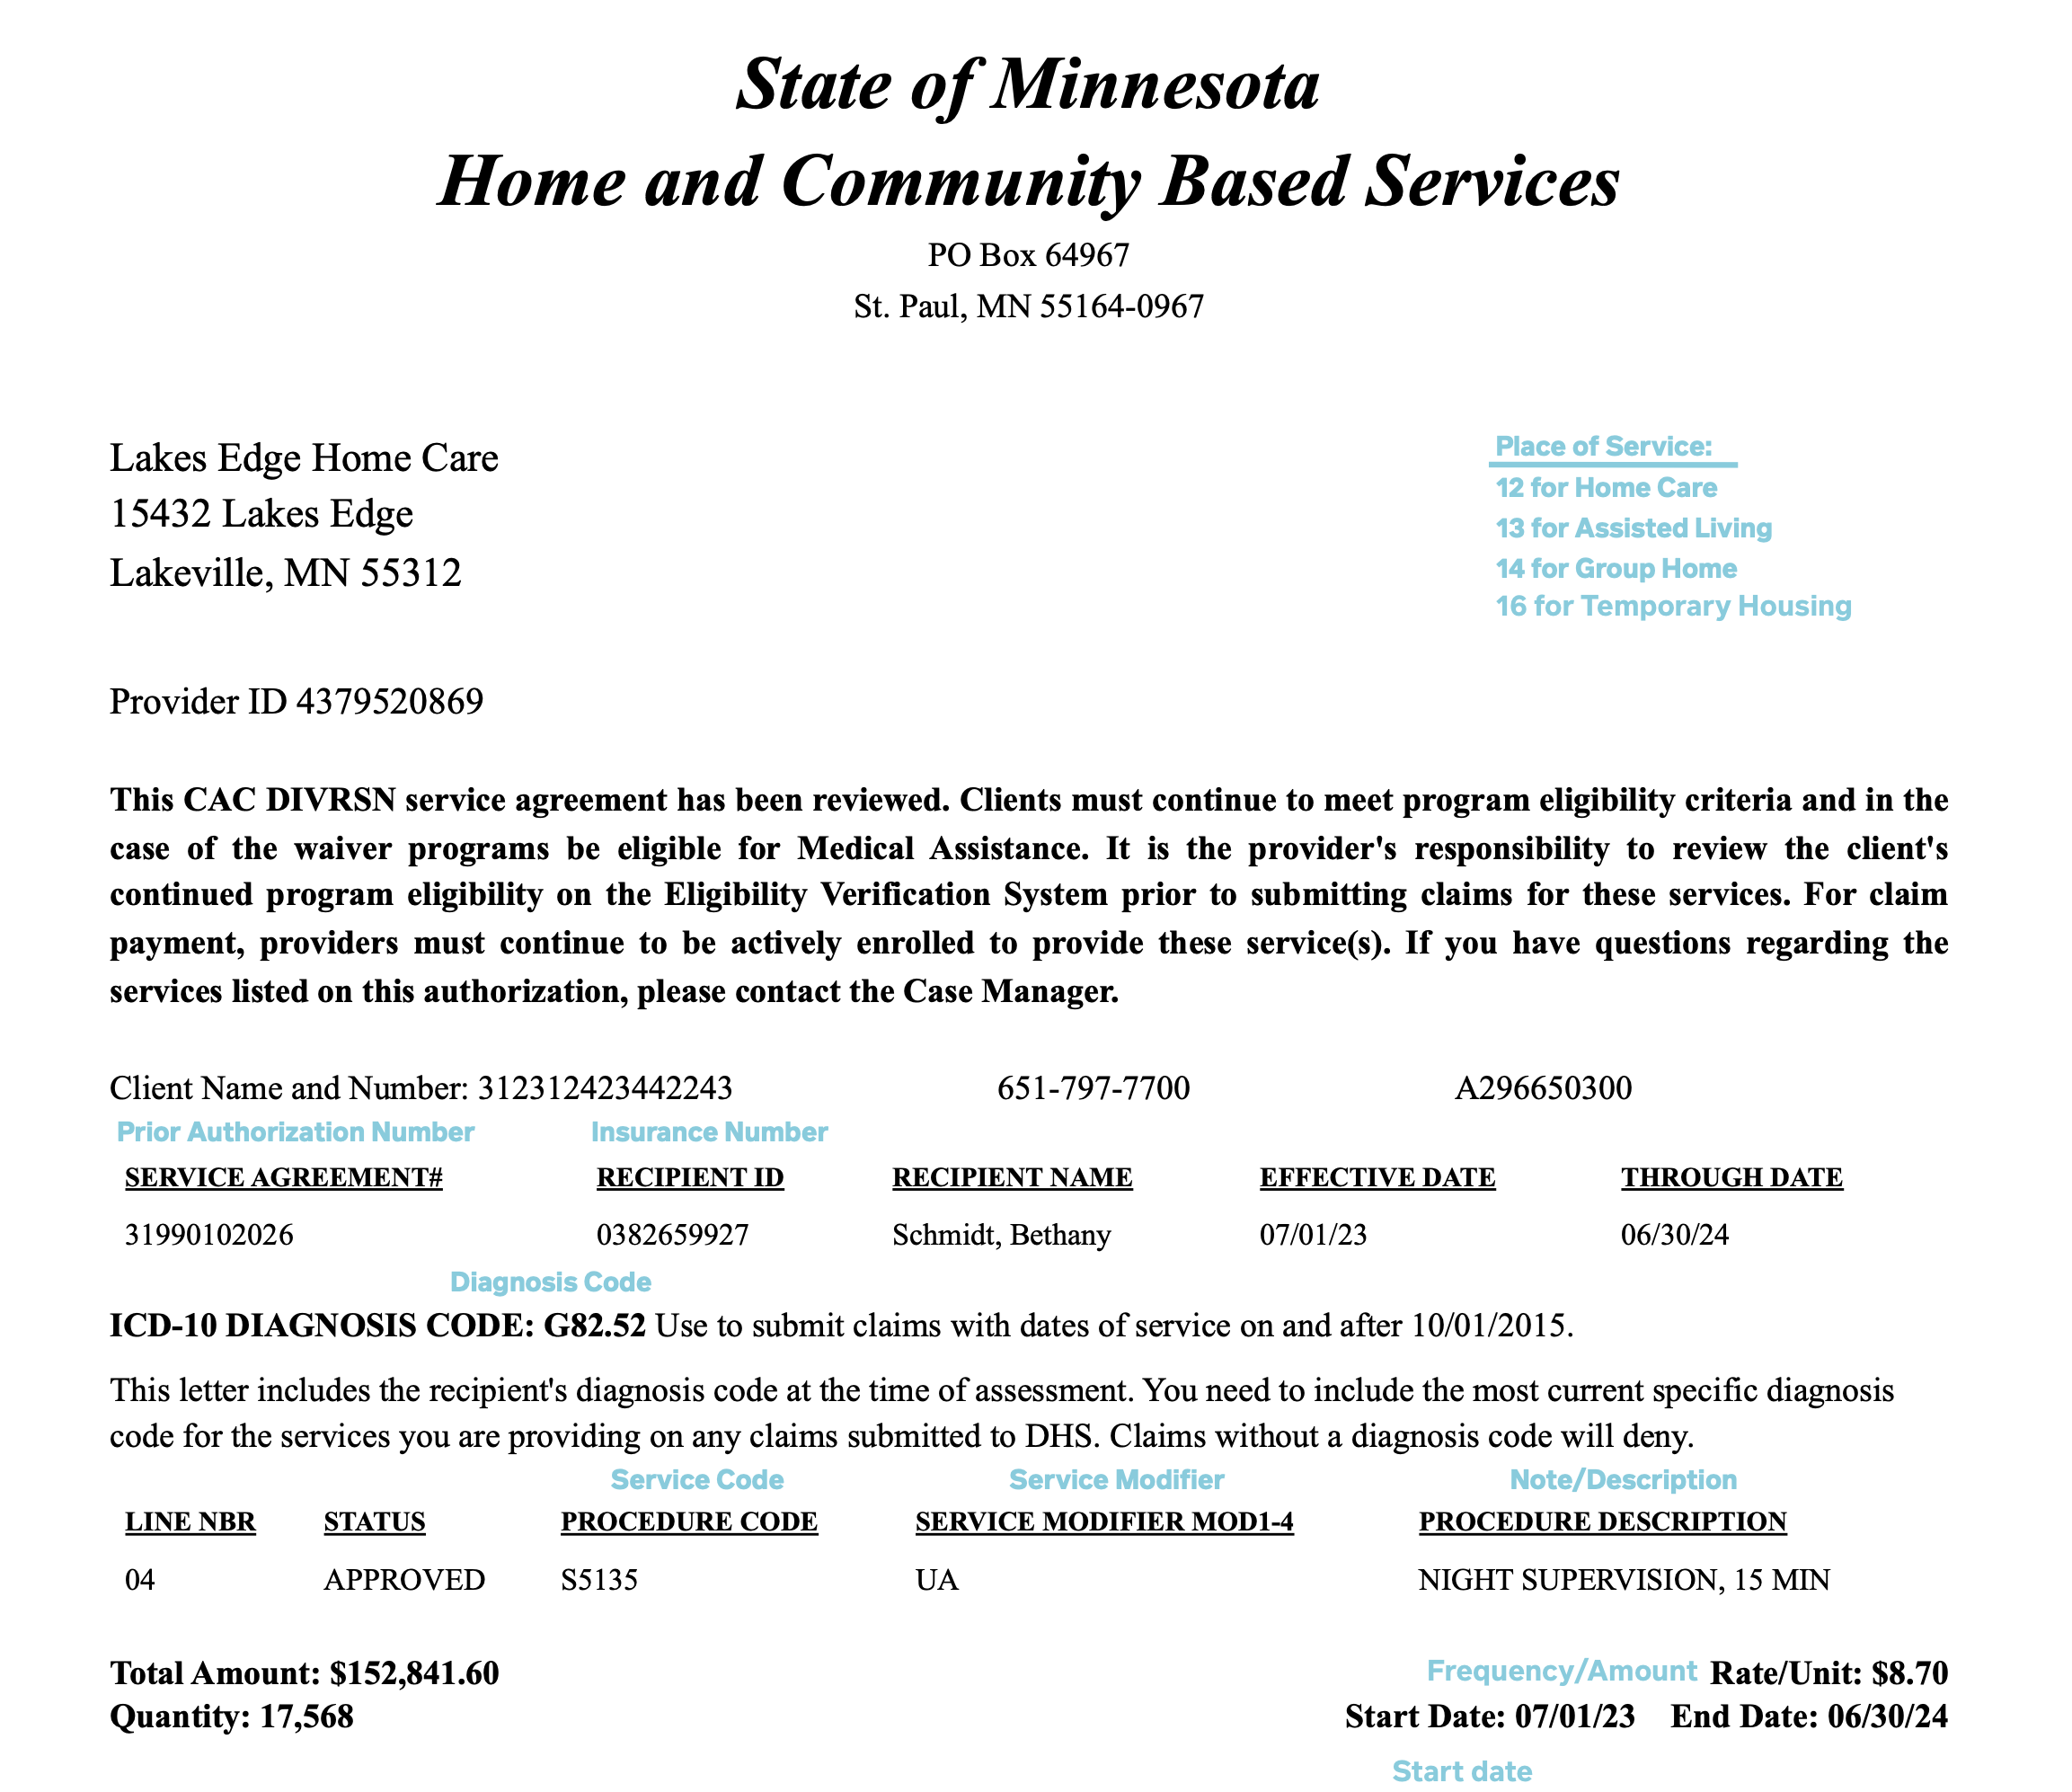
The above are examples of what a service agreement may look like. Follow the prompts showing what information needs to be entered into Residex .
Finding the Service Type
-
Use this link if you are unsure of the procedure code
- Open the above link and click onProcedure Codes
- Use your browser's "Find" option (CMD + F or Ctrl + F)
- Expand one of the Program Procedure Code option lists
- Type in the service code and press enter
- If this payer has the procedure code the search will show a #/# result
- This is the Service Type you will select in the Residex payer screen
NOTE: If the search results show 0/0, expand another program and click on the search field again and press enter. This will search in the expanded Program Procedure Code list.
If No Agreement is Available
If a service agreement for a client has not yet been received, a temporary placeholder payer called "Waiver Unknown" should be used. If this payer is selected, records will not automatically be submitted to HHAX upon clocking out.
Test Before Export
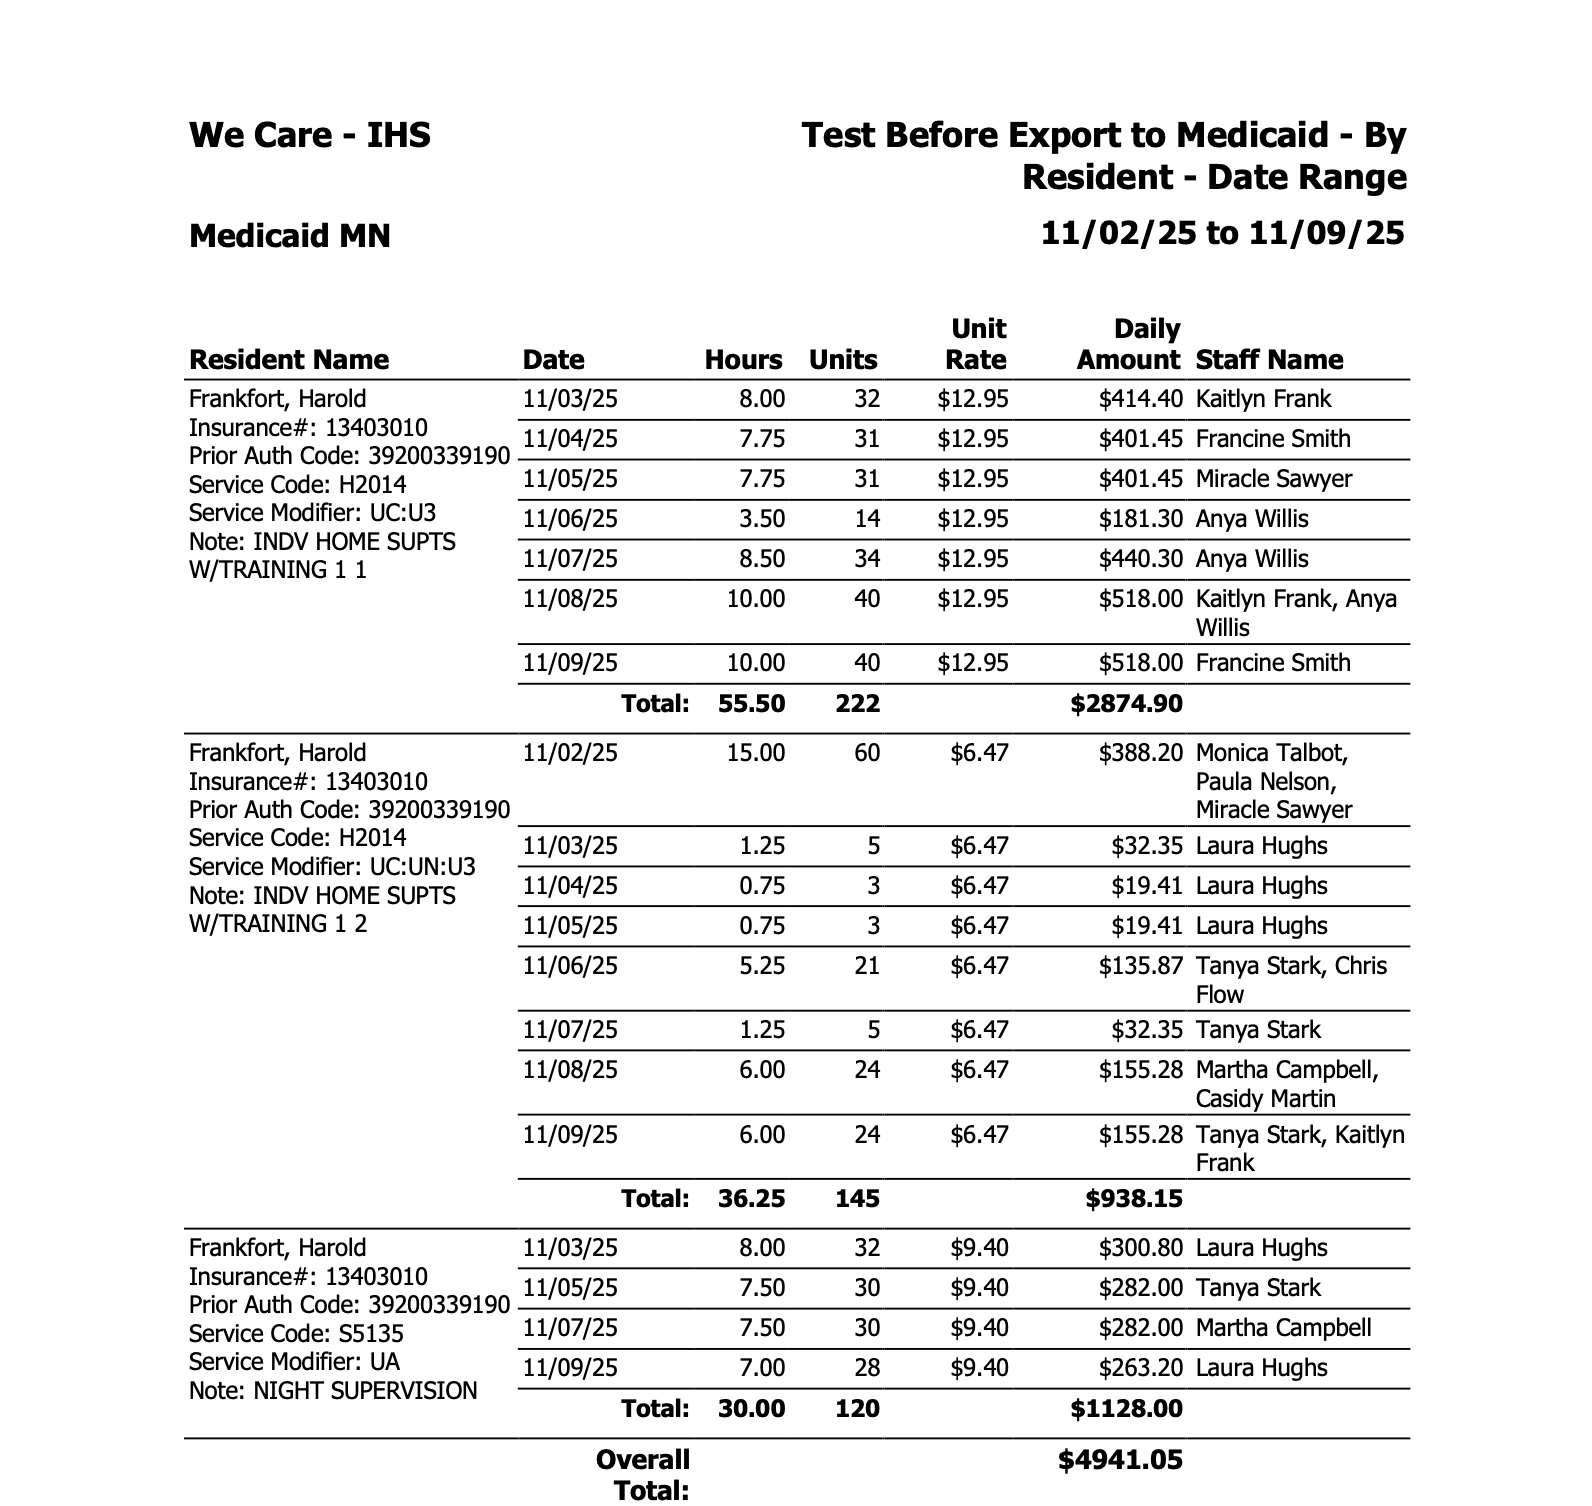
Test Before Export to Medicaid - By Resident - Date Range
This is one example of an export report. This is helpful for clients who bill every two weeks and wish to exclude some residents.
The test before export reports let you preview exactly what will be exported before finalizing. You'll be able to review items such as:
- Total hours for each date
- Number of units
- Rates applied
- Staff member(s) who provided the services
This preview helps you catch any errors or discrepancies before submitting your export.
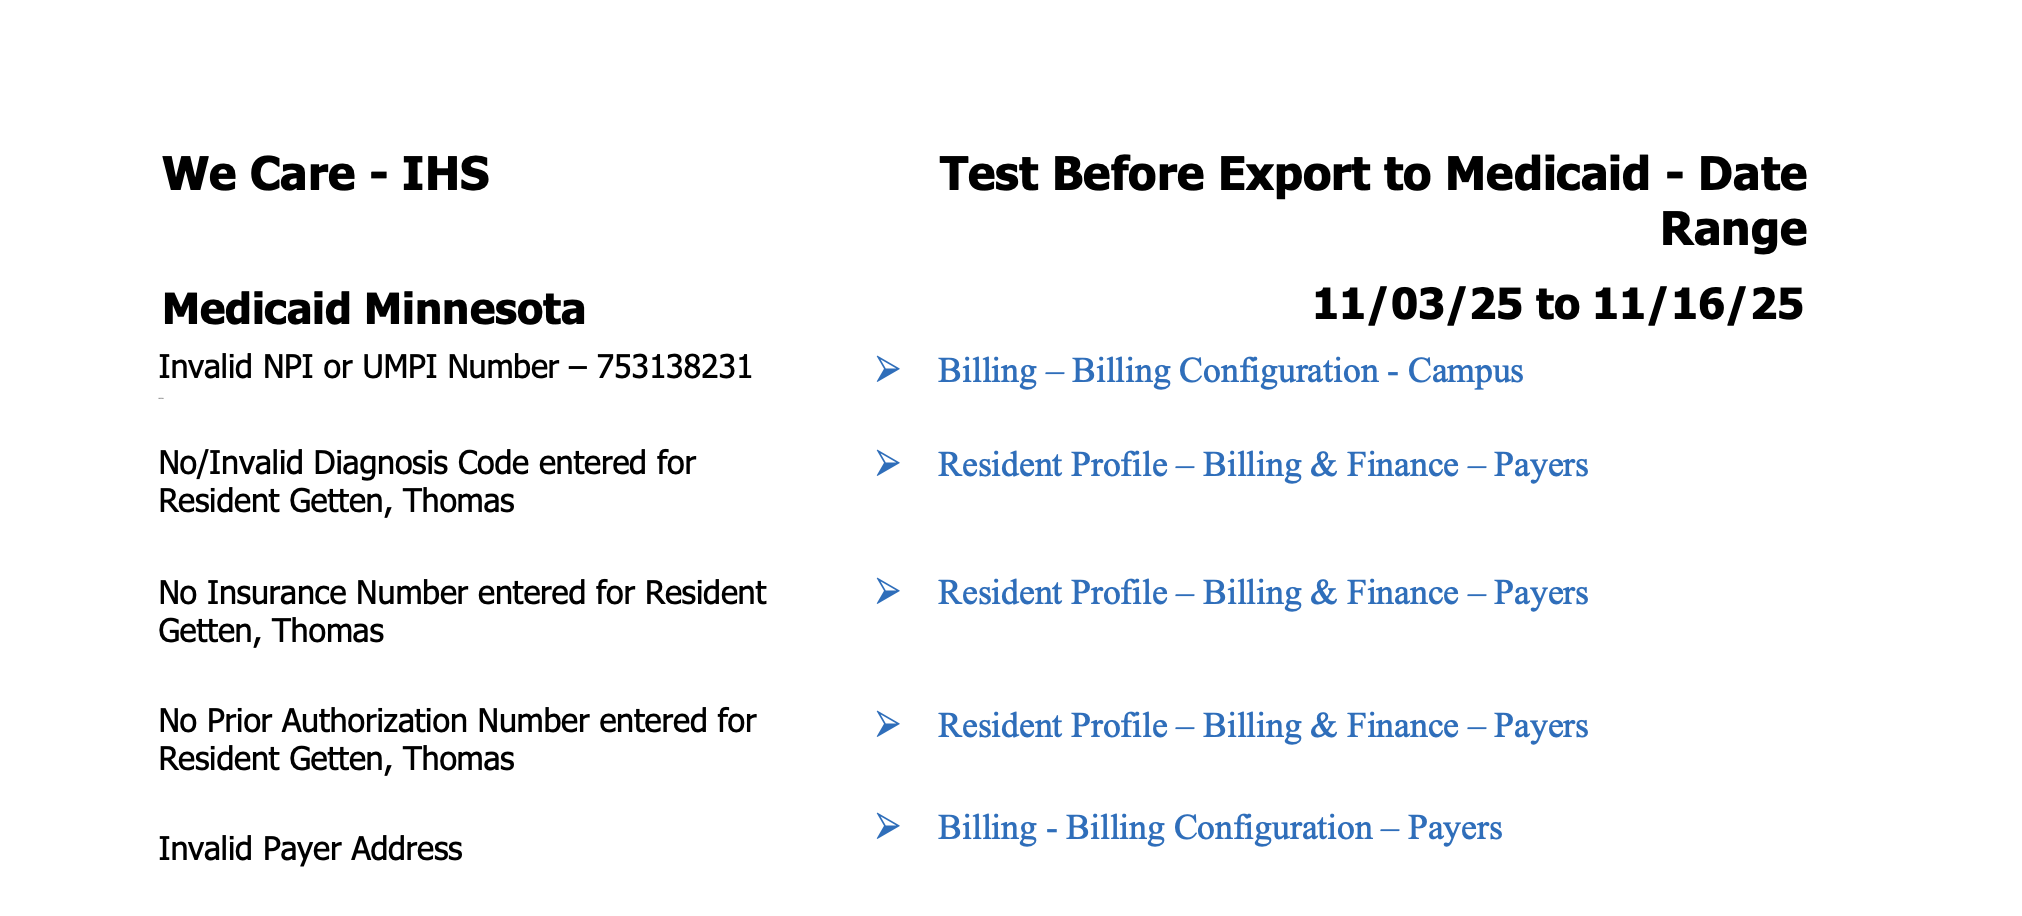
Check for Errors
If there are any errors that will prevent billing from exporting correctly, reports such as Test Before Export To Medicaid - Date Range will show a list of errors at the top. Each of these errors needs to be resolved before the export will work correctly.
Export
Export to Medicaid - By Resident - Date Range
Once the Test Export reports are clear of errors, it is time to run the Export to Medicaid - By Resident - Date Range
- Select the report
- Select the client(s)
- Select the payer and clearing house
- Specify the date range
- This report needs to be run as a text file.
- When you create the report it will download the text file on your computer and be available to upload into MN-Its
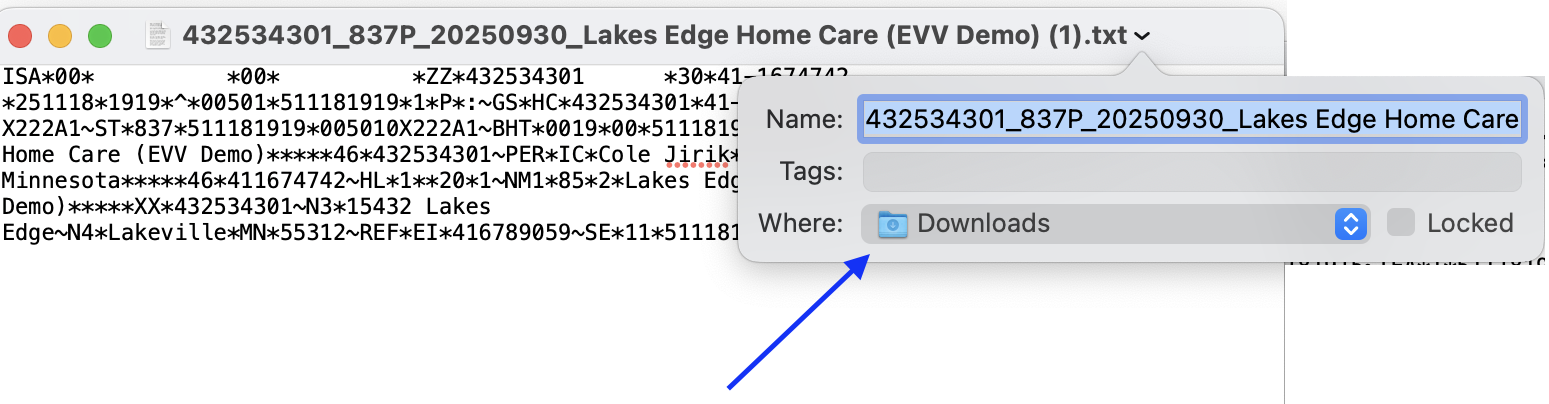
This is an example of what the text file will look like. The heading will contain information such as the NPI/UMPI number, period end date (backwards) and possibly the campus name.

Save the Text File
When the file downloads, it will be in your browser download files. You can click on it and save it to a different location if needed.
Test Account Setup
Medicaid Claims Submission Guide
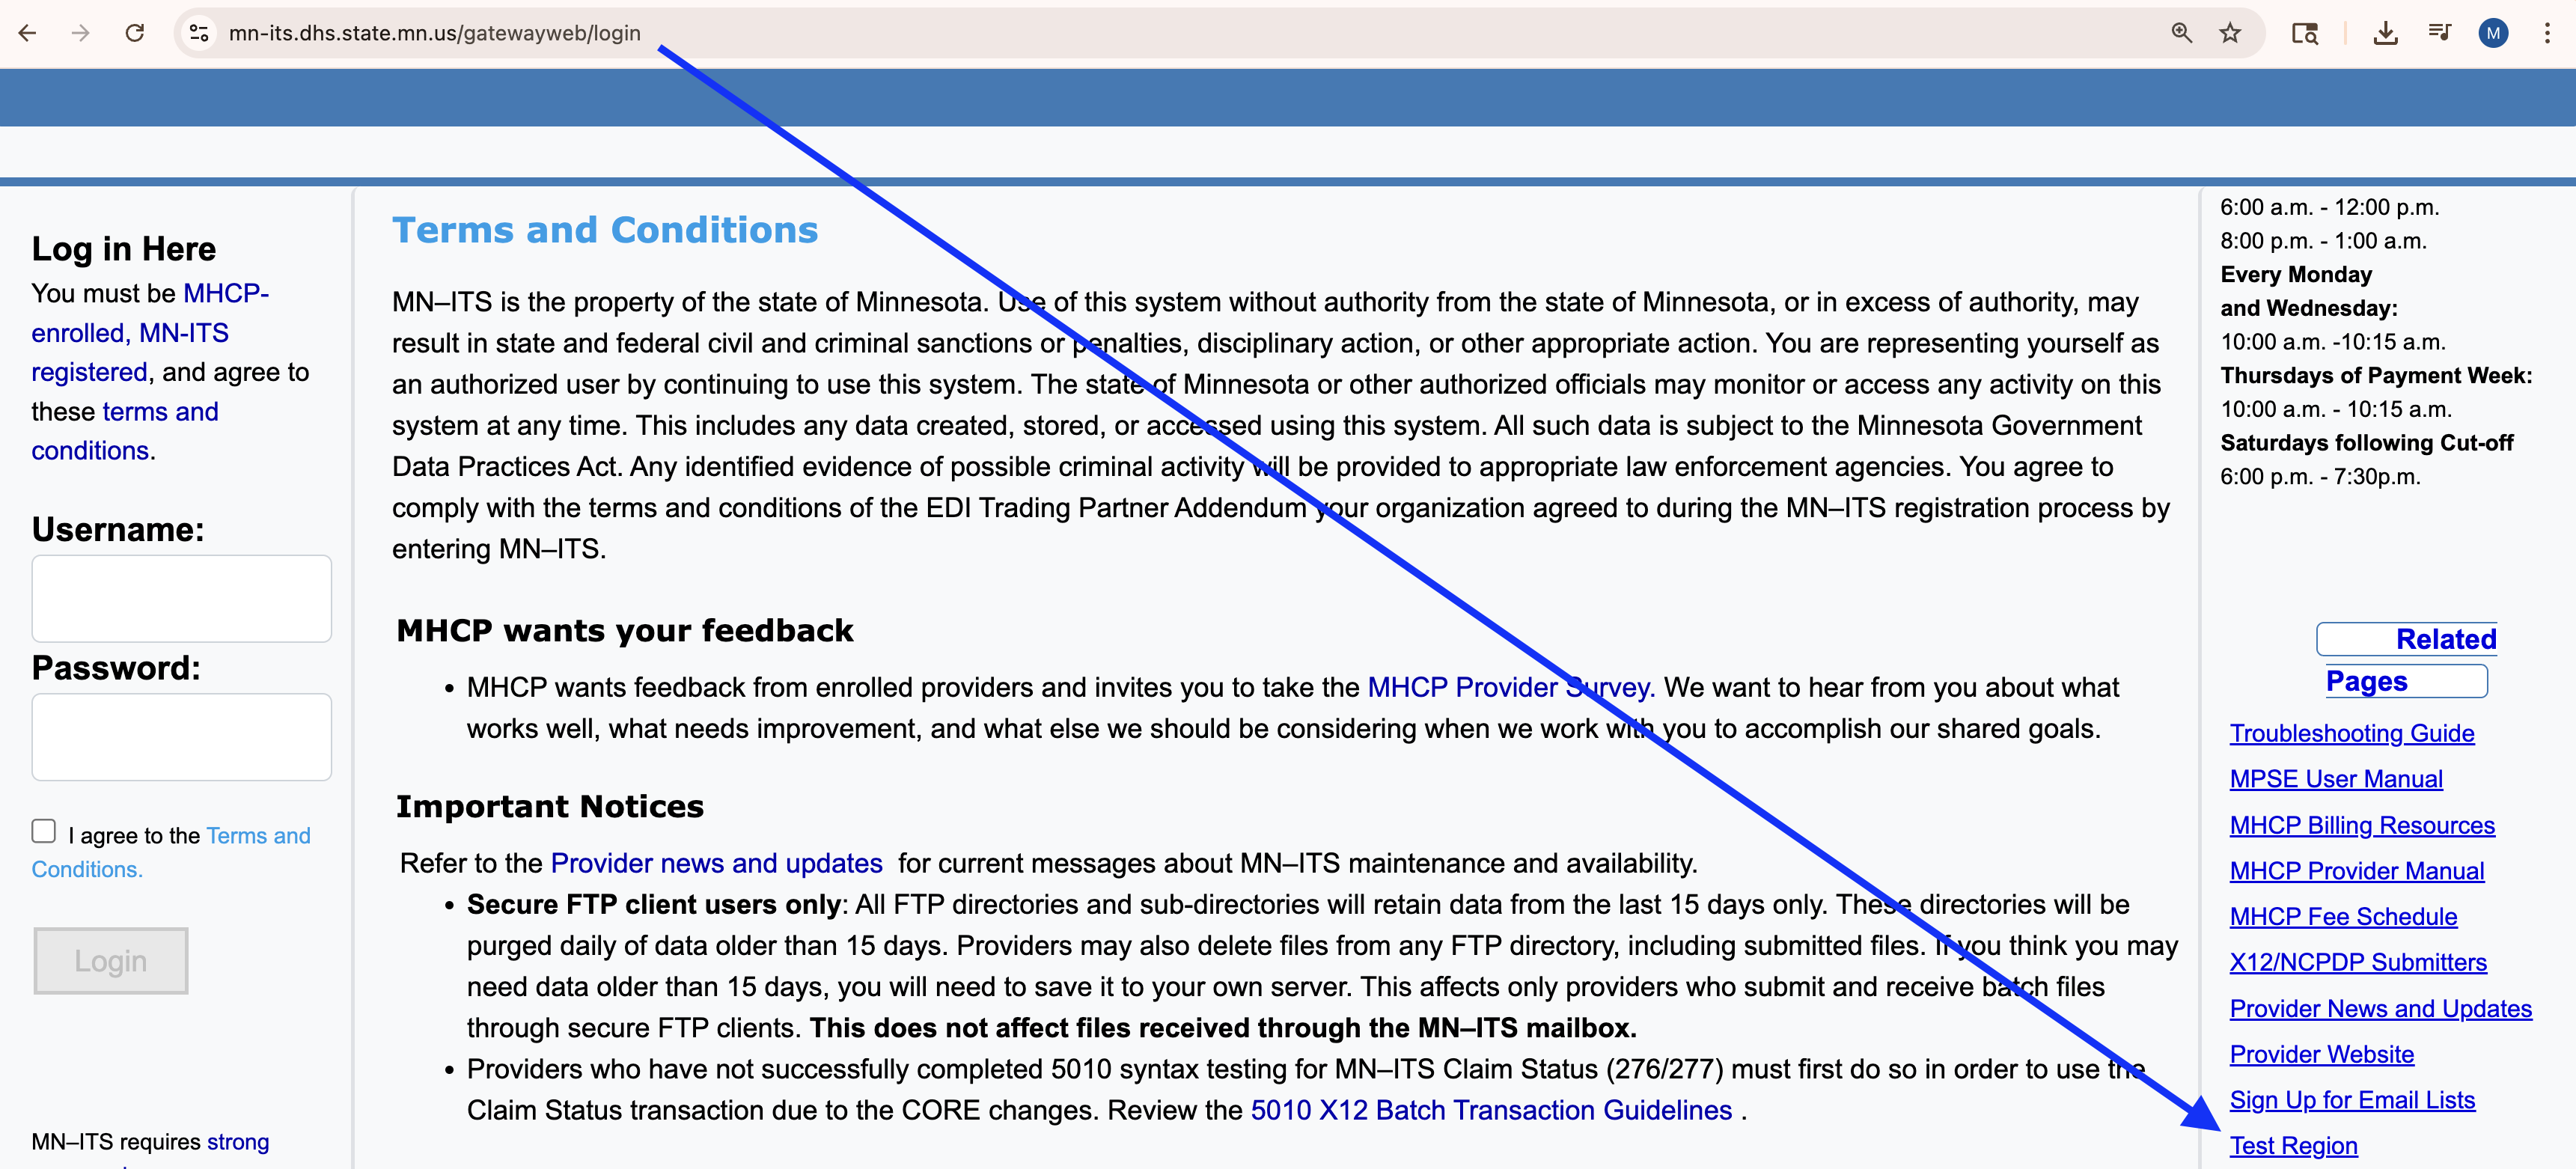
- Go to: MN-ITs Login
- Click on Test Region under Related Pages
- Scroll down and click "Create Test Account"
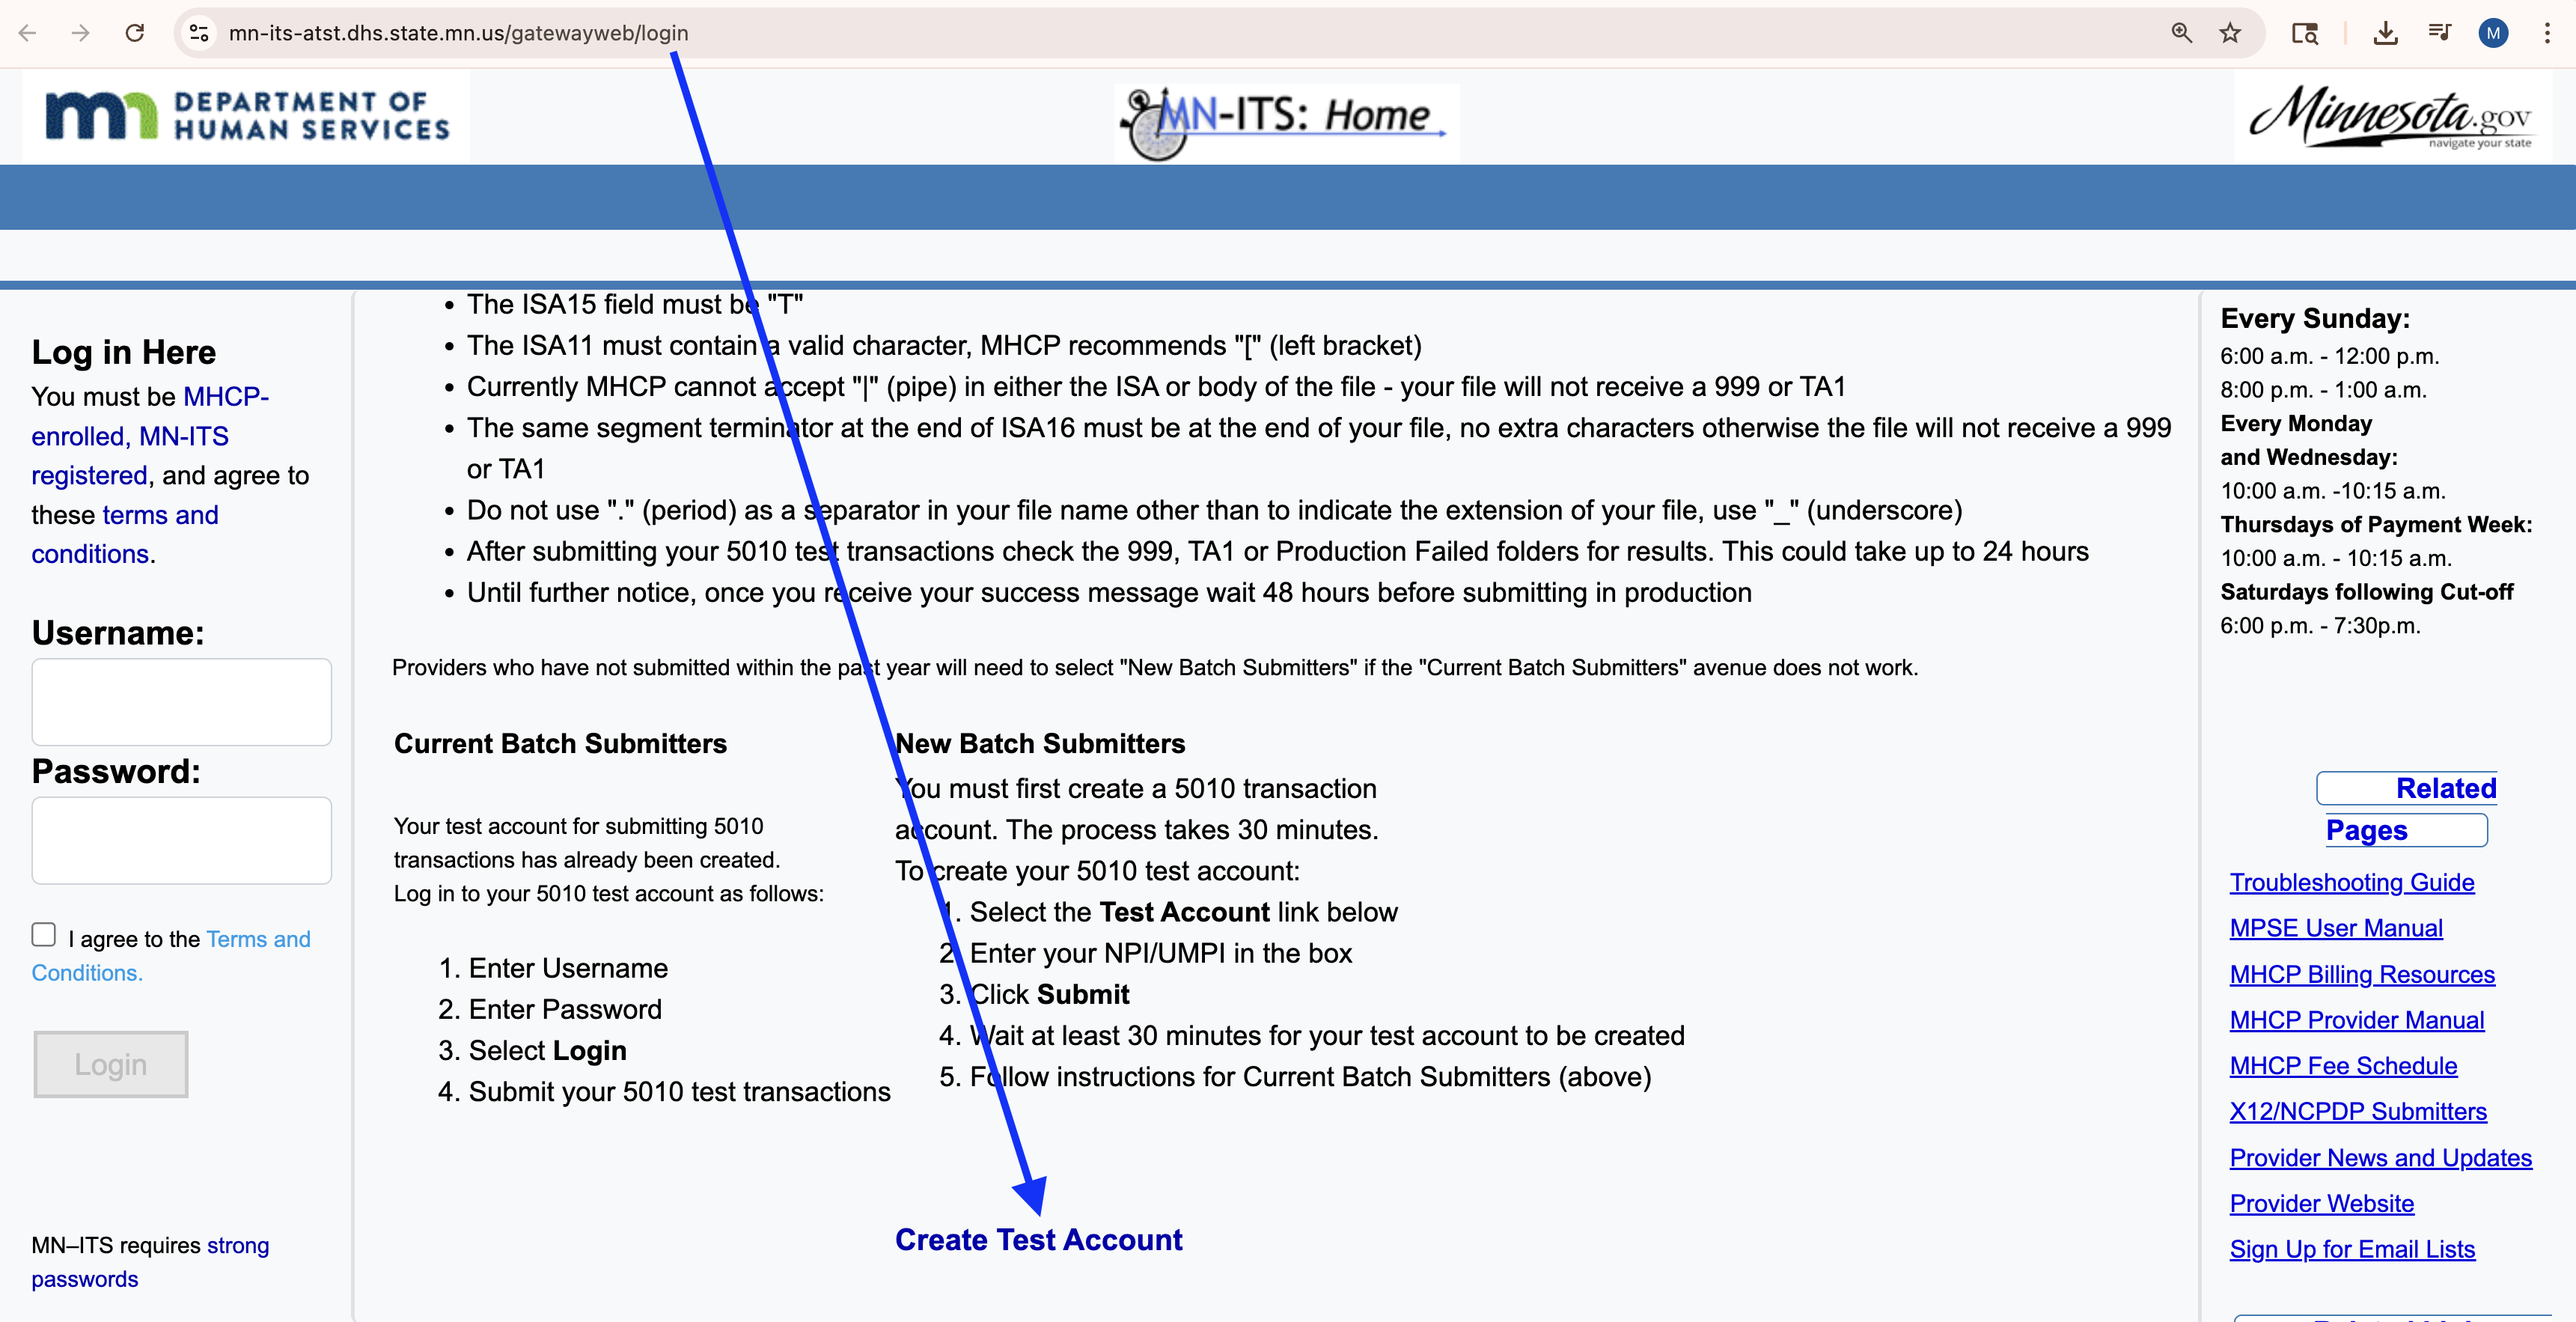
- On the screen that appears, enter your NPI or UMPI number
- Click Create User (creating your username takes about 30 minutes)
Test Account Login
Once the Account is Created
- Go back to MN-ITS Login Page
- Enter username: accepttest@NPI or UMPI number and temporary password
- You will be prompted to create a new password
- Scroll down and click "Create Test Account"
- Update your password
Upload a Test Export
- Follow the instructions in the Test Before Export to Medicaid
- Save the Export to Medicaid text file
- Click Choose file and navigate to where the text file is saved; then Upload in the Test Region
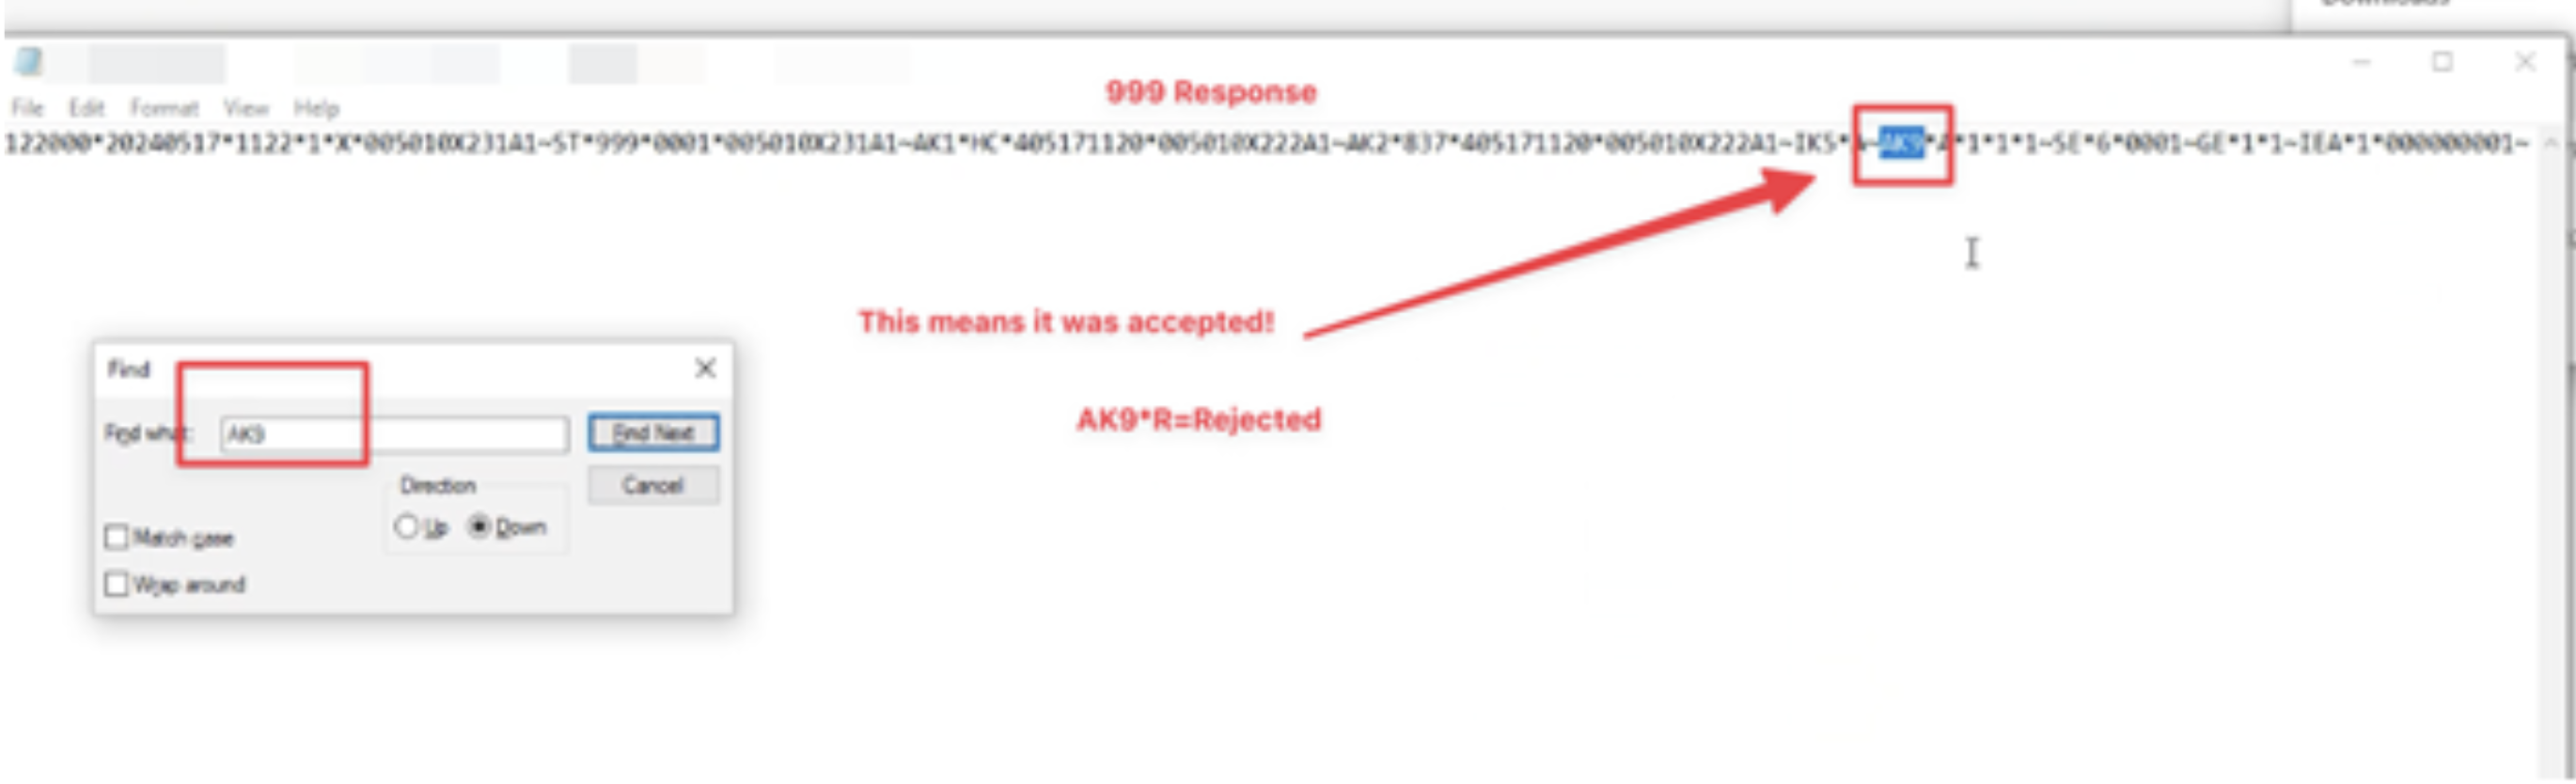
- You should receive a 999 response by going to the Test Account > Mailbox > Transaction Responses. It will come as a 999 response.
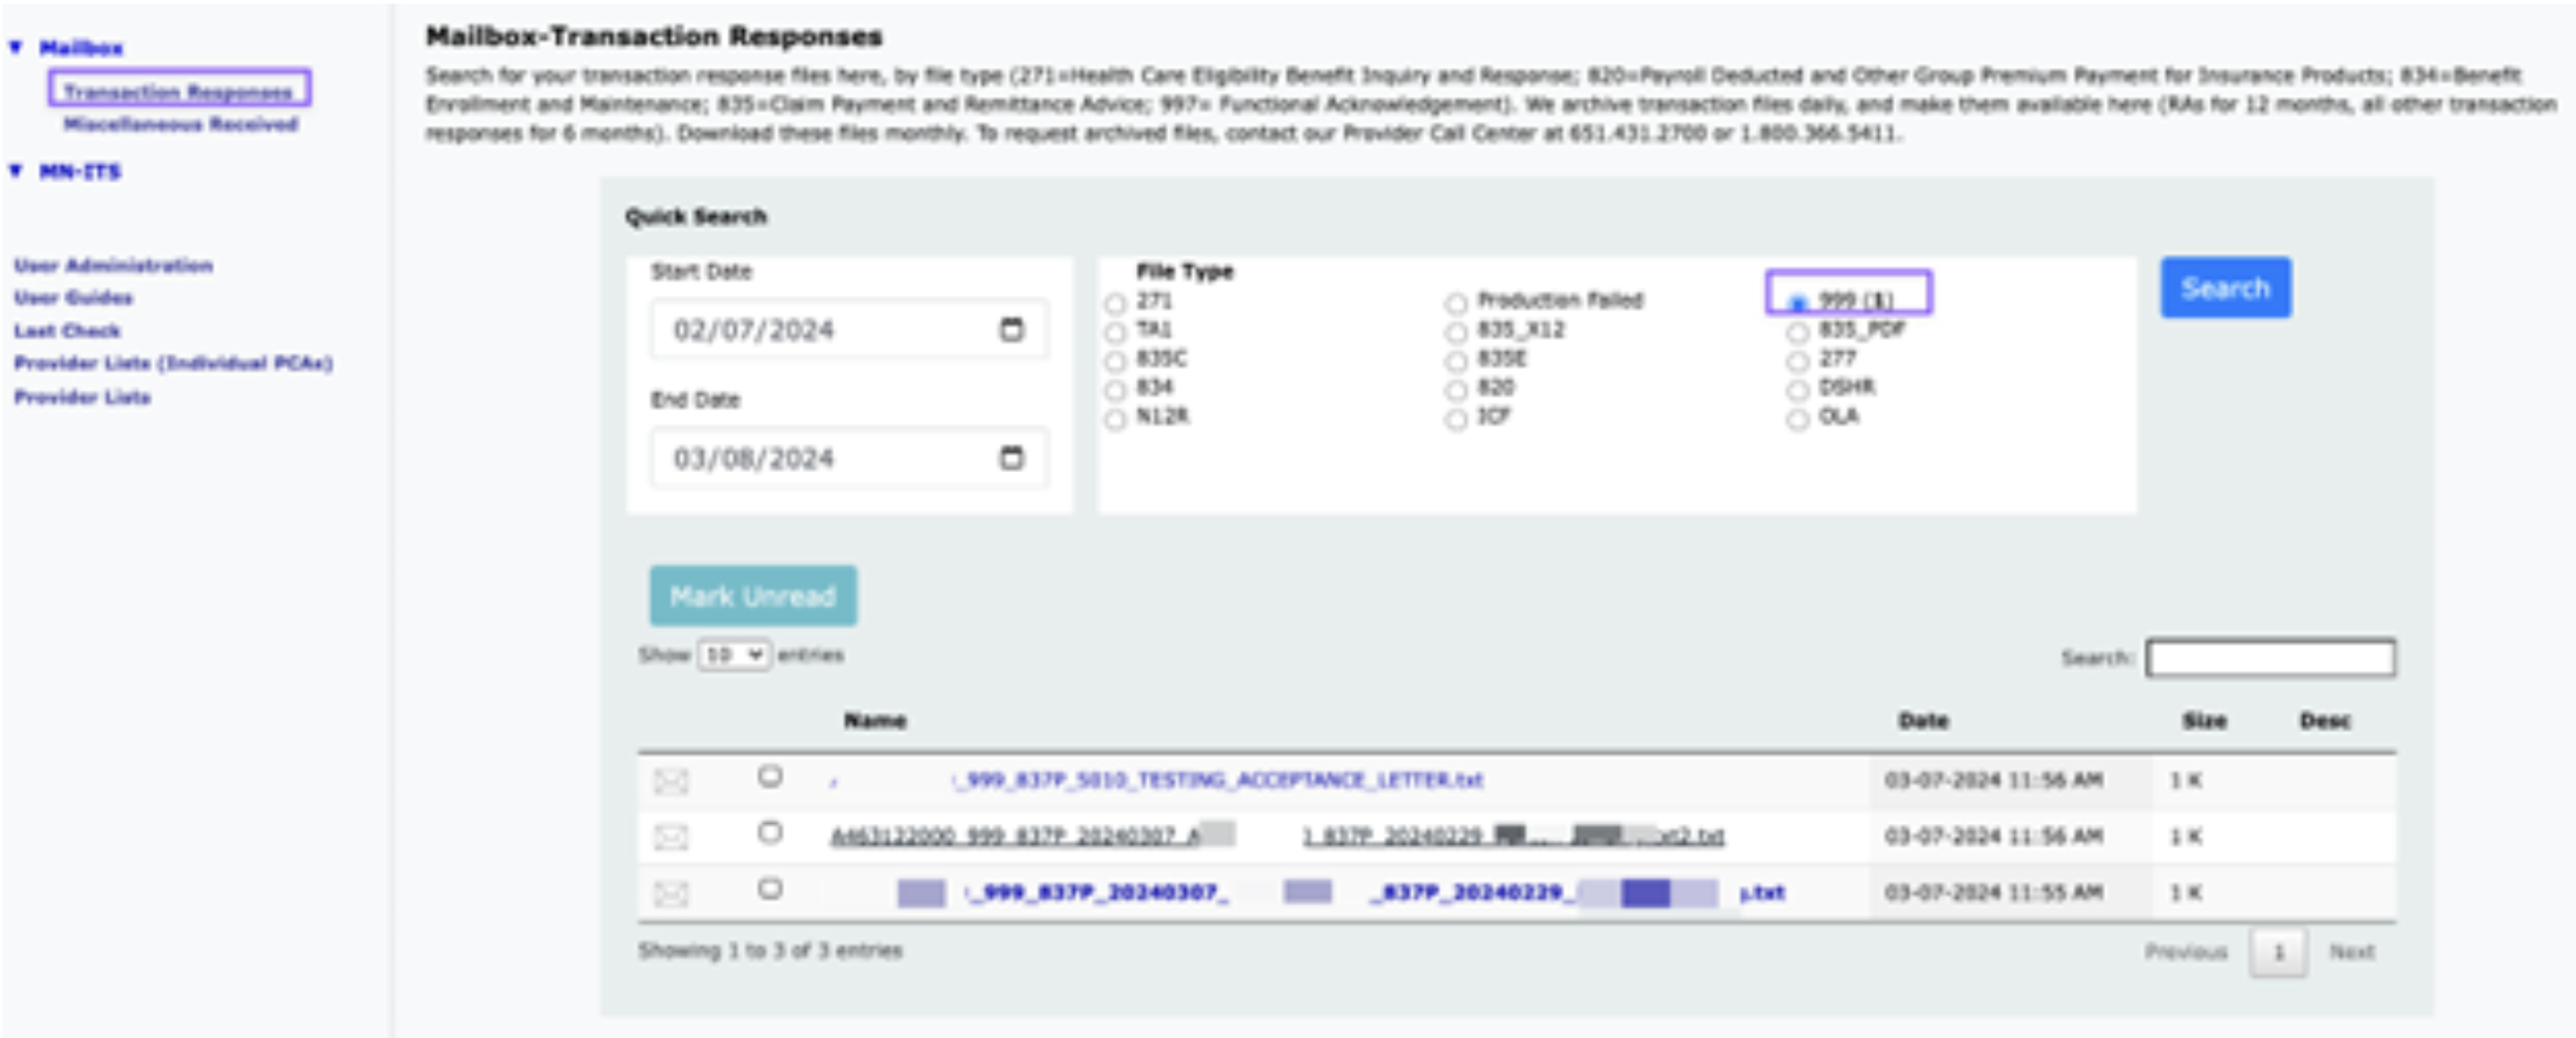
- Below is a screenshot of what the result report looks like.
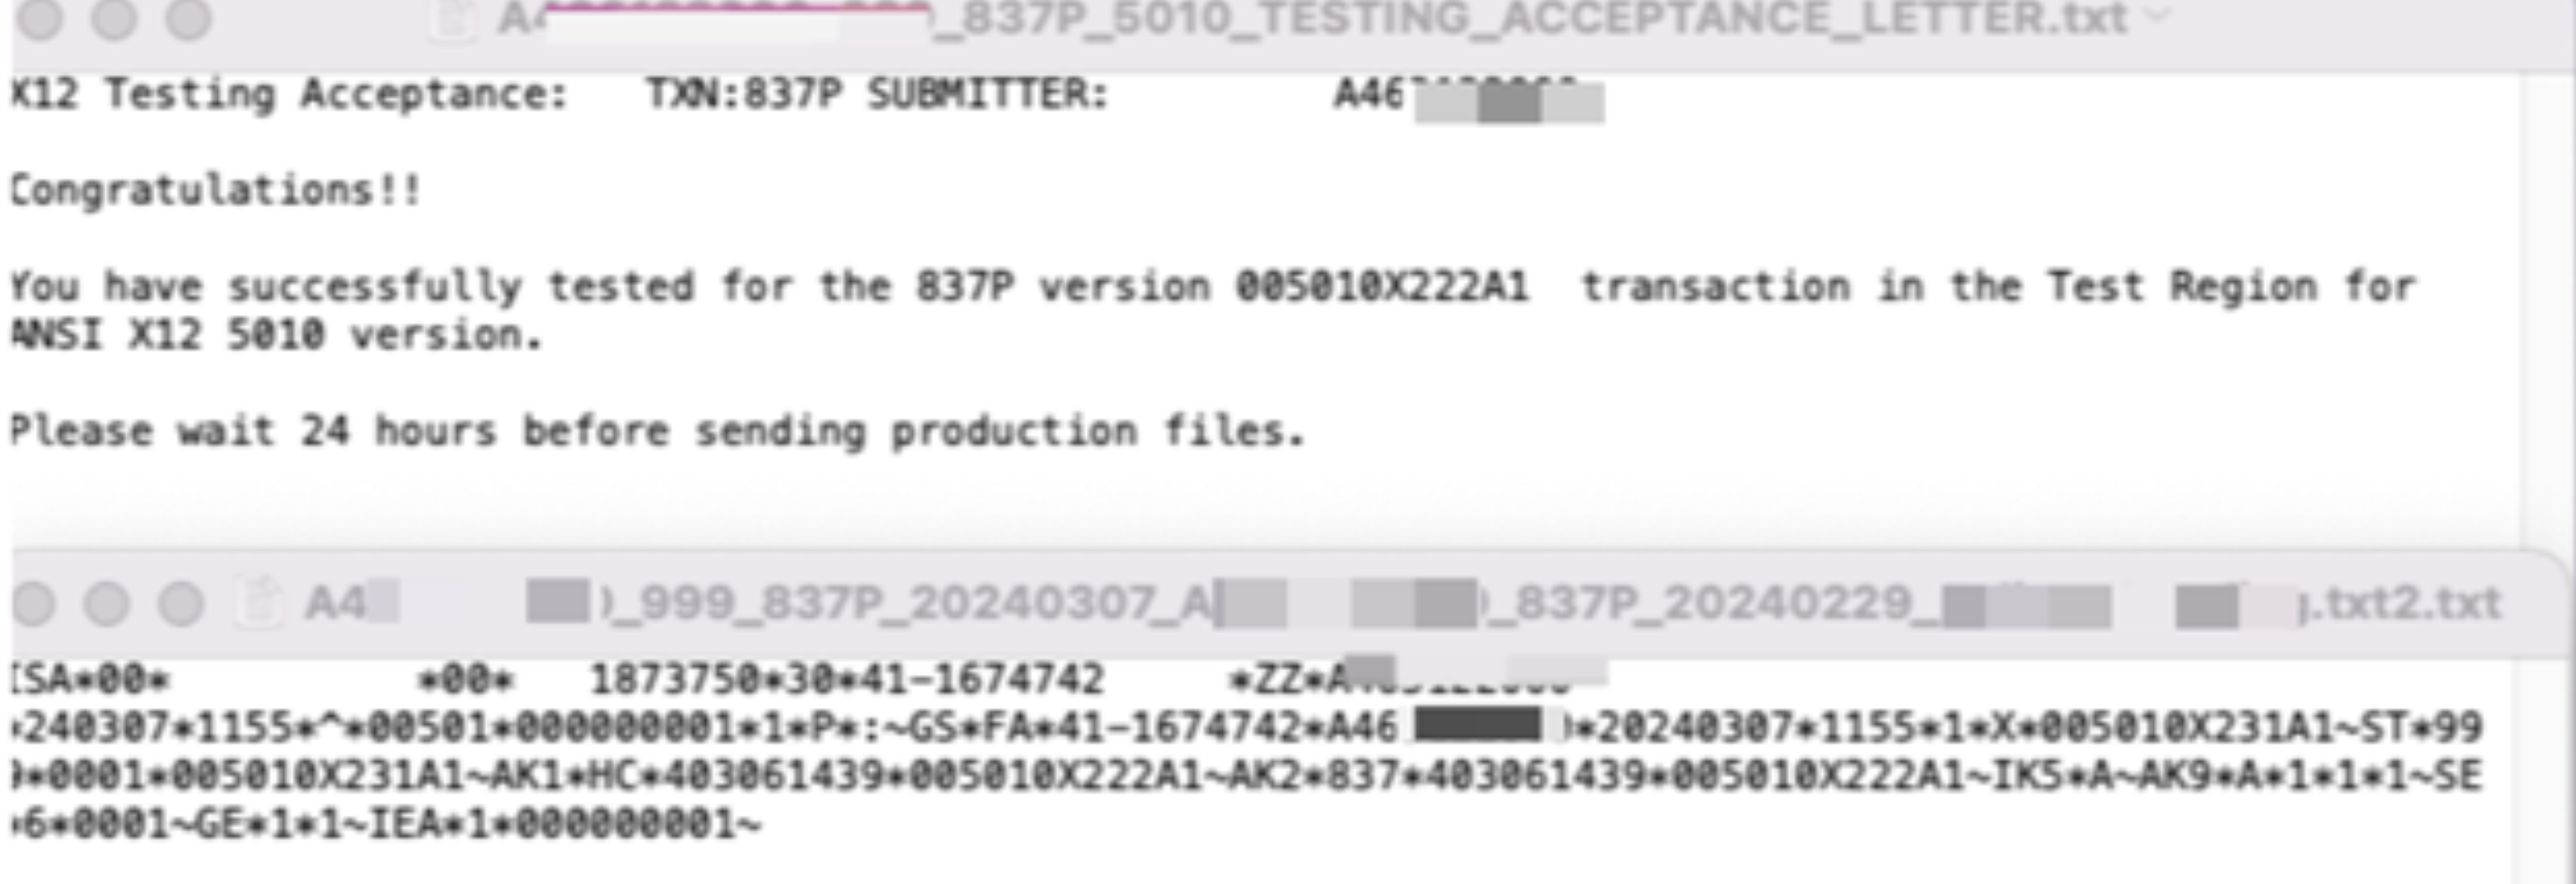
- Once you have a successful upload to the Test Region, you will be able to upload the file to your region in 24 hours
Medicaid Claims Submission Guide
Streamline your Medicaid claims submission process directly through Residex—no need to visit multiple clearinghouse portals for different payers!
Through our partnership with Waystar, when you contract with Waystar, Residex offers integrated claims submission that allows you to manage all your Medicaid claims from one central location, saving your billing staff significant time and effort.
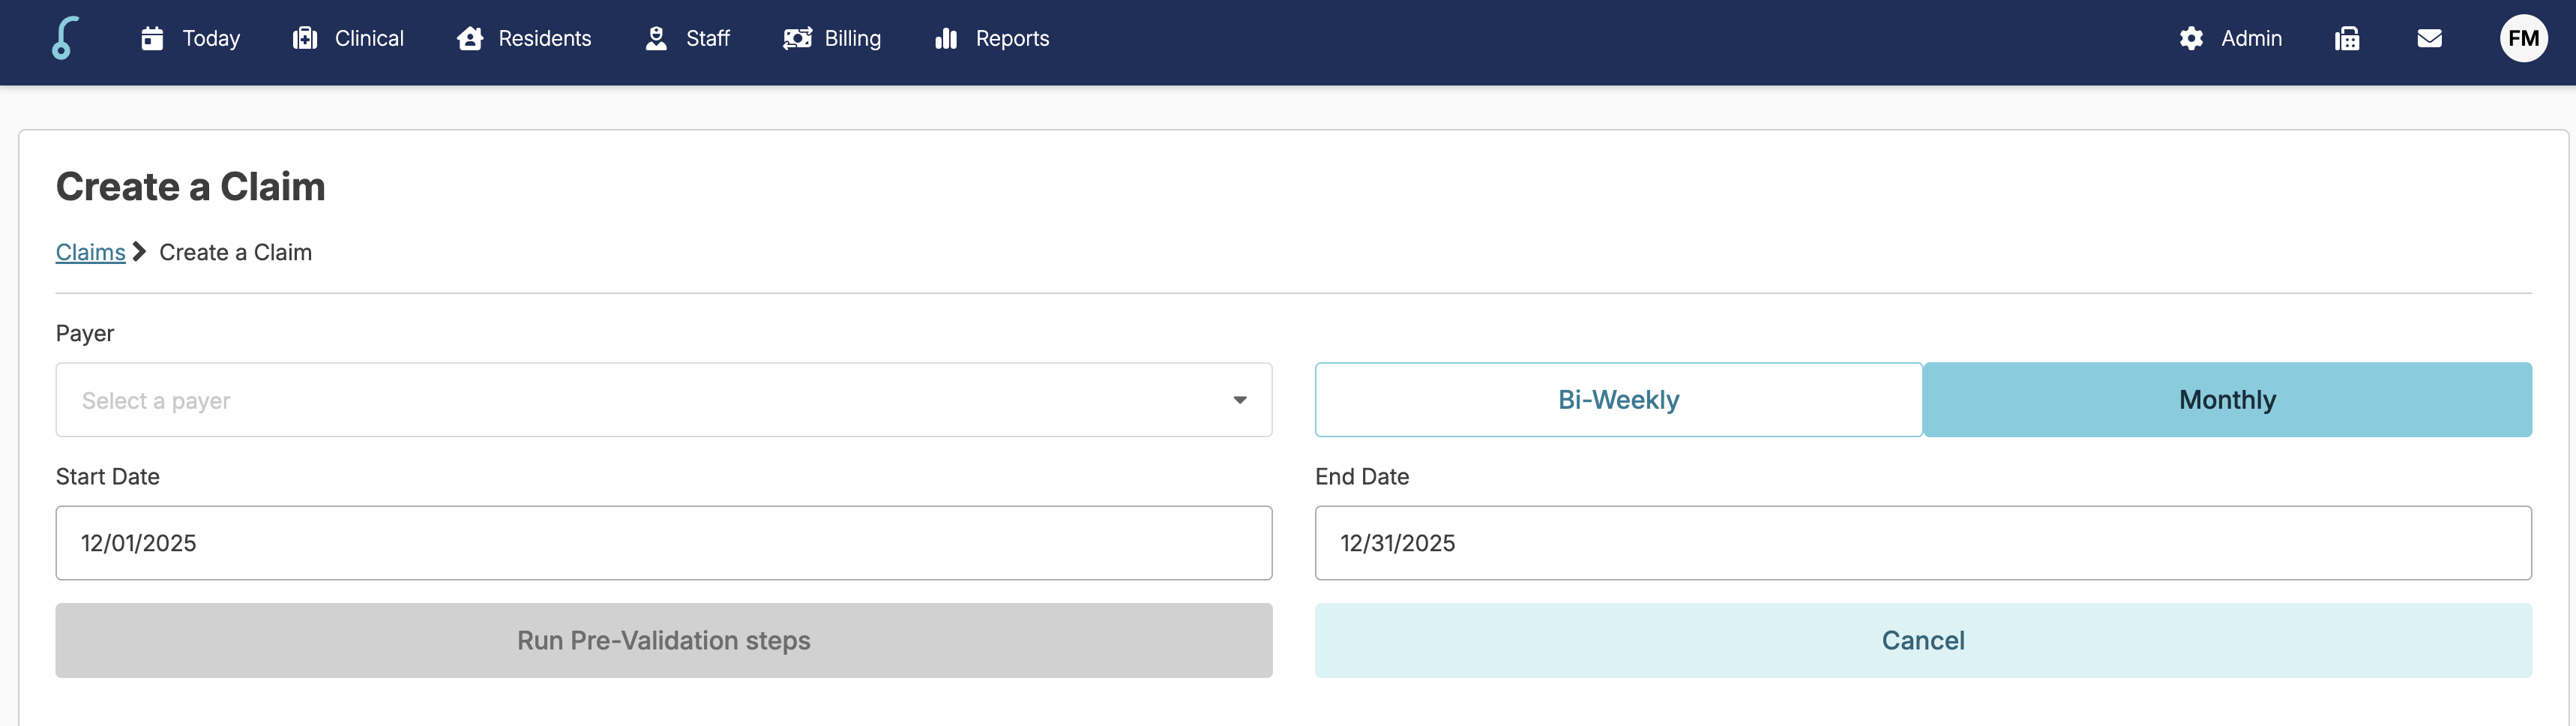
- Navigate to the Billing > Process Billing tab
- Select the Claims tab
- Click + Create a batch

- Choose your payer from the dropdown menu
- Residex will automatically populate a list of residents associated with that payer
- Select your submission dates
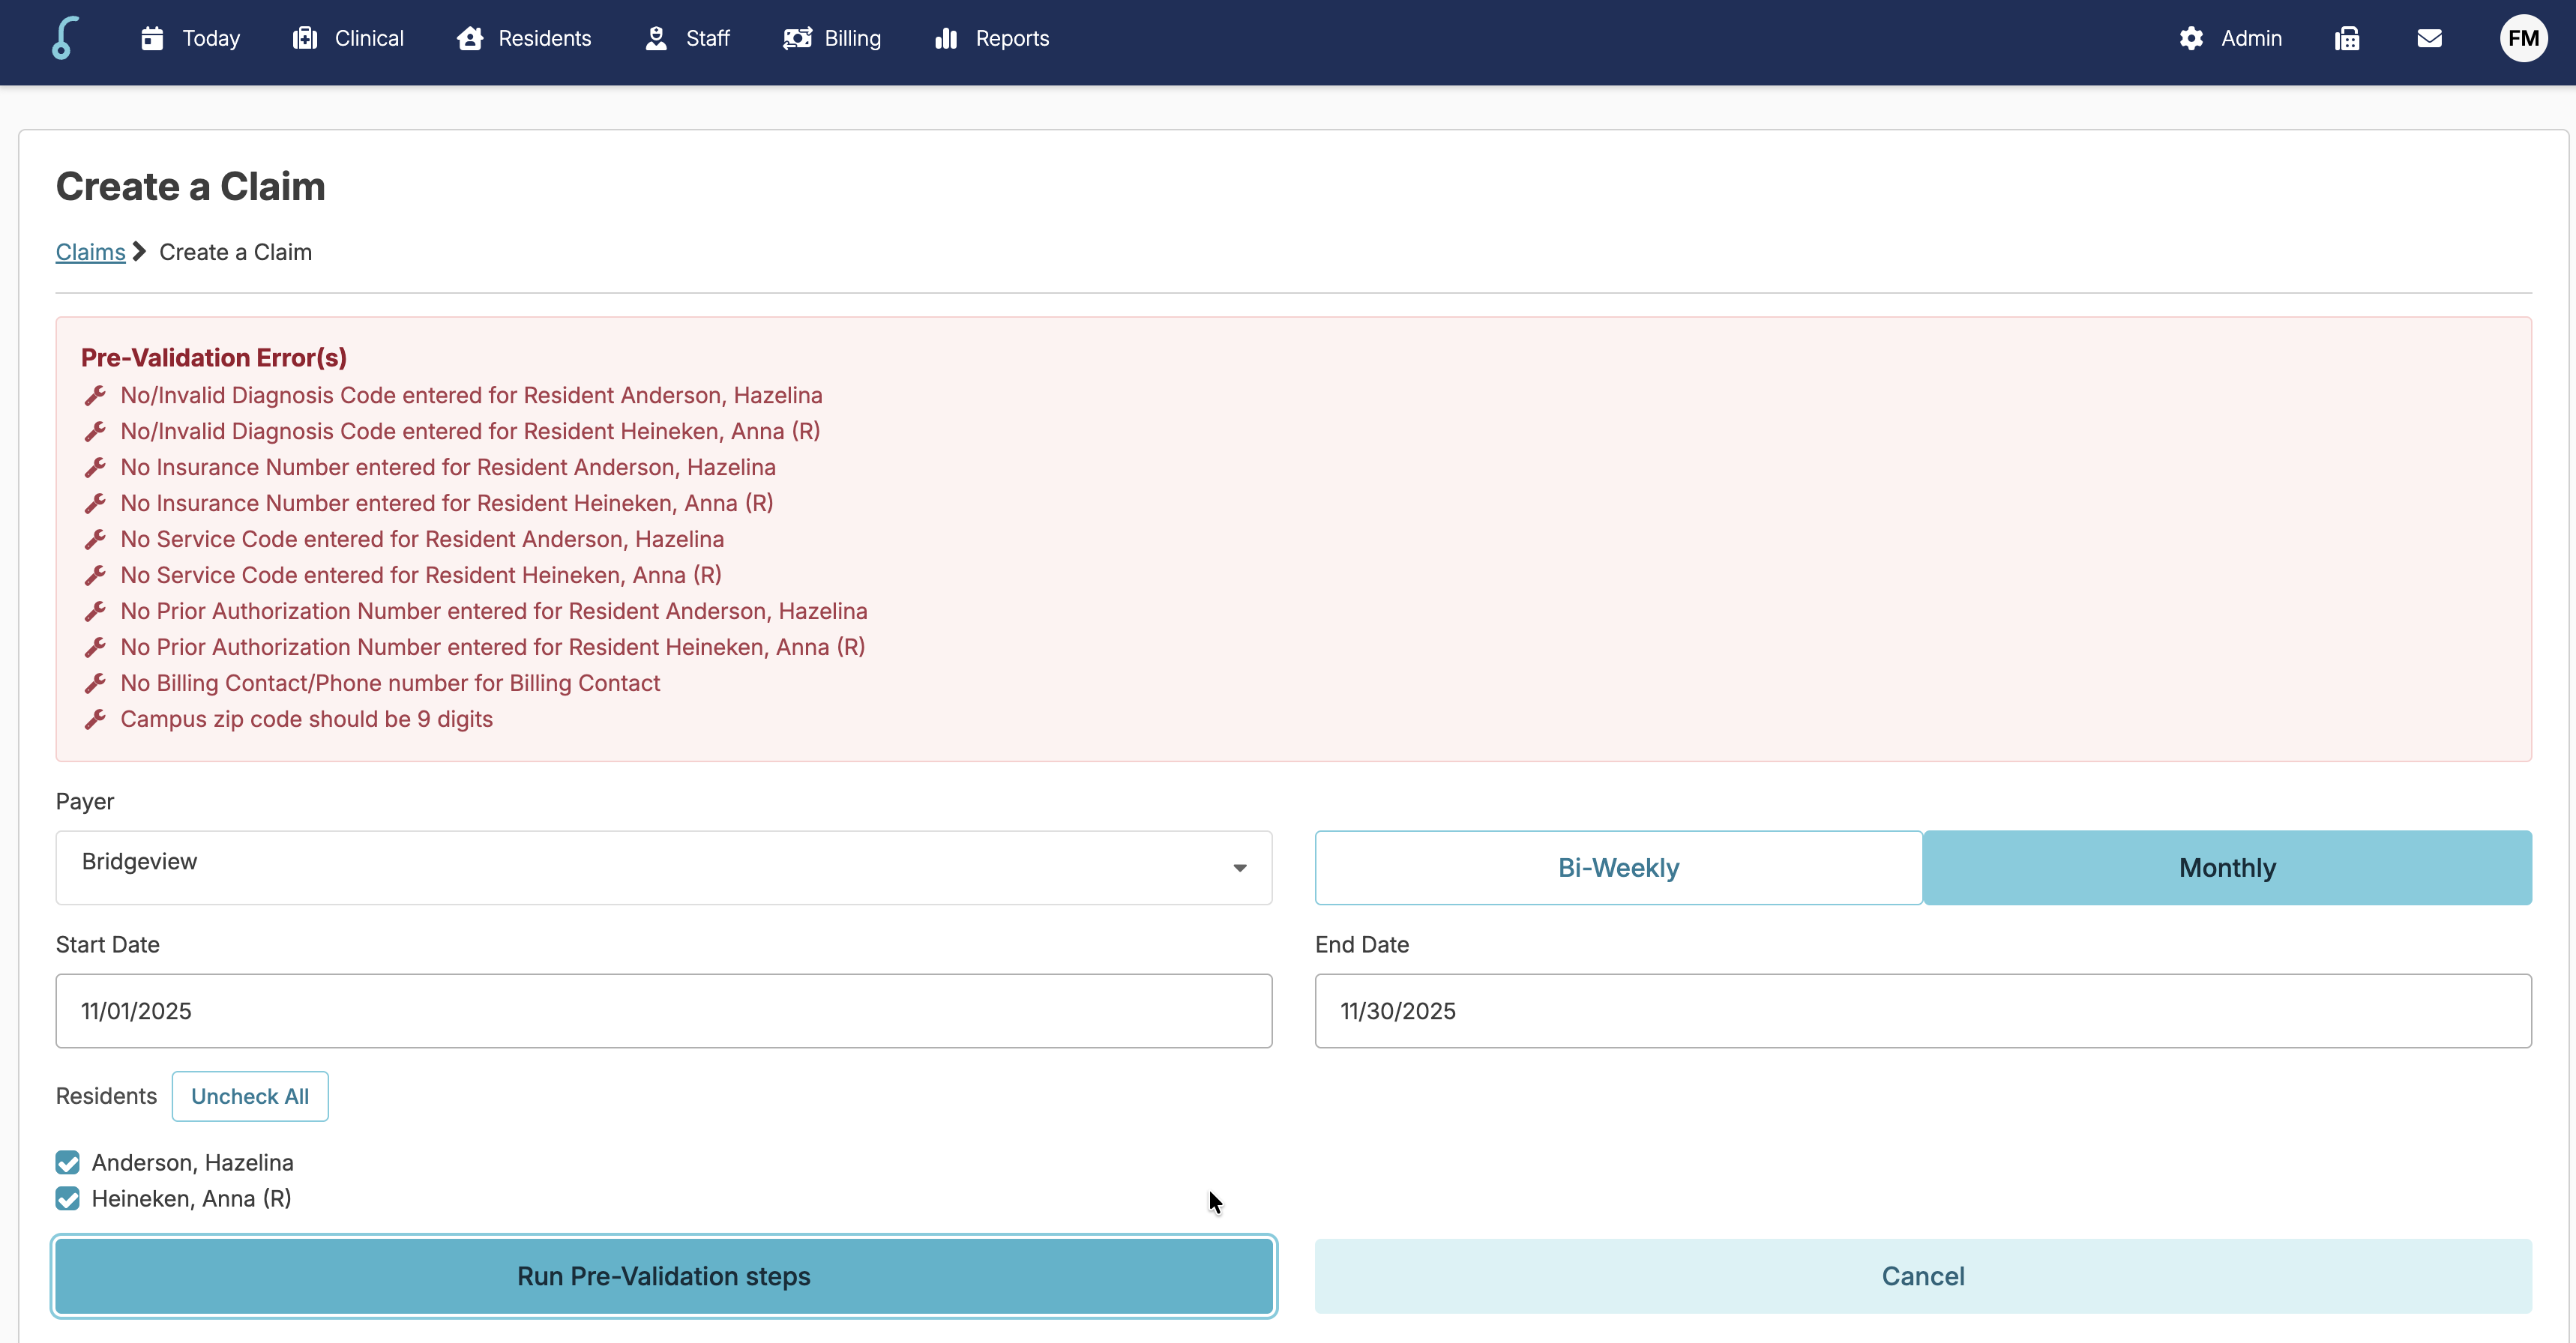
Before submitting your claims, Residex performs a critical pre-validation check to ensure accuracy.
The pre-validation step reviews all residents (selected) in the batch and checks for discrepancies between:
- What was charged
- What will be submitted (accounting for Hold days)
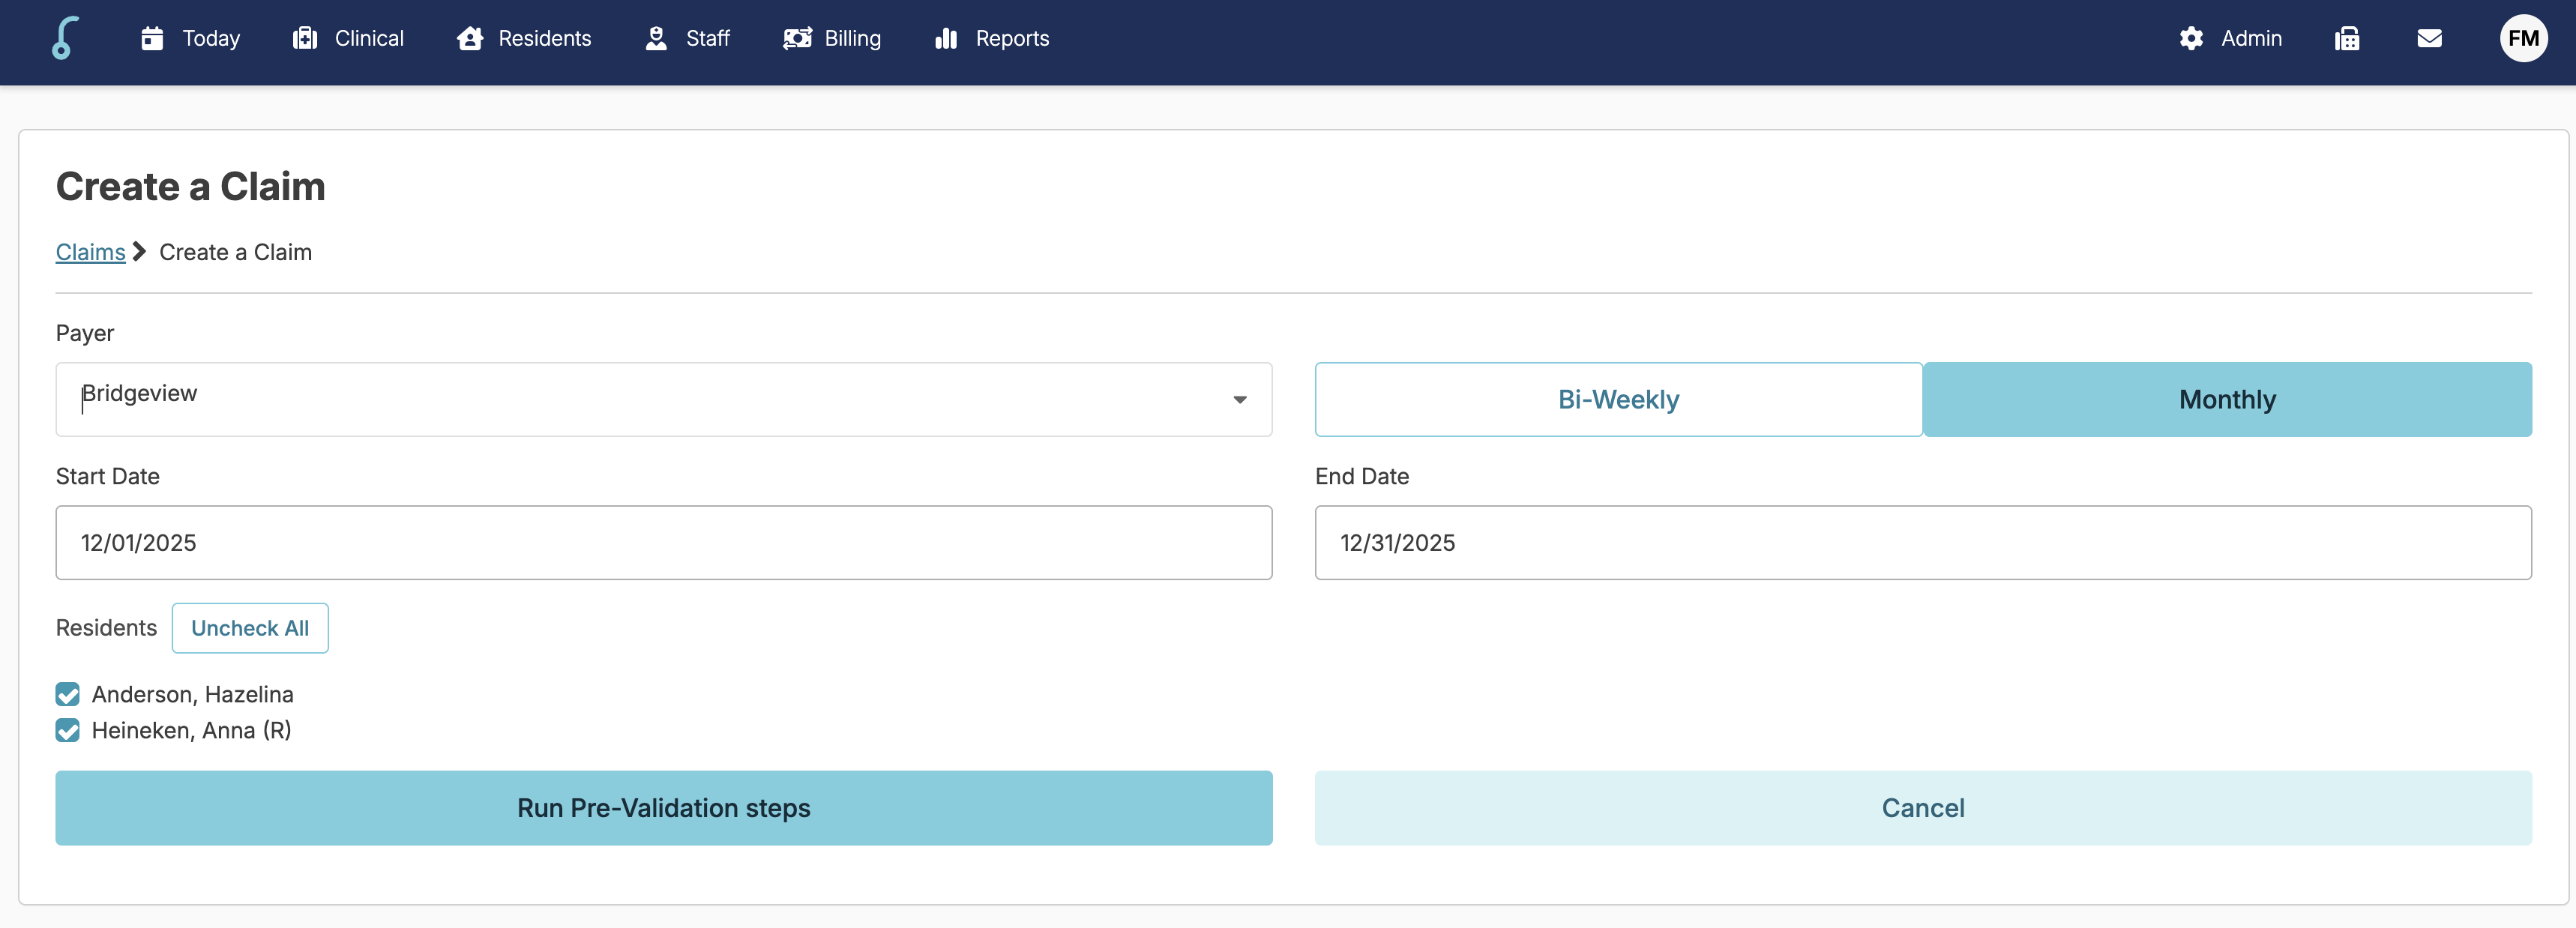
Success: If no issues are found, you'll see the message "Pre-Validation passed" and can proceed with submission.
Error: If discrepancies exist, you'll receive an error message explaining exactly what needs to be corrected before you can submit.
Residex provides real-time status updates at every stage of the claims process, saving your billing staff significant time and effort.
🗒️ Each payer may display slightly different messaging about claim status.
The payer has received the claims and is processing them.
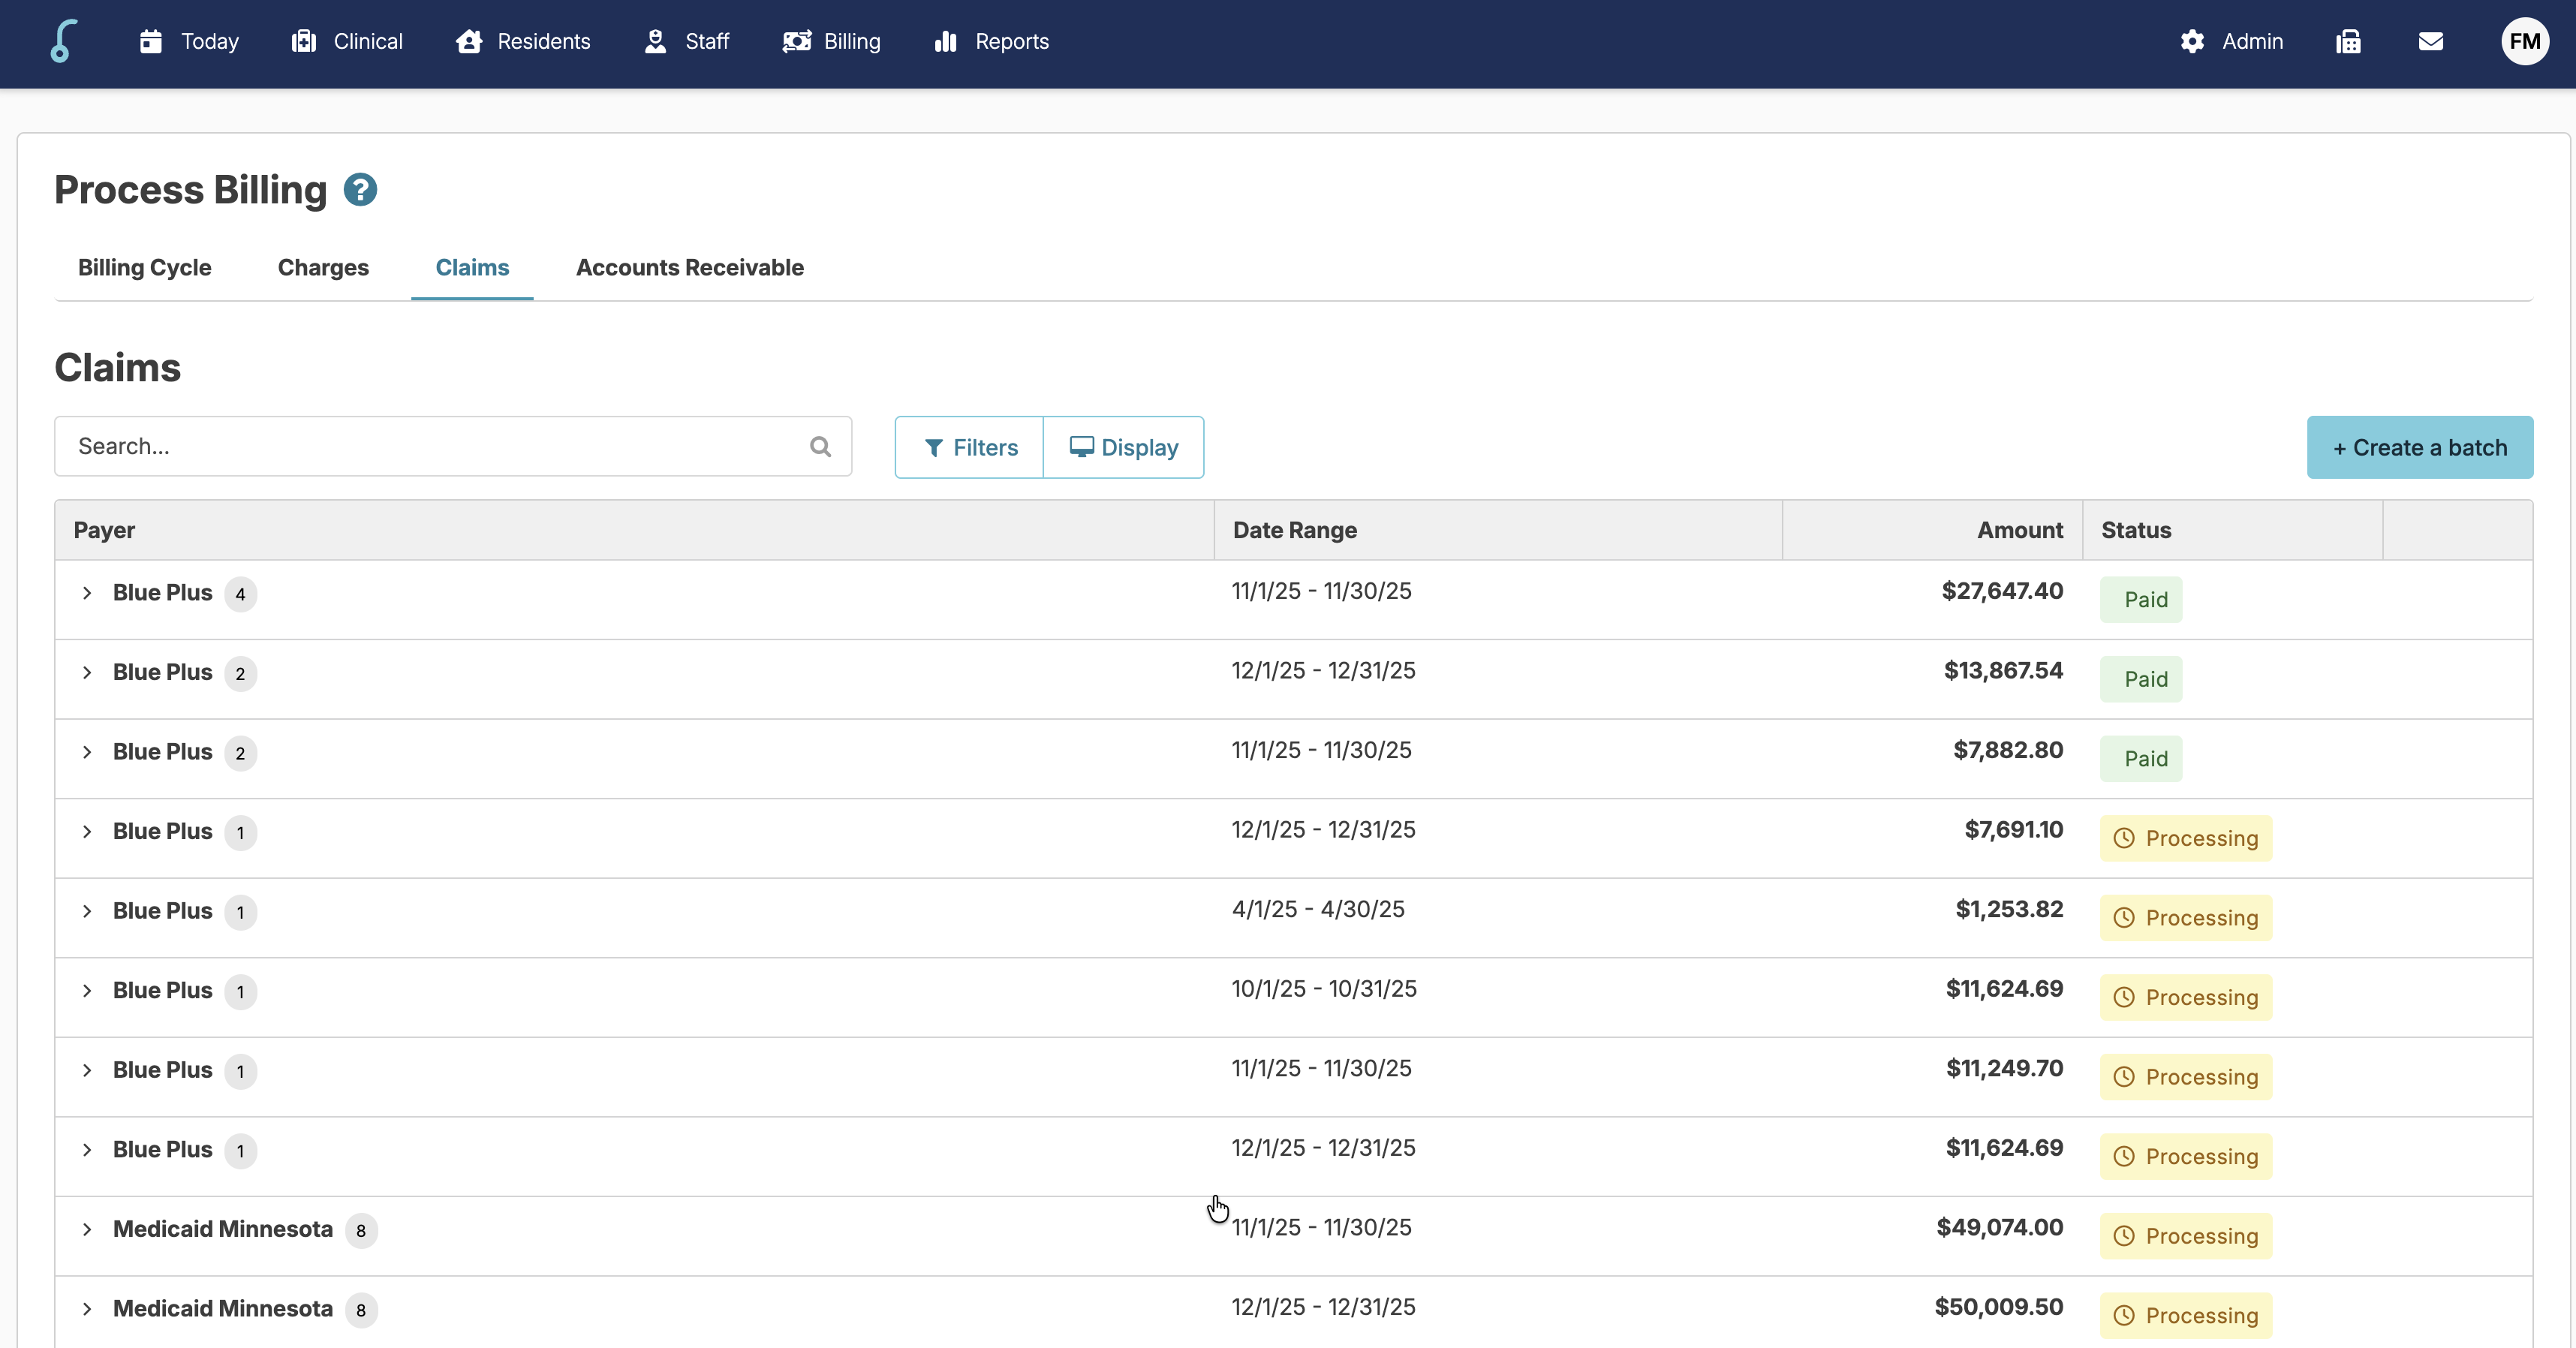
Means there are errors in the batch
Means no problems in the batch but no further updates on payment status
Each payer will display a number to reflect how many claims are in that batch.
Use the drop down arrow to see the claims in the batch
Click on the resident name to view the status of the claim. It will look similar to this:

You can scroll down to see the history of "responses" for the claim