This document will walk through the steps of adding an adjustment.
To enter adjustments, a user needs Billing (Role 4).
Adjust One Charge
- From the resident profile screen > select Charges
- Navigate to the month that needs to be adjusted
- Click on the charge line that needs to be adjusted
- Click Adjust Charge
- Select the Adjustment Type > Adjustment Reason > Adjustment Date. Note: A user with Billing Manager (Role 28) has the ability to manage the Adjustment Type and Reason.
- Optionally enter an Adjustment Note
- Enter the amount to be adjusted and select increase or reduce charge
- When finished press Save
Adjust Multiple Charges
- From the resident profile screen > select Charges
- Navigate to the month that needs to be adjusted
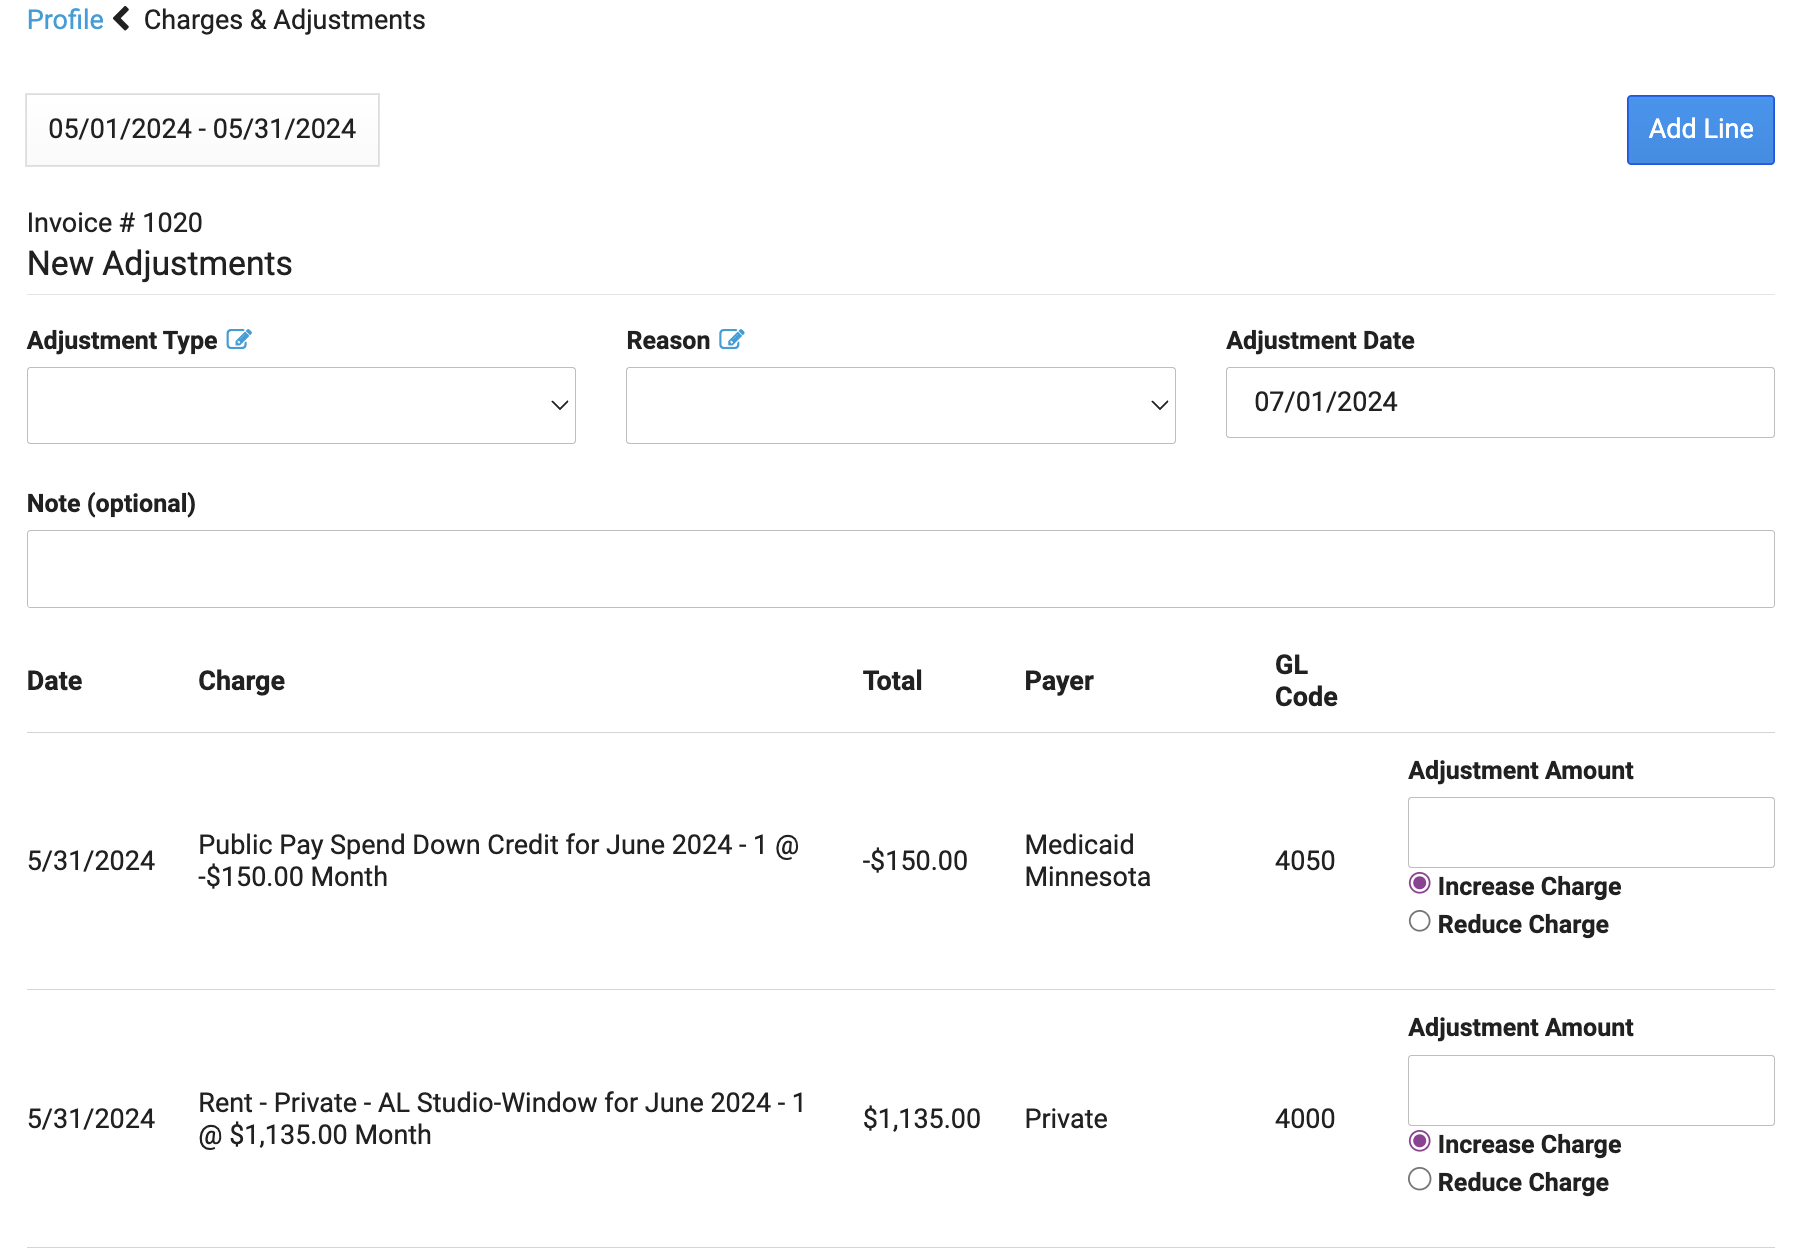
- Click Adjust Charges
- Select the Adjustment Type > Adjustment Reason > Adjustment Date
- Optionally enter an Adjustment Note (Only one note will be allowed to be entered for the entire adjustment process)
- Enter the amount to be adjusted and select increase or reduce charge on any charge line
- When finished press Save
Add Line
To add a charge or credit to a past invoice and to a line that does not exist, you can add a line. To do this, navigate to:
- Resident Profile > select Charges
- Navigate to the month that needs to be adjusted
- Click Add Line
- Select the Payer > Charge Type (this will add in the Default GL Code and Charge Description) > Adjustment Type > Adjustment Reason > Adjustment Amount (if it is a charge select Increase Charge or for a credit select Decrease Charge)
- When finished press Save
Note: The Charge Description will print on the invoice/statement.
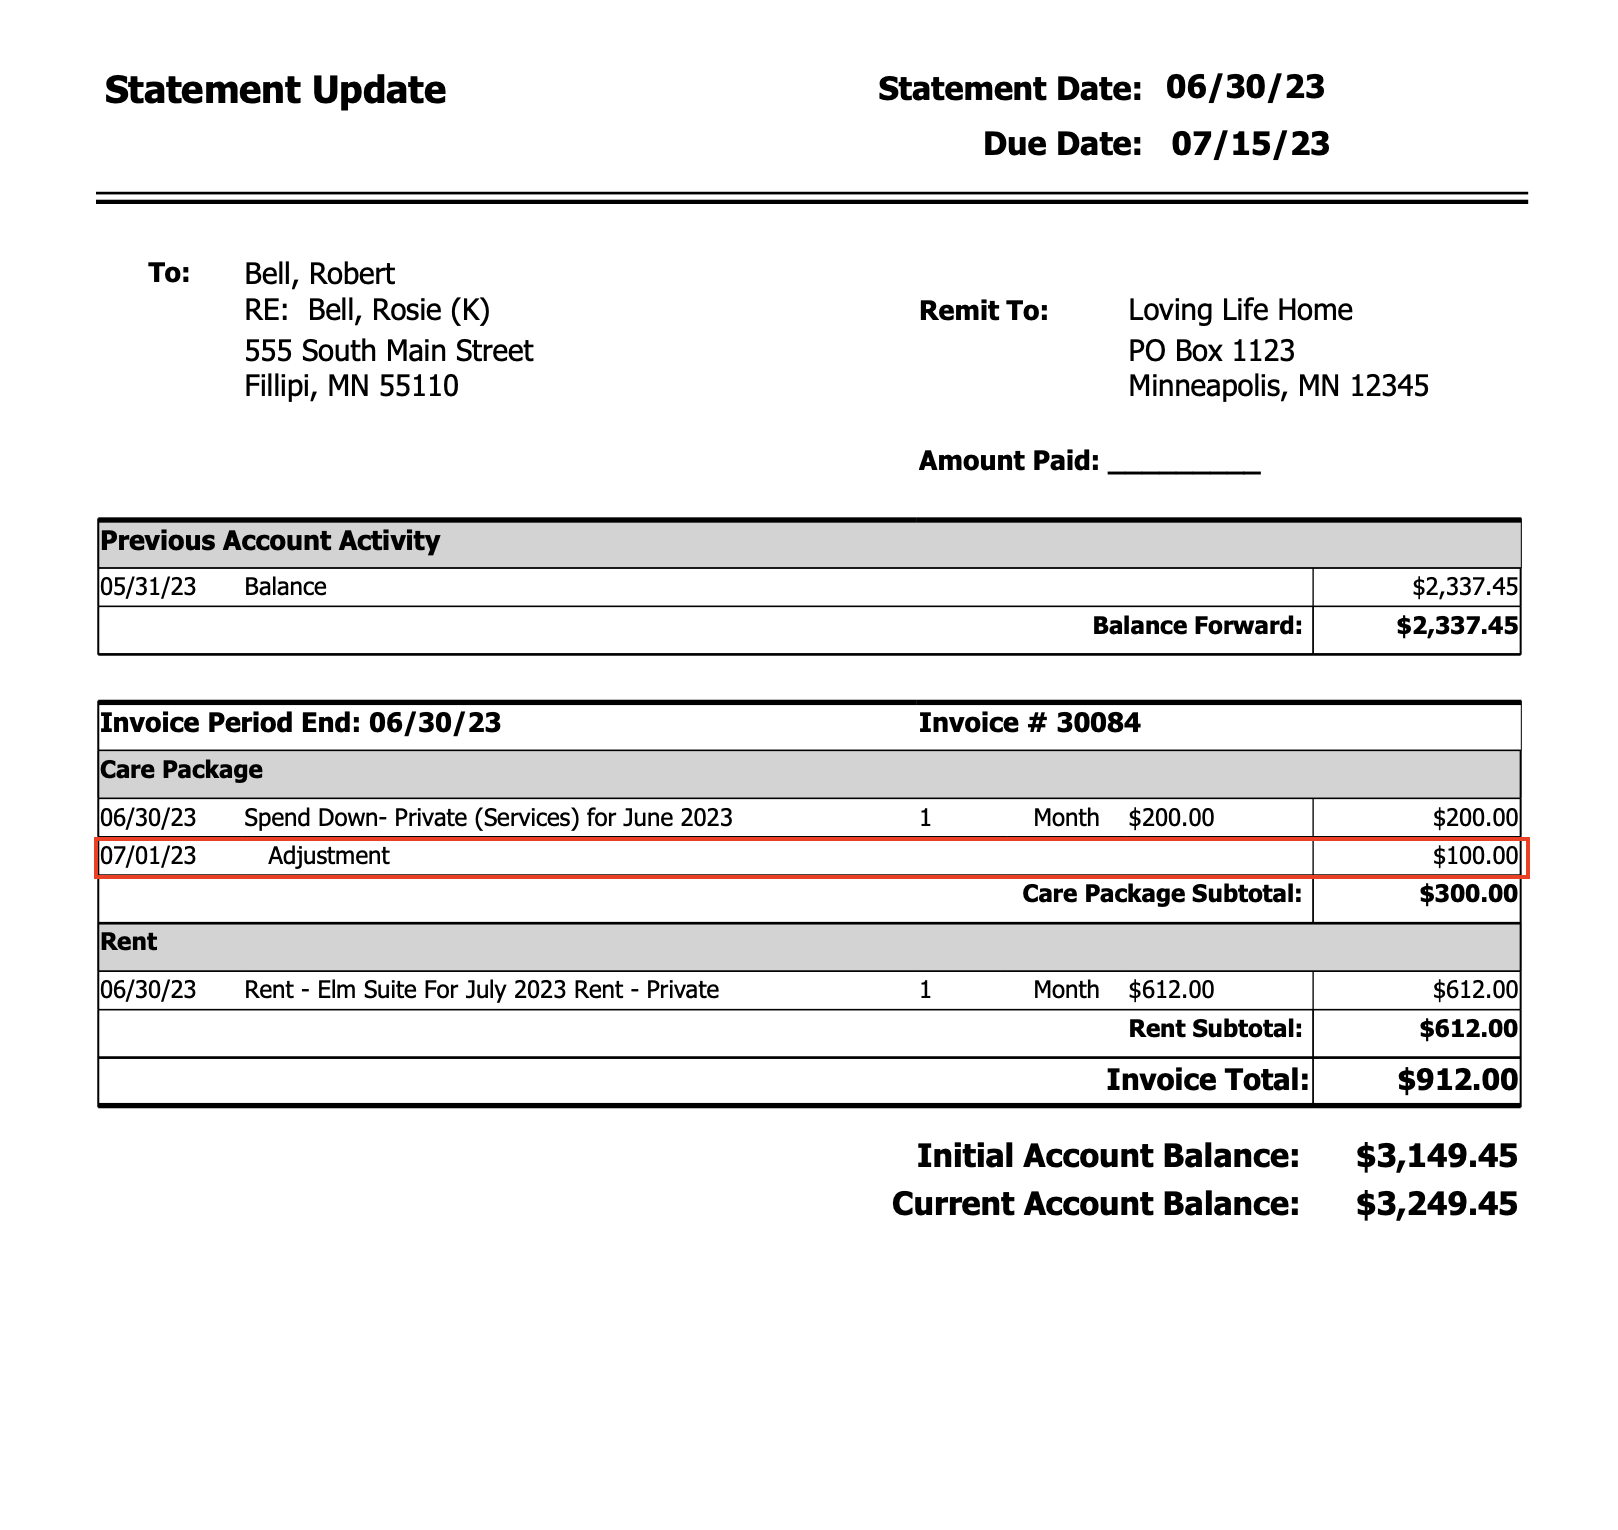
Statement-Update Report
After the adjustment is made, the adjustment will appear on the NEXT statement. If you wish to give a person an updated statement, you can generate the report "Statement - Update". This will reprint the statement with the adjustment displayed.