Table of Contents:
About Campus
Campus
Campus: Basic grouping of residents and staff in Residex by site/building.
In Residex, homes are divided up among 'campuses' - one campus is typically one physical location/one building, though this doesn't have to be the case.
You can manage details for your campus by navigating to Admin > Edit Campus. Each campus can have an address, legal address, phone number, fax number, GL code, time zone, license/HFID number, and other optional information. The 'Campus Info' field is a good place to enter key contact information (licensed directors, supervisors, on-call staff) as information entered here will appear on the all staff have access to this by navigating to the home screen in the dropdown menu beneath their name.
Community
Community: A subgroup of a campus. Communities may be different types of care (assisted living, memory care), or different parts of the campus (different floors/wings/buildings).
Campuses may be further divided into communities. A community must belong to only one campus; a campus must have at least one community, but might have many.
Communities may be based on the service type (e.g. independent living, assisted living, memory care), or to accommodate service scheduling based upon location in the building (different halls or floors).
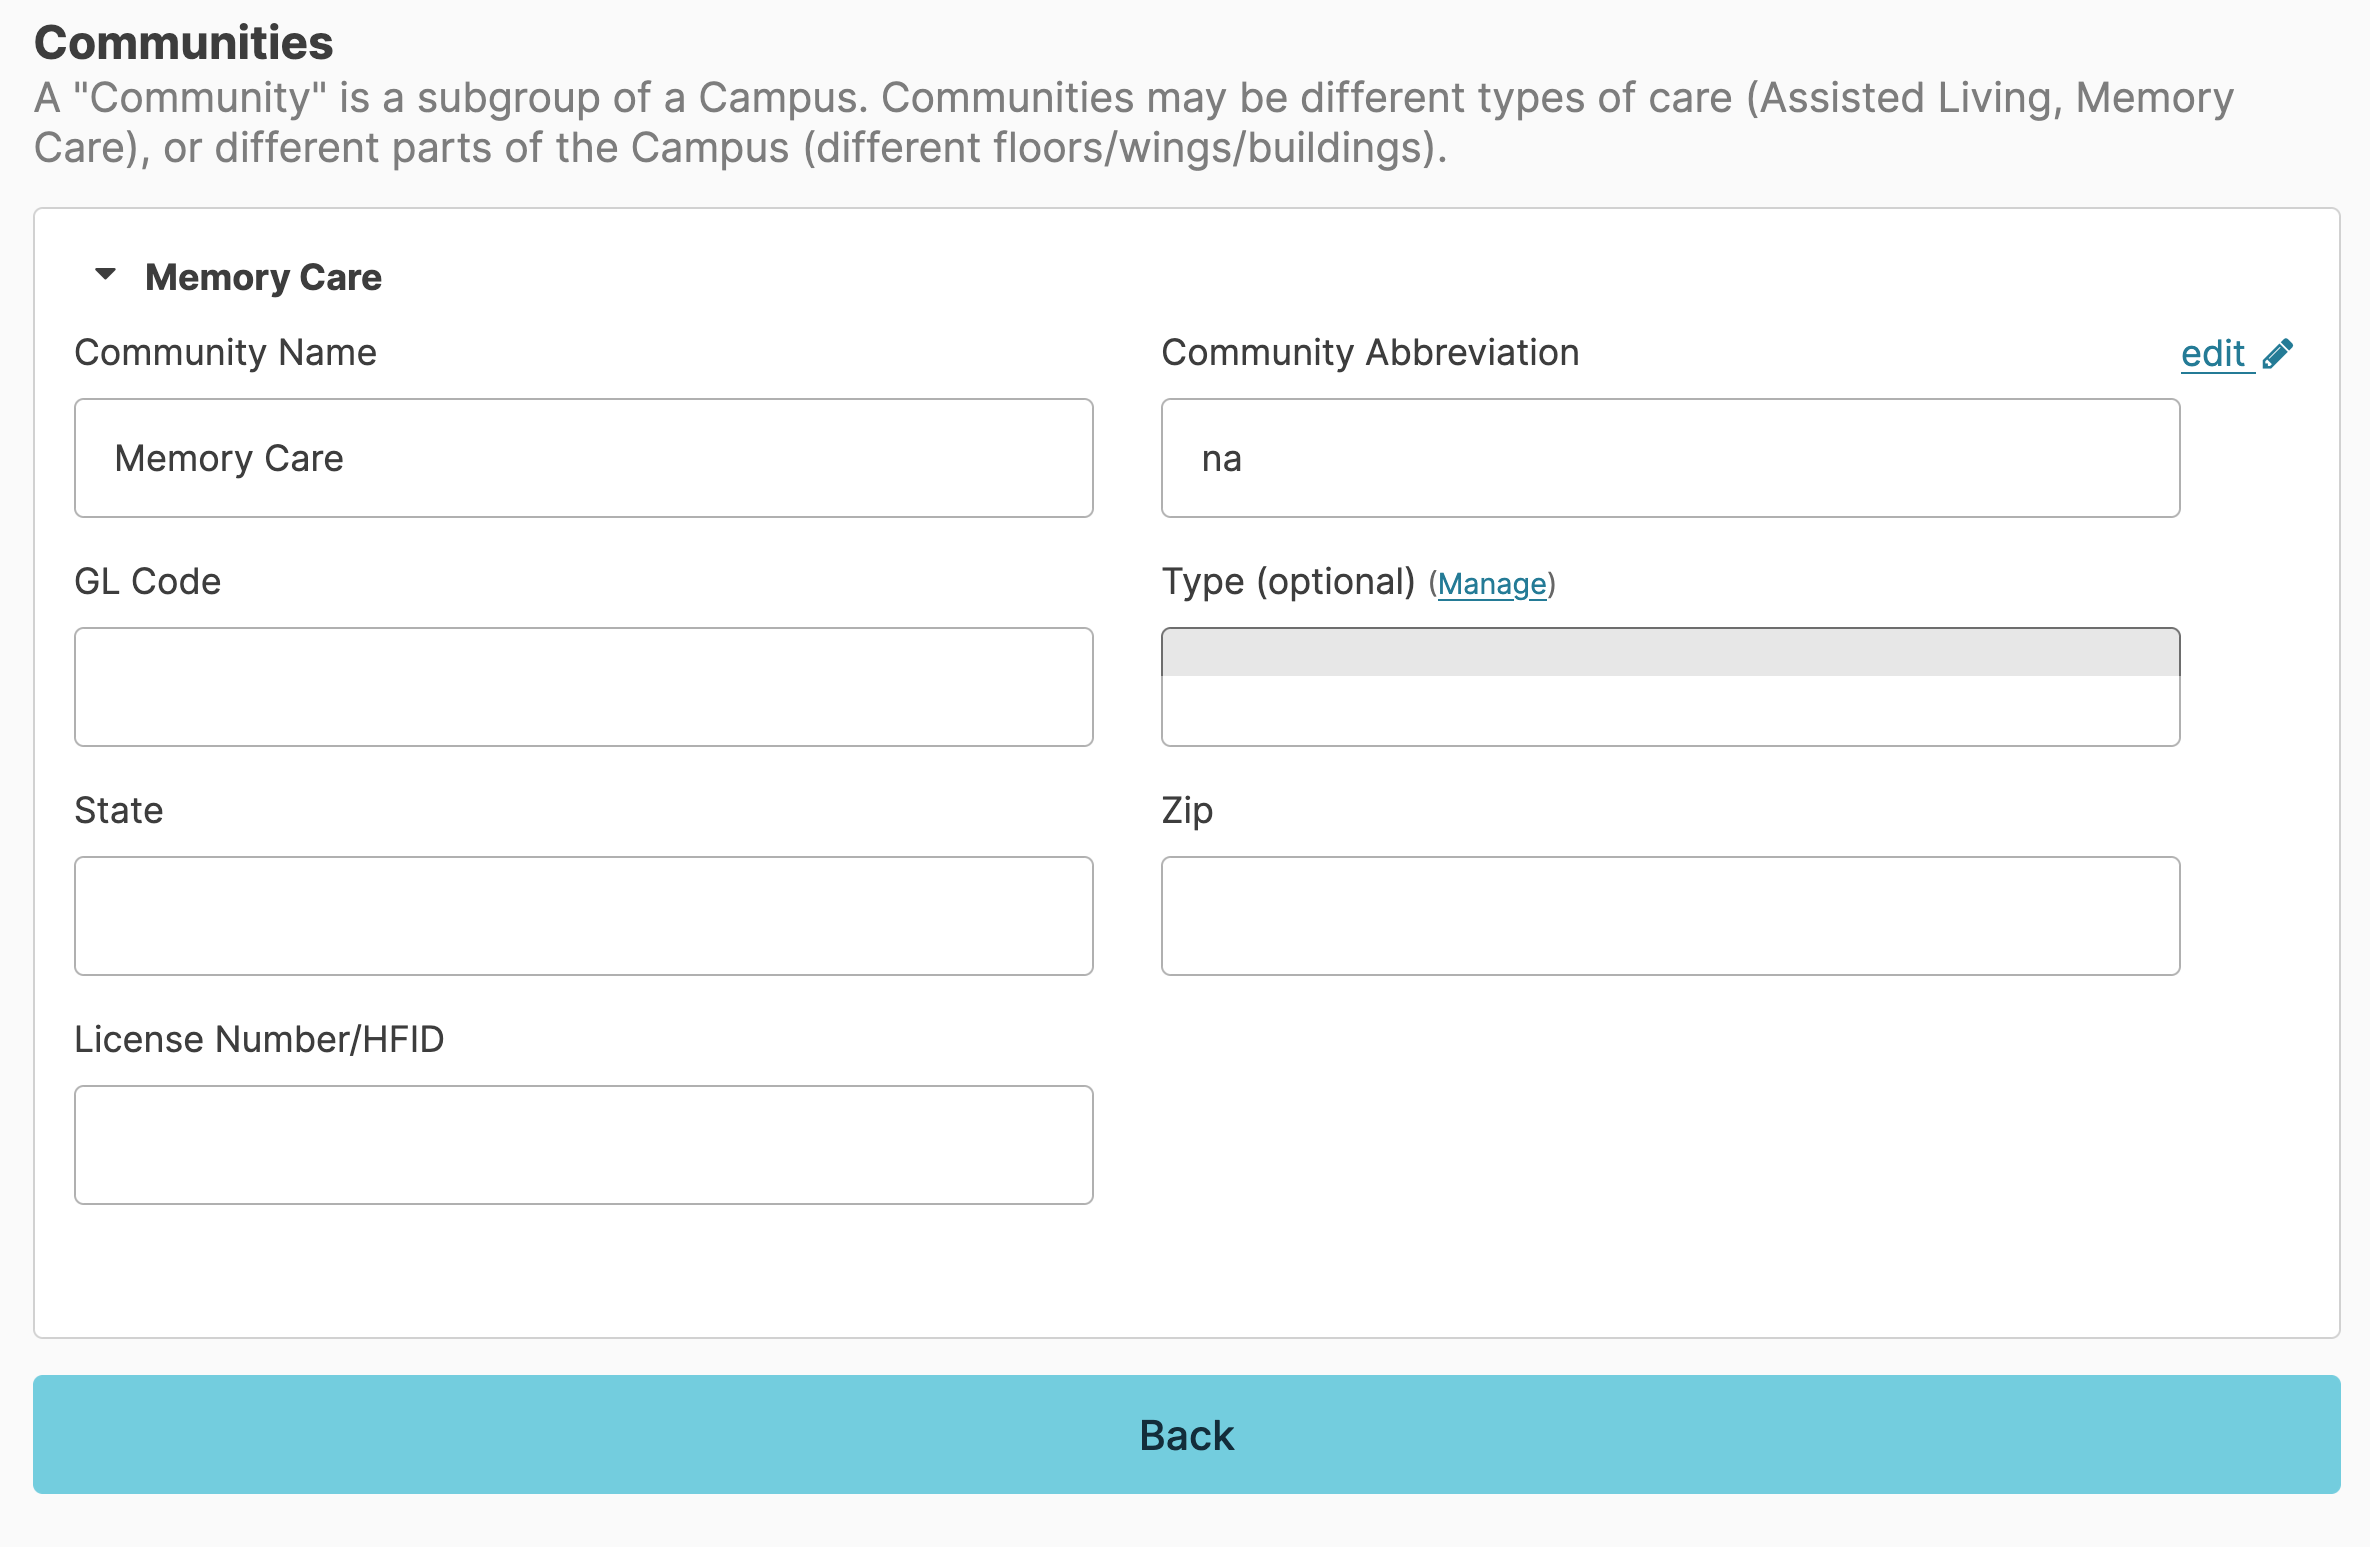
Edit a Community
Communities can be managed by users with the Administrator (Role 411) or Administrator Assistant (Role 410) and can be found by navigating to Admin > Manage Communities, select the community you would like to update and click edit. Once you have made all of the needed changed, click Save.
Note: To add a new community, contact your Residex account manager.
Deactivate a Community
Before the Deactivate Community button becomes available, the following conditions must be met:
- There are no current residents associated with the community
- There are no current staff assigned to the community
Once both conditions are satisfied, the Deactivate Community button will appear and the deactivation can be completed. A deactivated community can be reactivated at any time.
Deleting a Community
A community can only be deleted if it has never had any residents or activity recorded against it. Once a community has historical data, it can be deactivated but not deleted.
Campus Units are the rooms/apartments/units within your building(s). These Unit numbers must be entered prior to assigning a Unit number to a resident. A Campus Unit must belong to only one Community, which in turn belongs to only one Campus.
Managing Campus Units
Units may be managed by users with Supervisor (Role 13), Administrator Assistant (Role 410) or Administrator (Role 411) by navigating to Admin > Units.
- Adding units can be done by clicking the Add new Unit button, entering a 'Unit Number,' 'Description (optional),' 'Type (optional),' and assigning a 'Community.'
- Multiple units can be added more efficiently using the Save + New button. Using this button will follow the sequence started by entering just the first unit for that community. This will save the unit you added and automatically pre-fill in the next unit number, increasing by one. All of the previously completed drop-downs will retain their information as well.
- A unit's details may be edited by clicking on the edit (pencil icon) button.
- If a unit can be in either independent living or assisted living communities (depending upon the needs of the resident), you can place the unit in an AL/IL community type and use the housing type option to select the appropriate choice for the resident occupying the unit.
Campus Memos
Information about events or occurrences at your campus can be documented using Campus Memos. These memos can become announcements to staff by adding them as an option to the Dashboard for review by staff.

Have more than one campus in your organization? Click the blue Add this note to additional campuses link to add that same campus memo to additional campuses.
Create a new memo by navigating to: Admin > Campus Memos > New Campus Memo
View memo history: Admin > Campus Memos
Campus memos can be edited and deleted by the original author, Manager (Role 11), Supervisor (Role 13), Administrator Assistant (Role 410), and Administrator (Role 411) users.
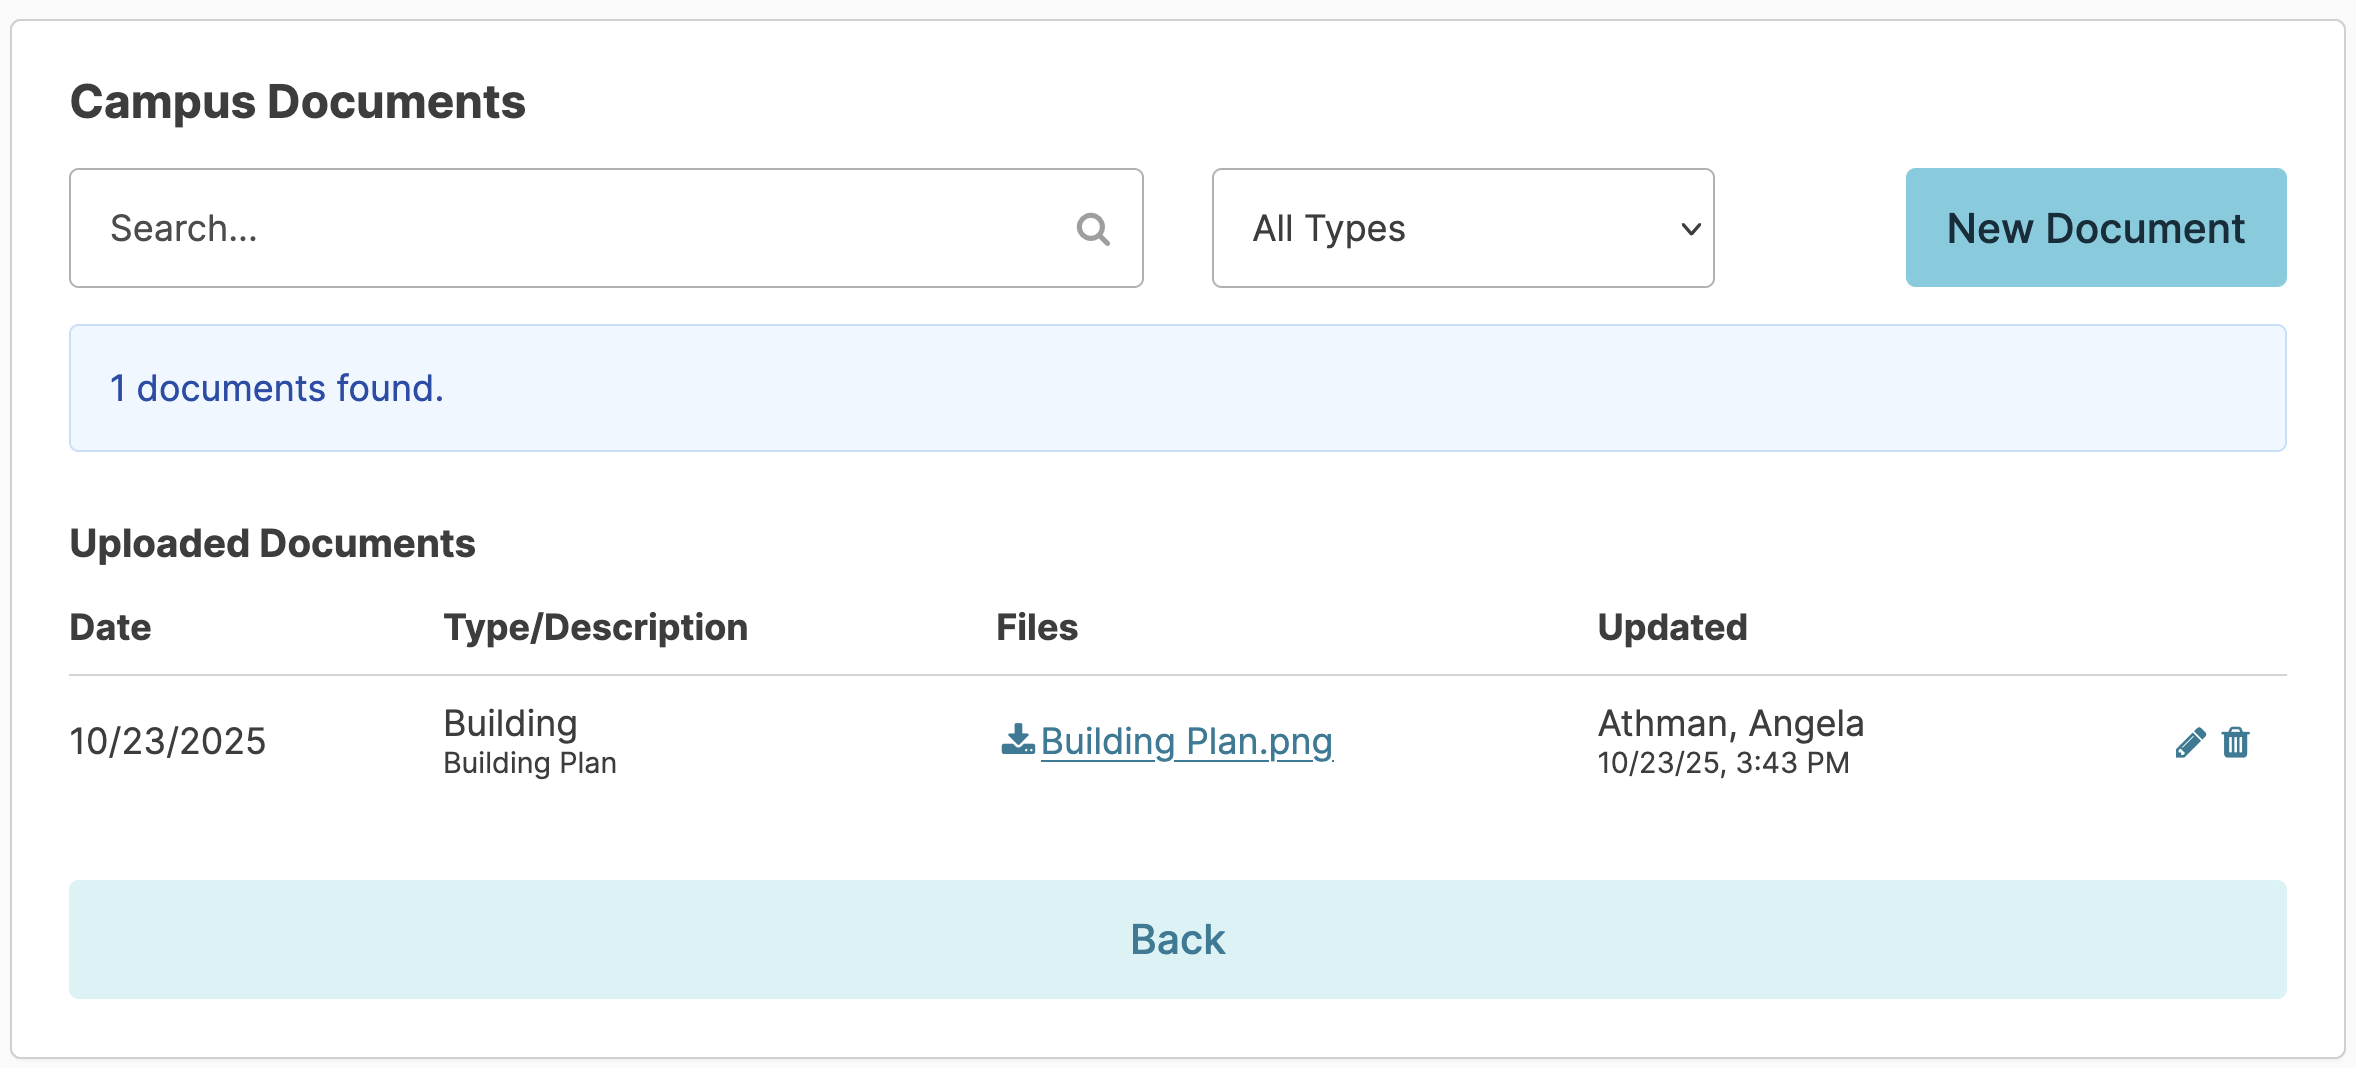
Campus Documents
Campus documents ensure that documents pertaining to campus operations are available with the click of a link. Document types and permissions give access on a need-to-know basis.
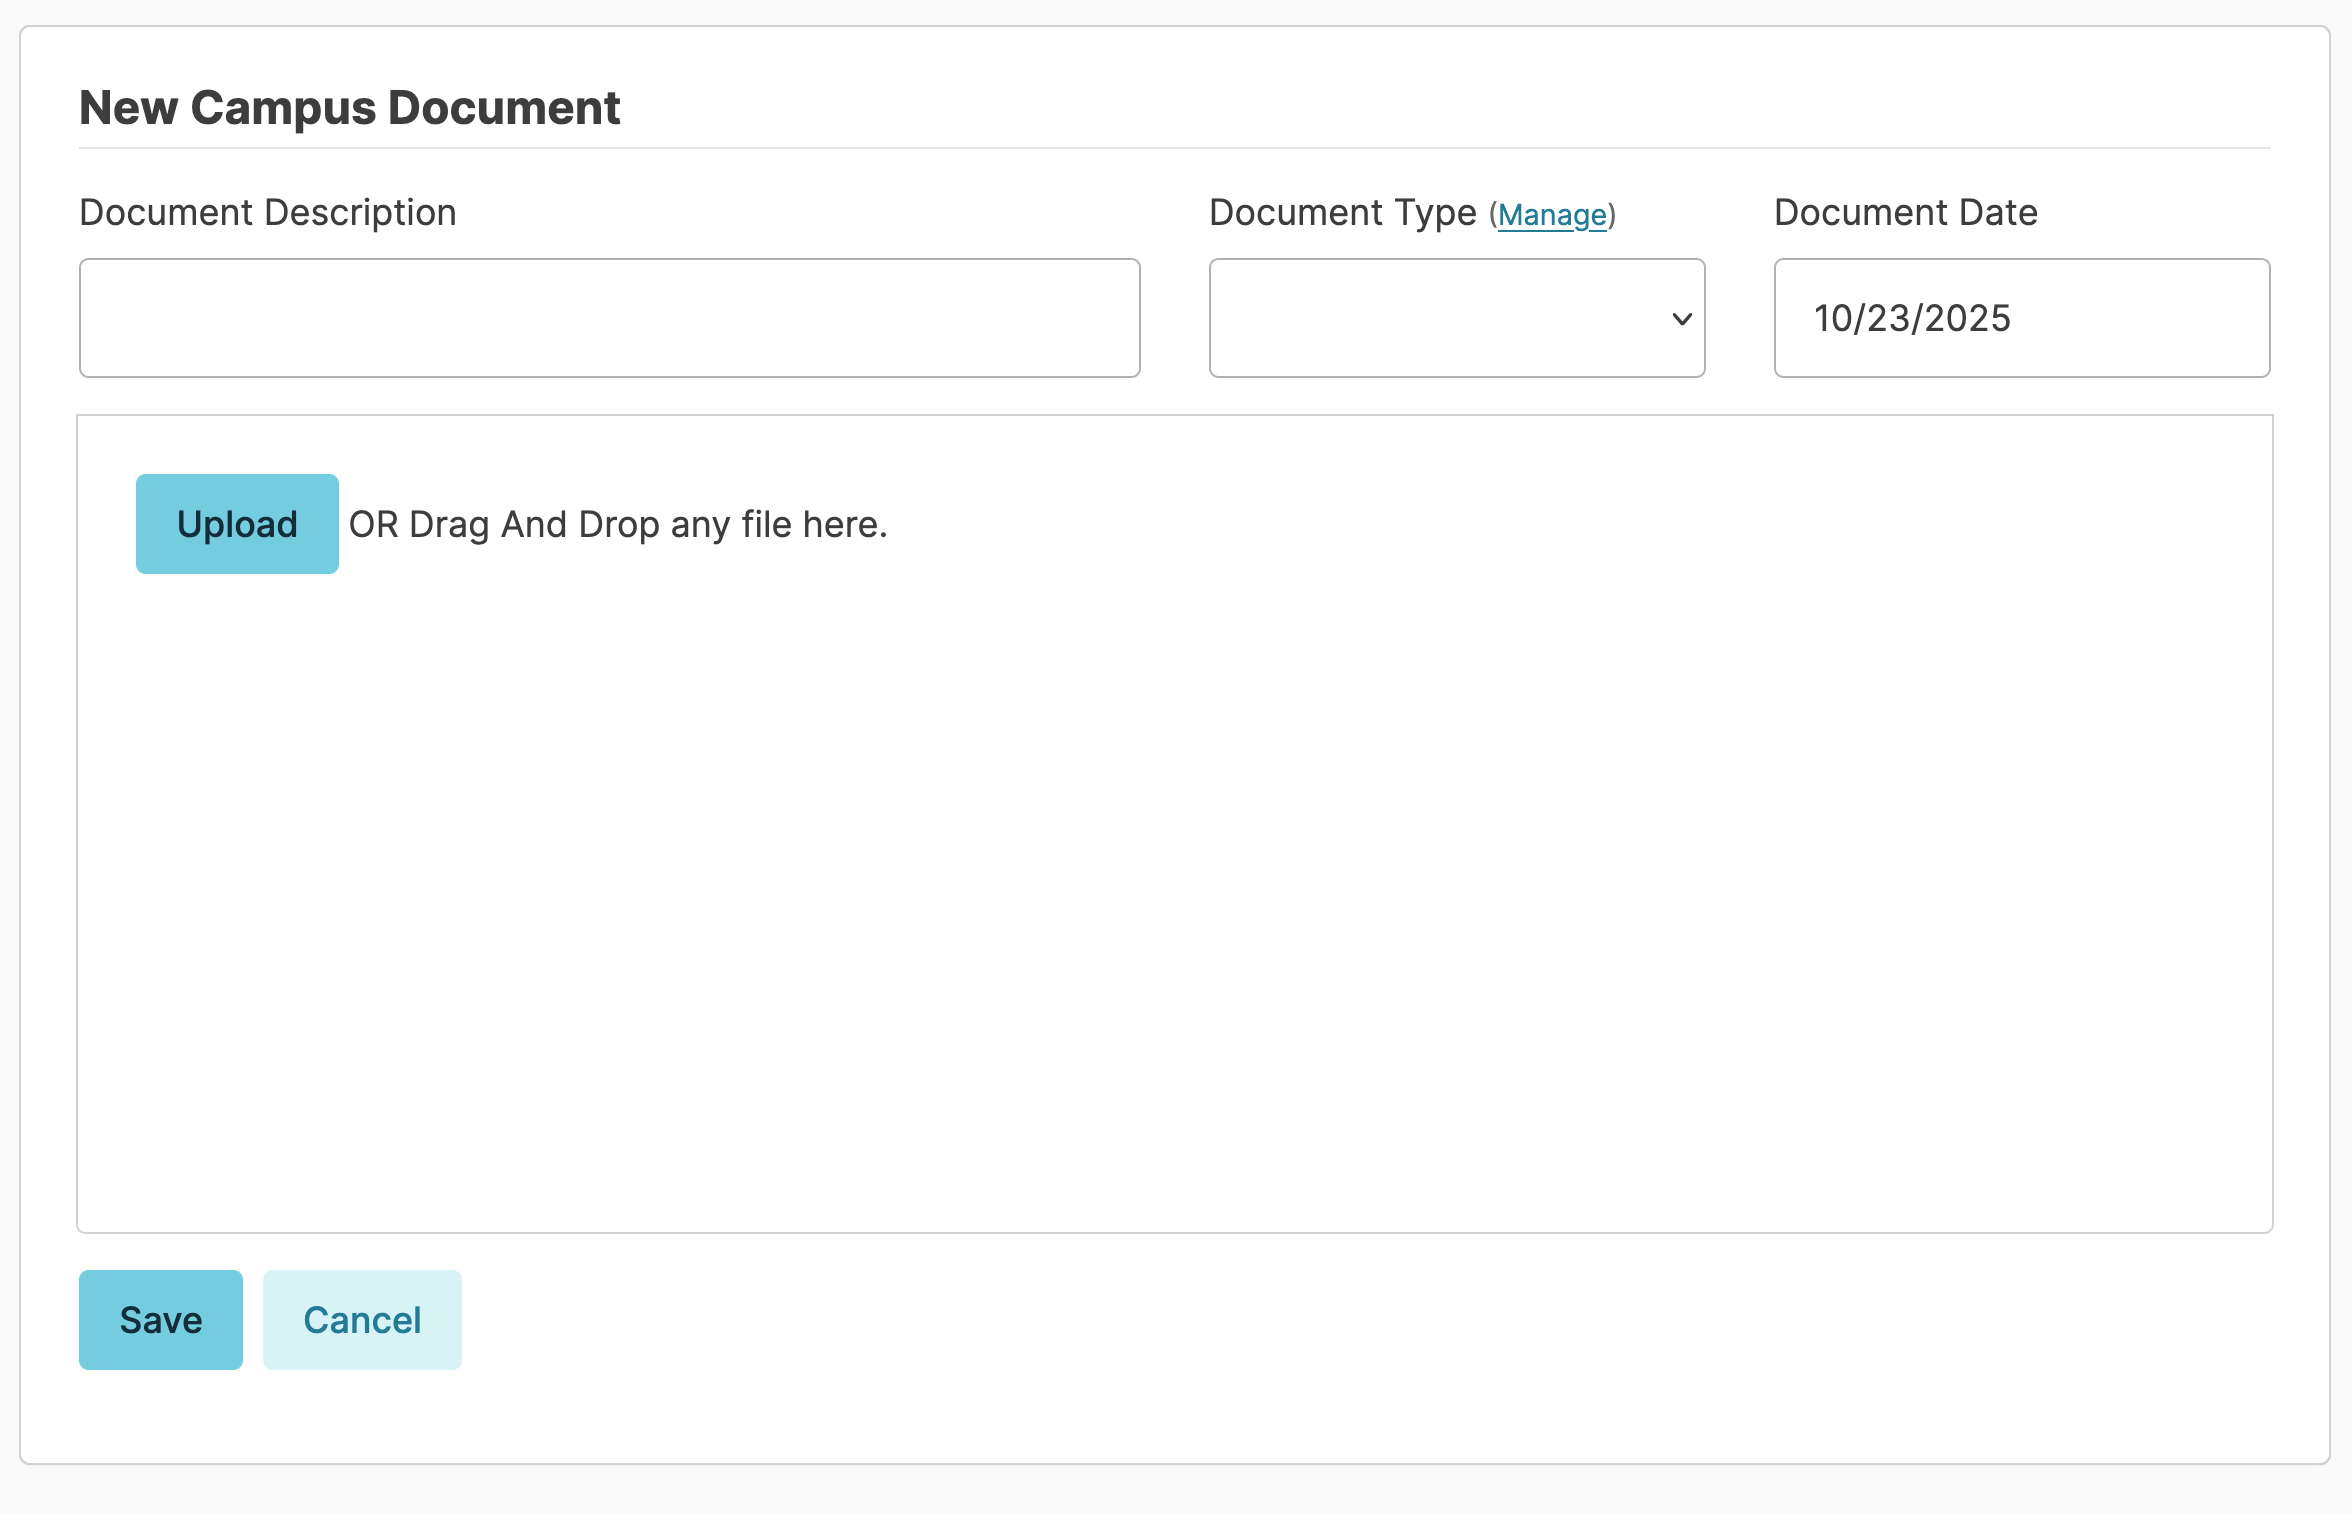
Add a Campus Document
Navigate to Admin > Documents > click New Document. Enter a 'Document Description,' 'Document Type,' and 'Document Date.' Click Upload to add a file, or drag and drop the file here. Click Save.
Residex's eFax feature also allows faxes received to be processed and saved directly to campus documents.
To view a previous document, simply click on the document link.
Users who attach a document or those with Manager (Role 11) or Supervisor (Role 13) can edit or delete an attachment.
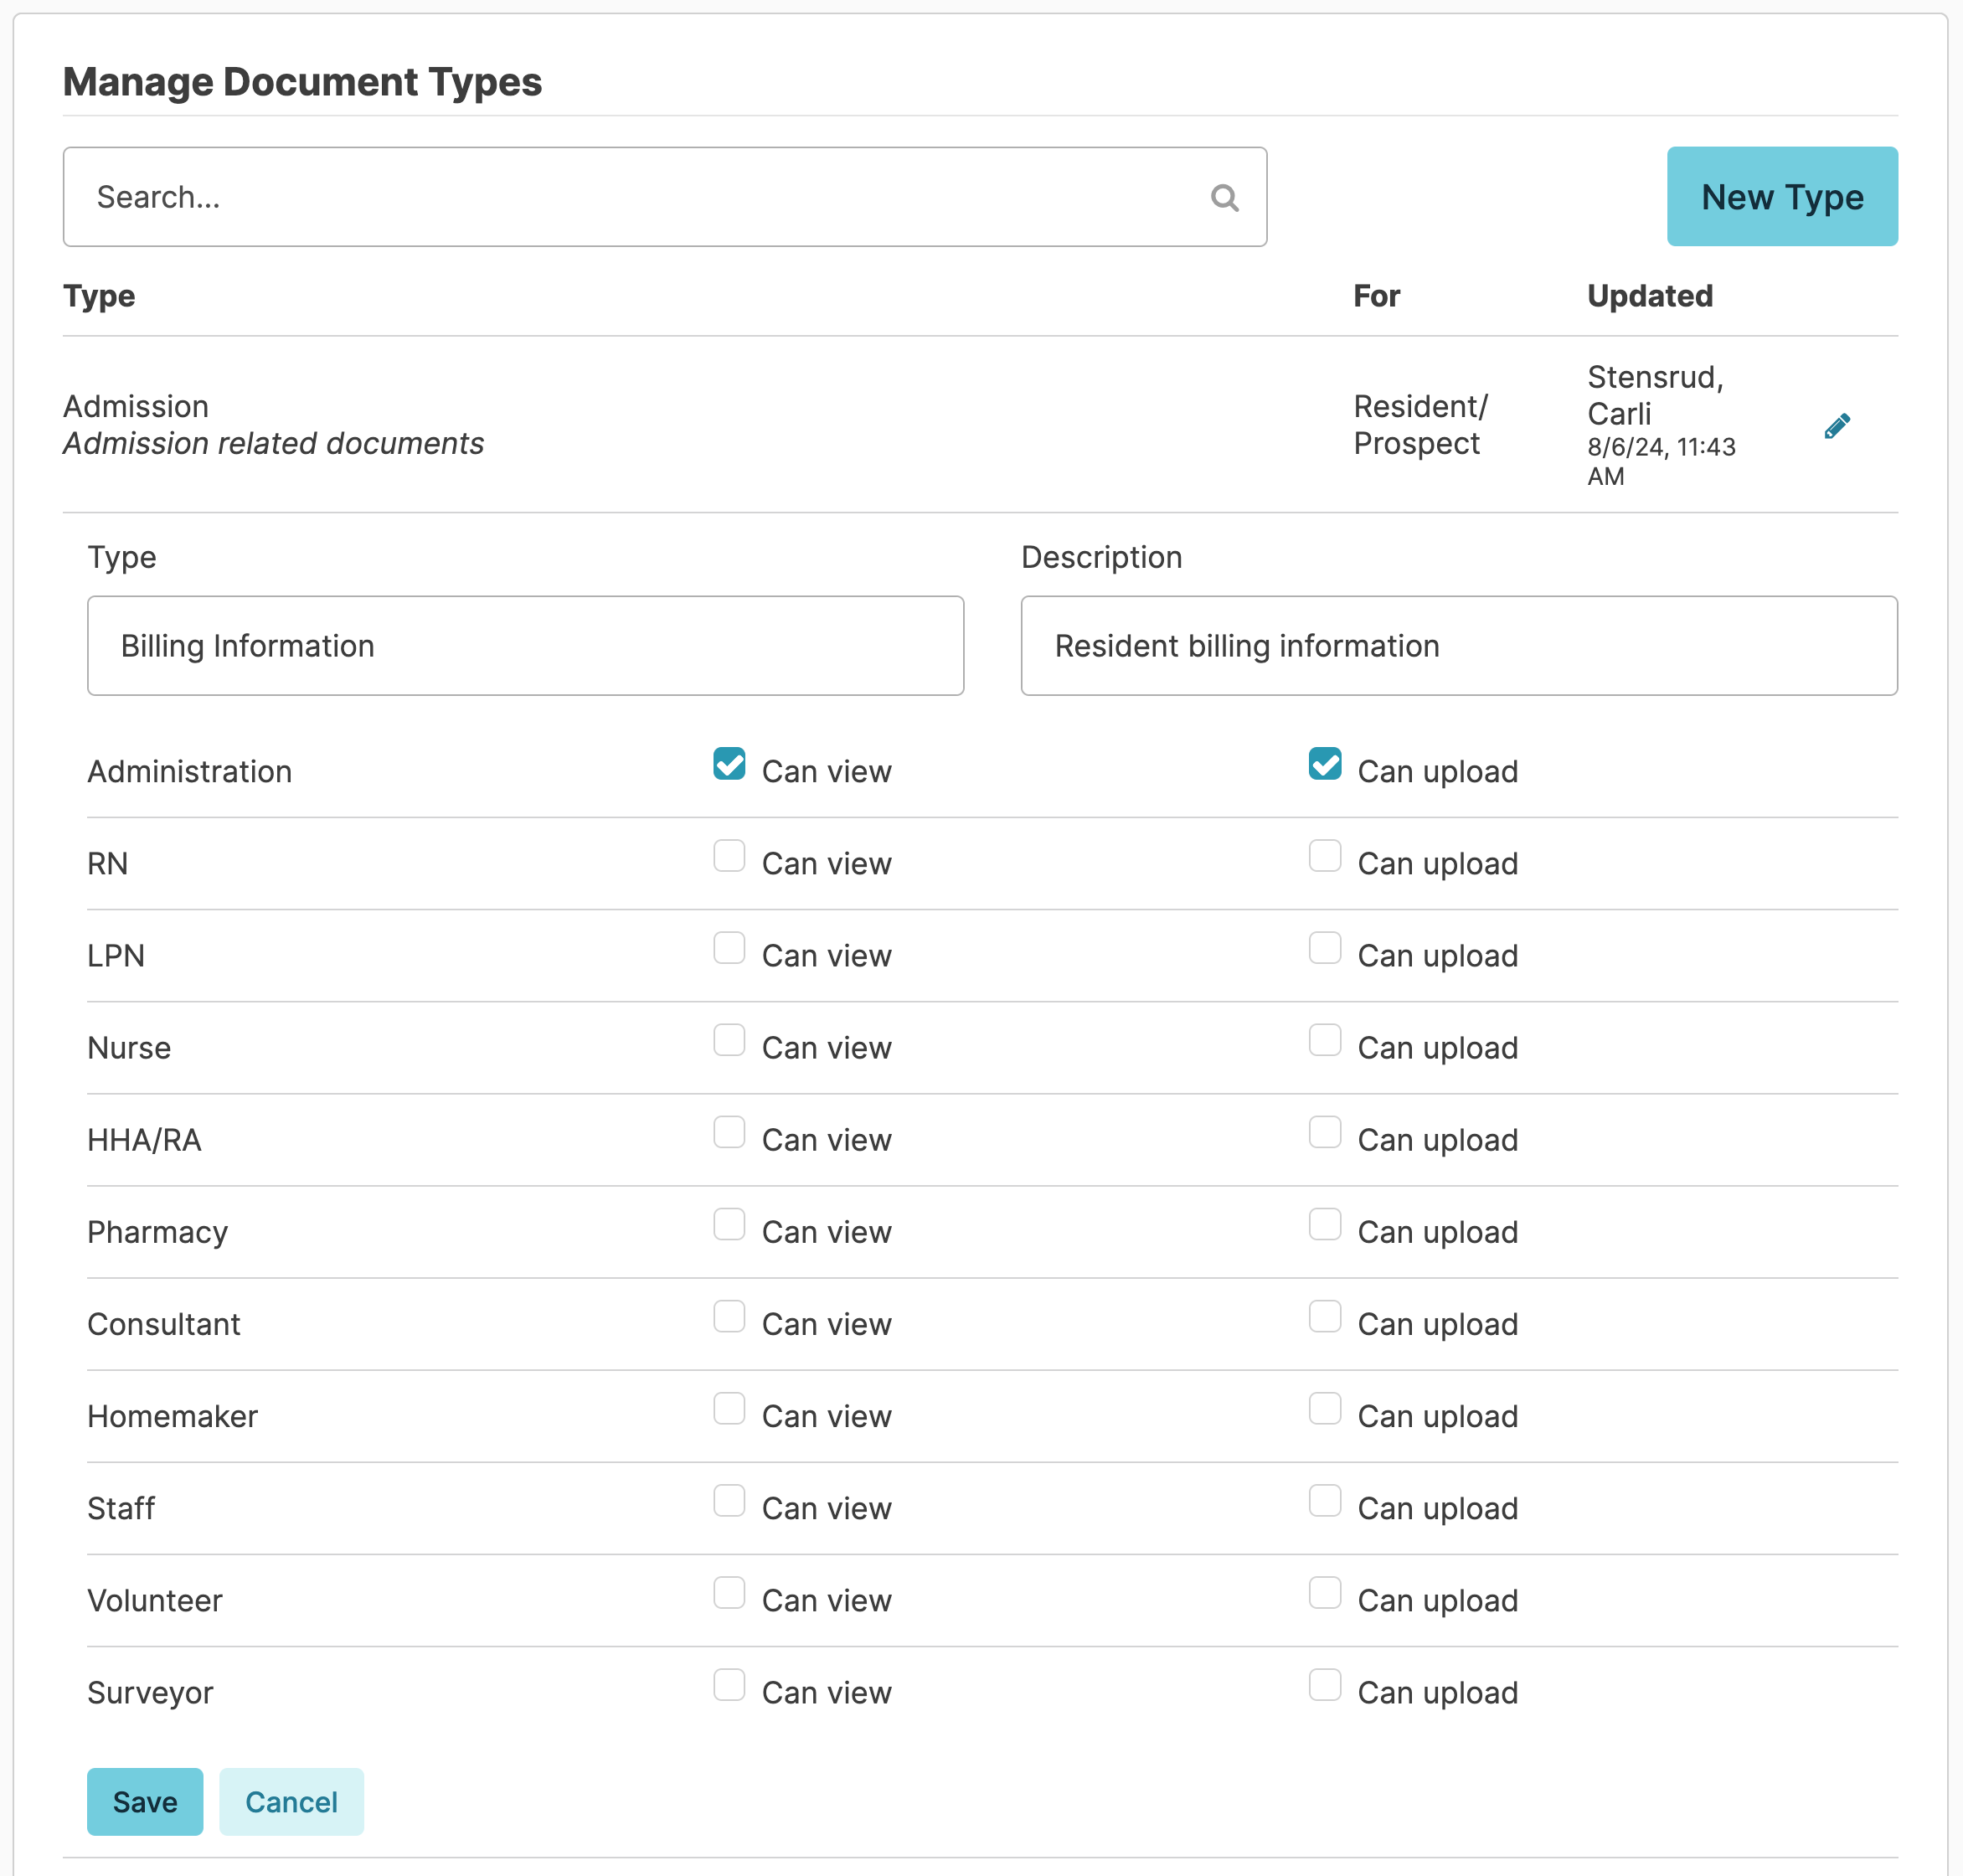
Managing Document Types and Permissions
A Manage button, visible above the document type field, will allow users with Administration Role 411 to add and edit document types, as well as manage permissions to view and/or upload. Document types entered in error or not in use may be deleted. The managing document screen can also be accessed by navigating to Admin > Document Types.
Assignments
An assignment usually refers to a specific task or scheduled shift, such as AM, PM, NOC, Housekeeper, or RN. Assignments can be associated with residents (for services like care) or general facility needs (like chores). Each assignment is created for particular work to be completed on a certain shift or by a certain type of staff.
Assignments allow for scheduling of services and chores to a particular 'shift' or 'home' so that your staff can view, at a glance, everything they need to do during a days work.
The setup of assignments is customizable for your agency. For example:
- A small home may have very few assignments, such as AM, PM, NOC, and RN.
- A larger home may break down assignments by location and have multiple assignments operating at the same time, such as Assisted Living AM 1, Assisted Living AM 2, Memory Care AM, RN, LPN, Housekeeping, etc.
- If you provide home care, you may label your assignments using the client's first initial and last name, such as R. Smith.
Note: Each campus must include a 'Not Assigned' assignment name. This is required for certain processes to work correctly.
When your staff log in to chart, they will first navigate to Today > Assignments and select their Assignment for the day. This will allow them to view the services and chores assigned to them during their shift.
Each assignment name and each Residex user are assigned a 'provider type,' which acts as a level of hierarchy security setting. Users may only see assignments with provider types equal to or less than their own.
Managing Assignments
Assignments can be configured uniquely for each campus and community. Assignments can be managed by going to Admin > Assignments.

You edit an assignment by clicking on the assignment, making the needed changes, and clicking Save. Unselecting the Active checkbox and clicking Save will deactivate that assignment. An assignment cannot be made inactive if it has services or chores currently associated.
You can add a new assignment by clicking New Assignment. When you create a new assignment, you will be required to fill in the following information:
- Assignment Name (AM, PM, NOC, Housekeeper, RN, etc.)
- Provider Type (RN, LPN, HHA, Housekeeper, etc.)
- Primary Community (this makes it easier to assign cares to the appropriate assignment)
- Shift (this ensures cares can only be assigned to Assignments during their scheduled hours)
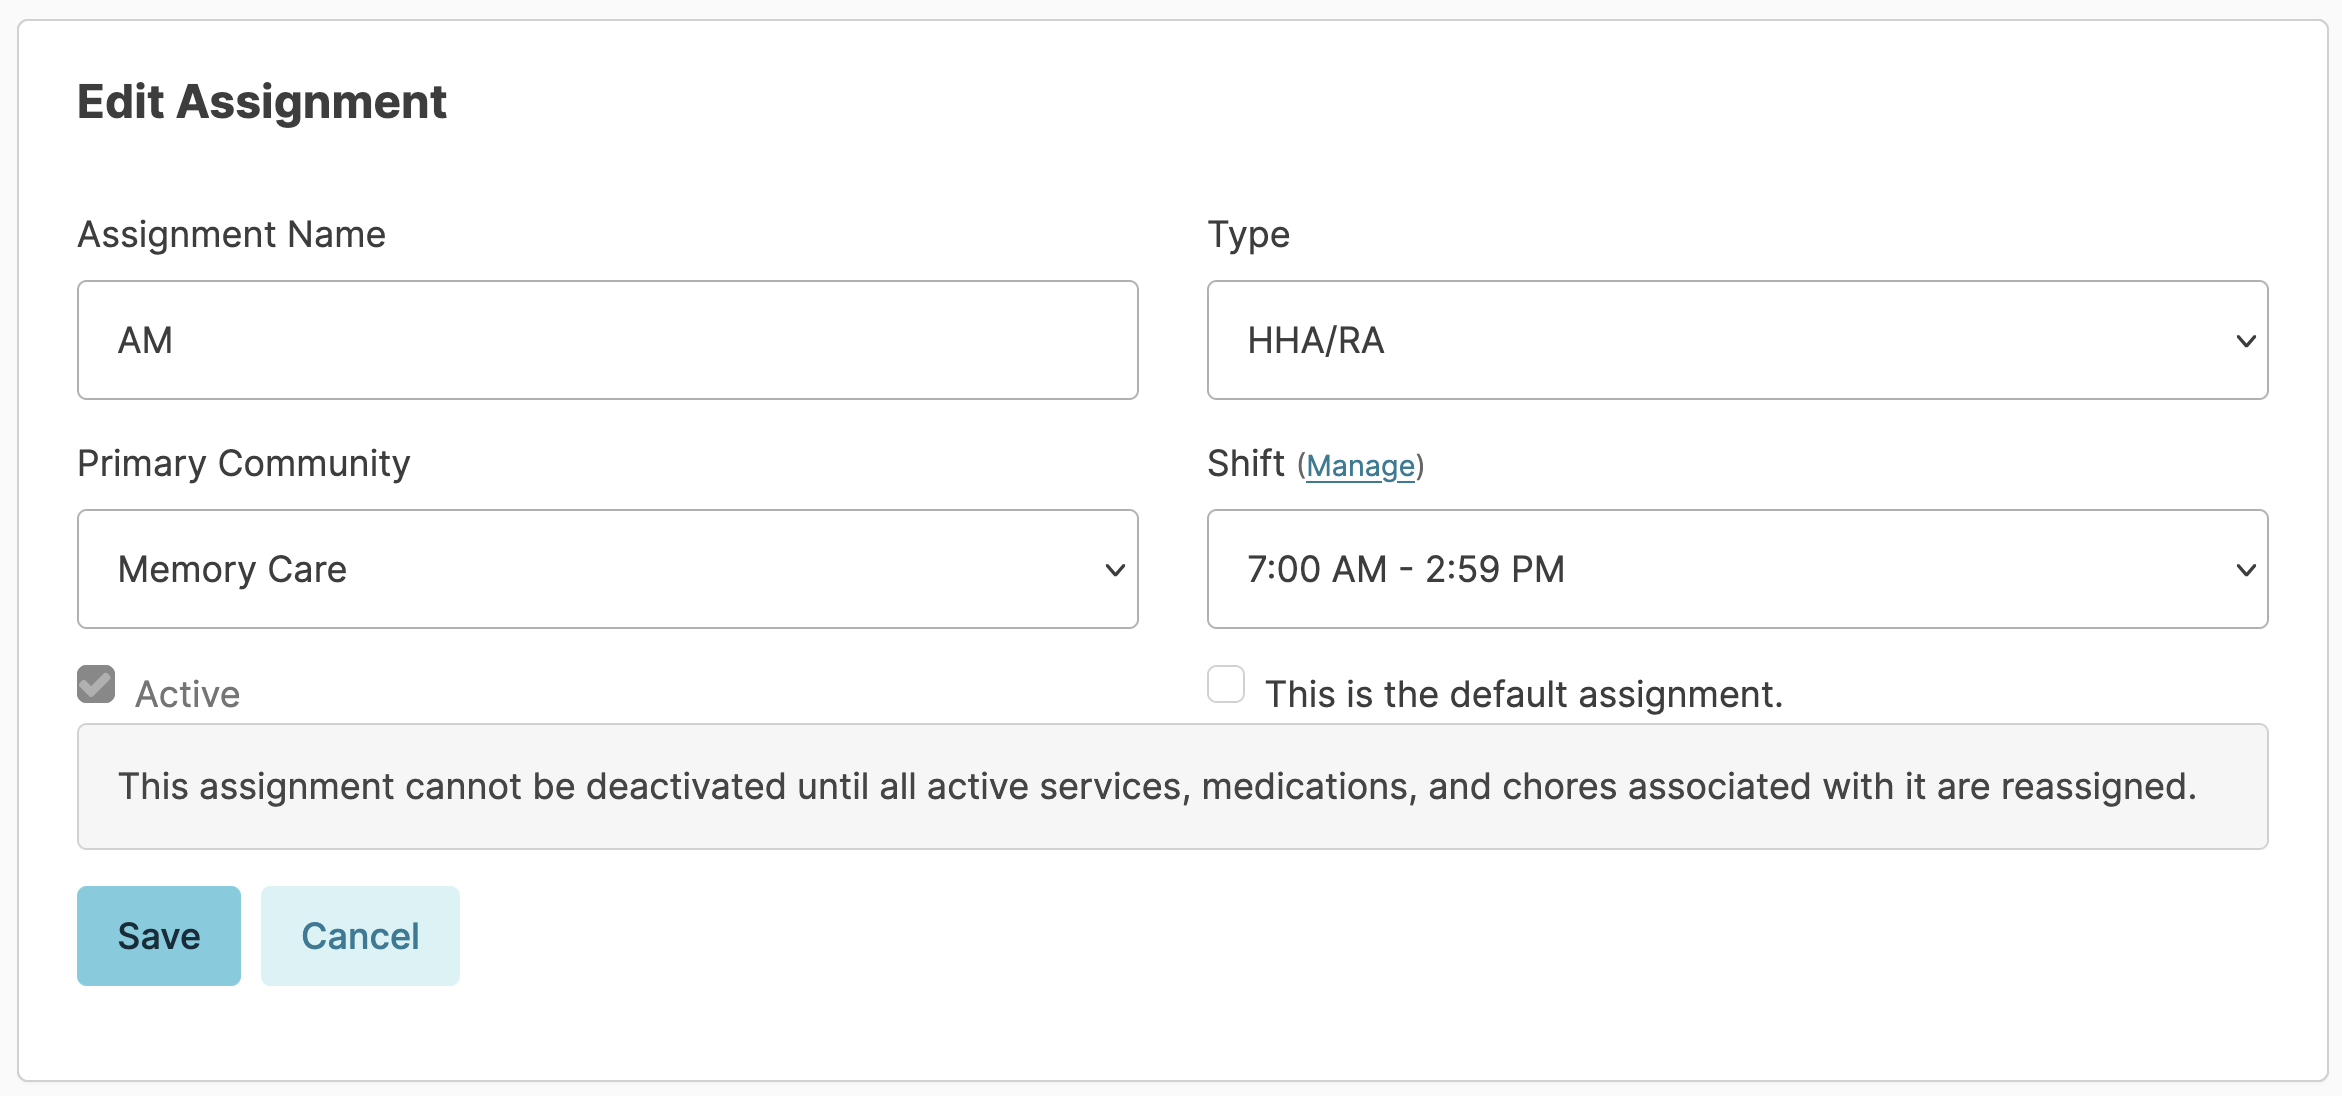
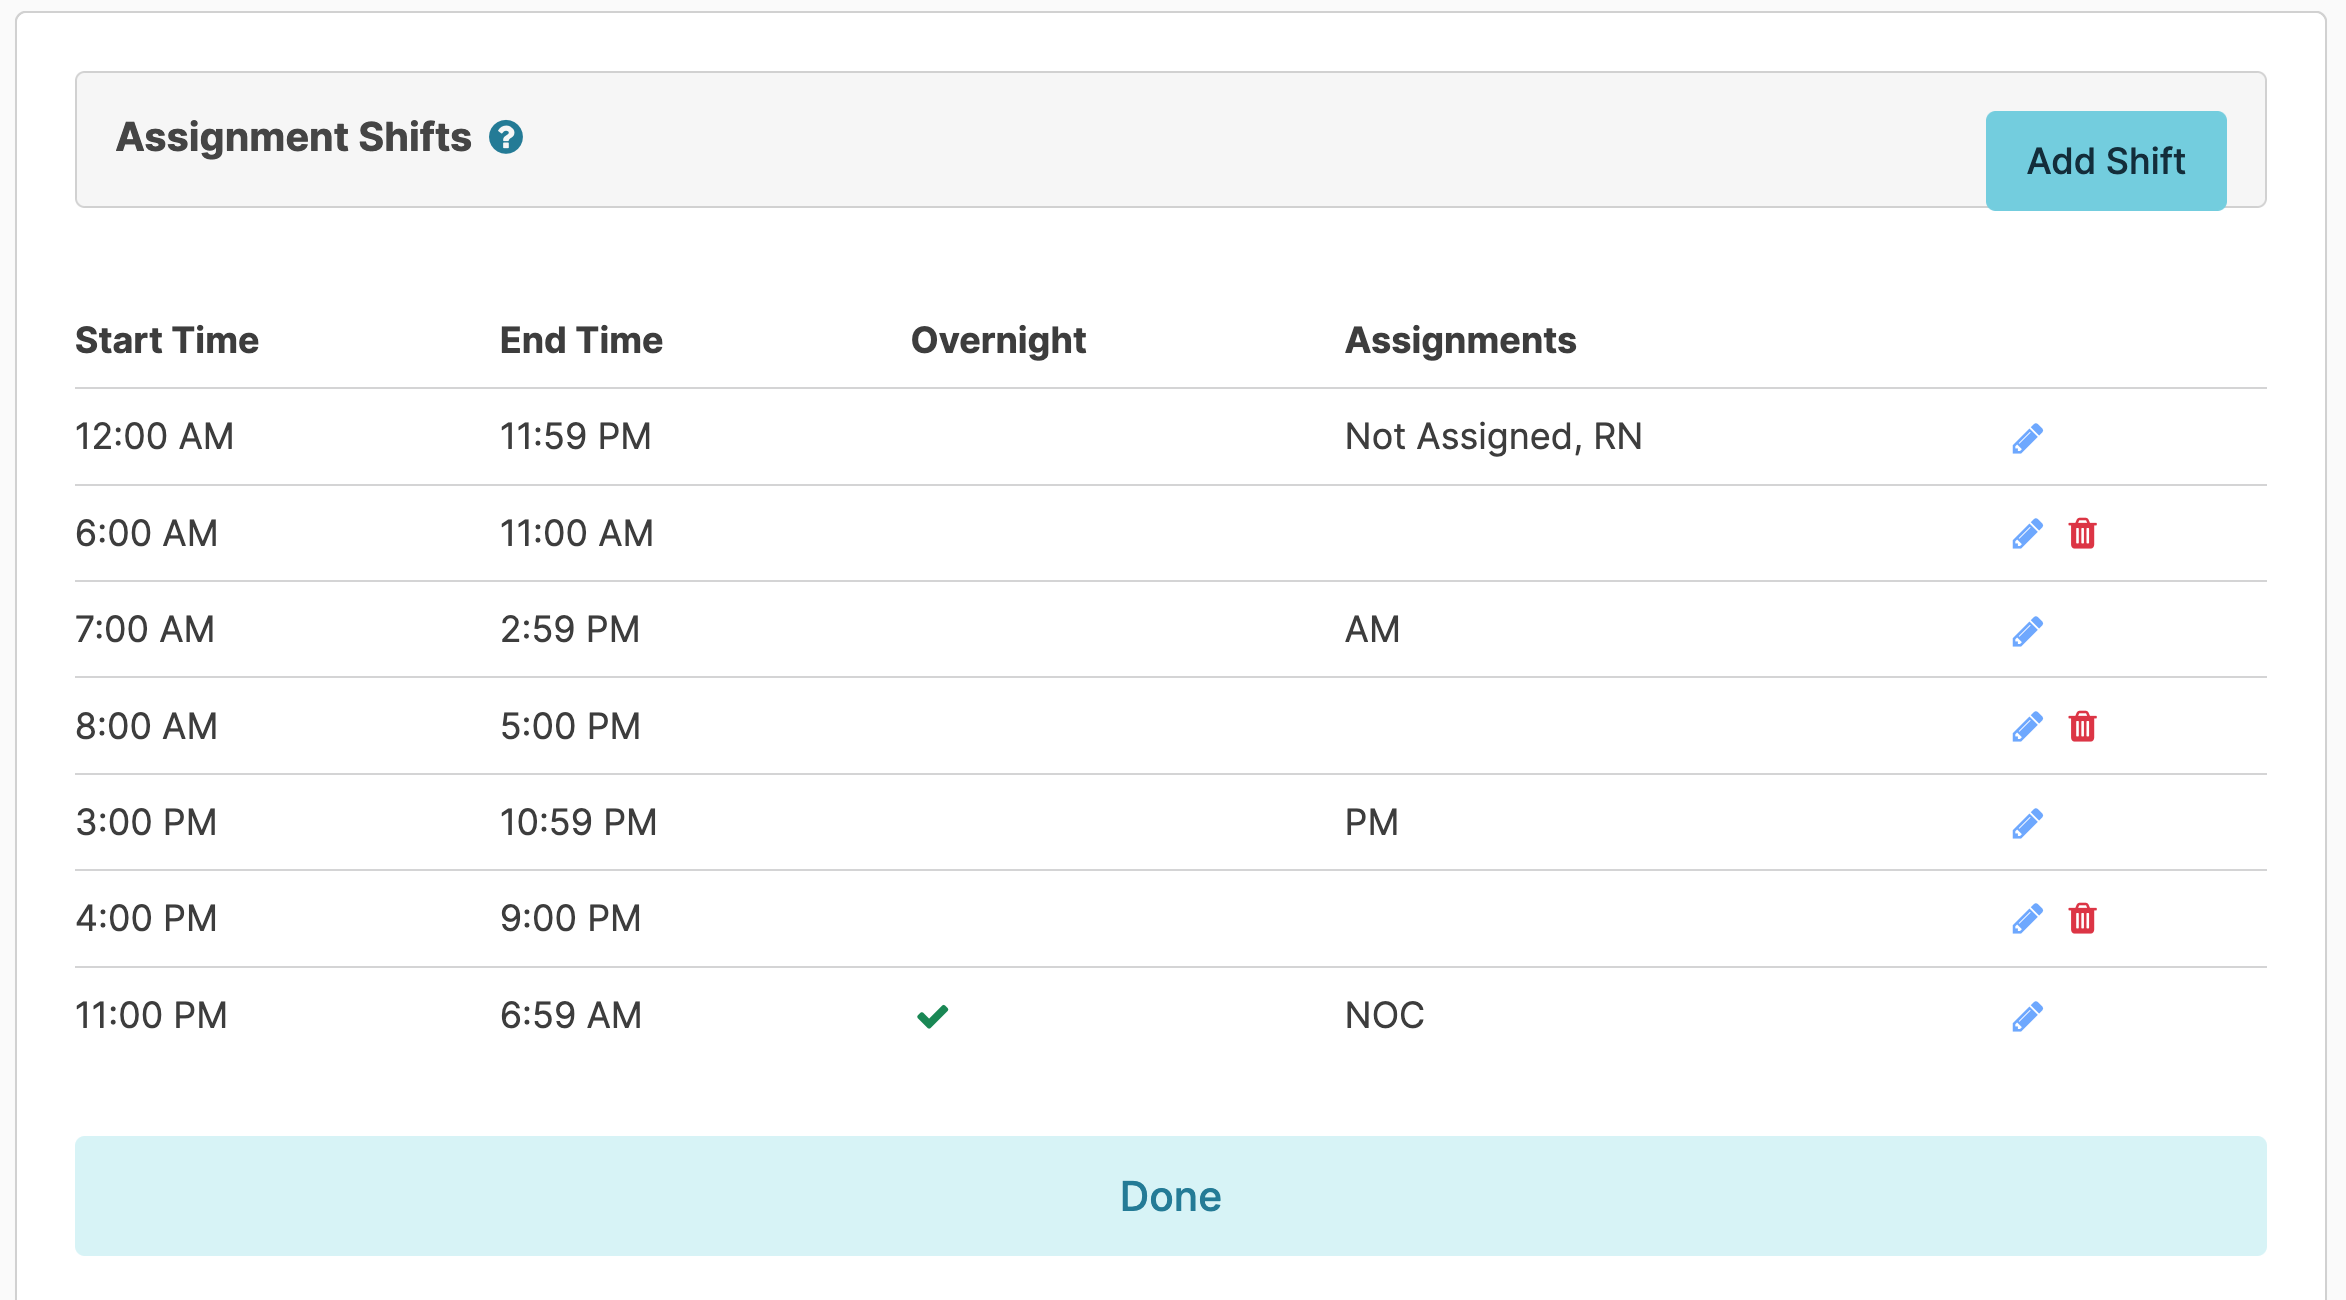
Available shift times may be managed by selecting the blue Manage link next to Shift. Once on the Assignment Shifts screen, select the blue edit (pencil icon) to the right to edit an existing shift. Note: Ending the shift time a minute prior to the next shift time helps the system know what assignments are available to schedule to at a given time and will help prevent accidental scheduling of services to the wrong assignment list.
Provider Types
A provider type is a classification like RN, LPN, HHA, Housekeeper, Maintenance, Consultant, etc. Provider types create a hierarchy, controlling which assignments a person can see or perform. For example, an Admin provider type can see everything, while other provider types may only see assignments for their level or those below. Provider types also affect permissions, care responsibilities, and reporting access.
Managing Provider Types
Navigate to Admin > Provider Types to manage provider types.
As described above, each assignment in a campus is assigned a Provider Type. The provider types that appear in the dropdown are in order of hierarchy. This applies controls on what that provider type can see or do from the Assignment screen. A user with the 'Admin' provider type, top of the hierarchy, can see or chart anything assigned on the Assignment screen. A 'Maintenance' or 'Consultant' provider type, further down in the hierarchy, will only be able to see or chart items assigned to their own provider type or those lower in the hierarchy.
Access to specific reports is controlled by provider type as well.
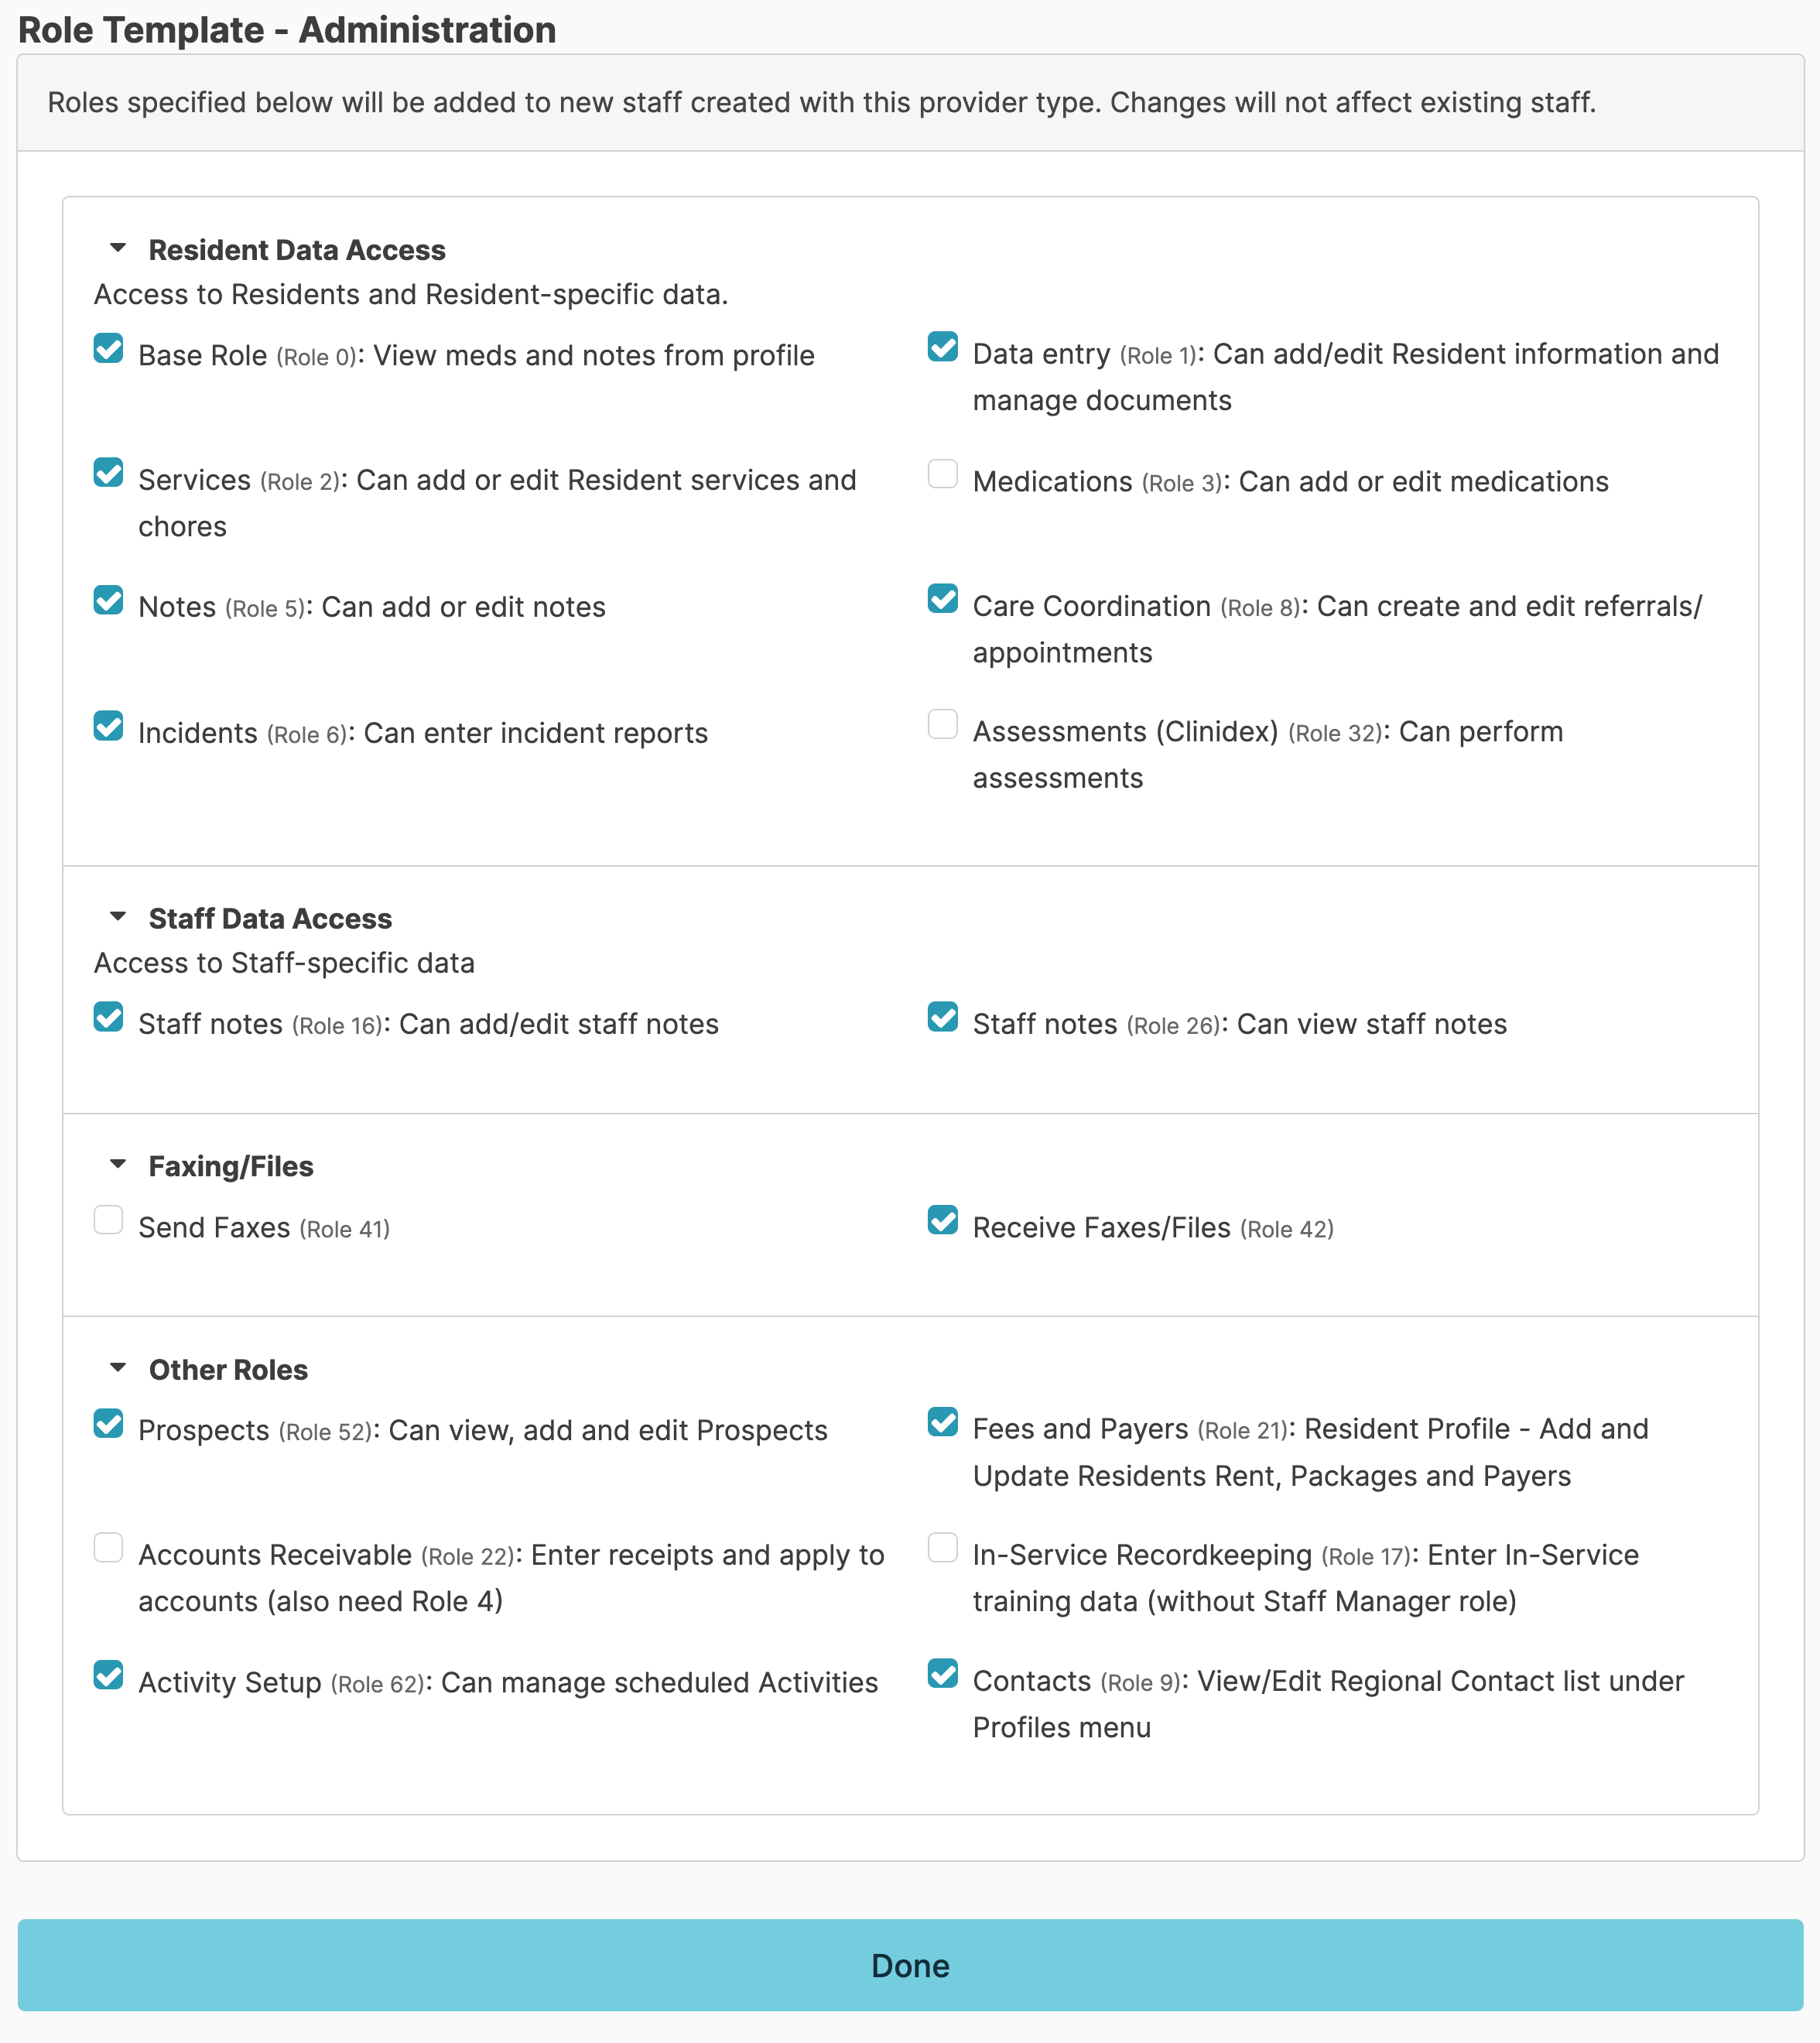
Administrators with Role 411 can manage provider types and their associated role templates from the Provider Types screen. From this screen, designate whether the provider type should clock in using Time Clock, receive care plans, or requires staff supervision. Click the edit link next to any provider type to configure which roles serve as the standard for that provider type when adding new staff. Individual staff members' roles can be further customized from their staff profile > Security screen.
Note: Additional configuration options are available that allow provider types to be designated as non-facility staff. This designation exempts them from policy reviews and removes them from staffing reports viewed by surveyors. Support can also edit provider names as needed. To adjust these settings, please contact support at support@residex.ai for assistance.

Chores
Resident services are scheduled to assignments, but you can also assign work not associated with a resident to assignments. These are typically facility-specific needs referred to as 'chores.' Your staff will chart these chores from the Today > Assignments screen just as they do for all of their other work.
Examples of chores include cleaning, maintenance activities, emergency drills, quality management activities, etc.
From the Admin > Scheduled Chores screen you can:
-
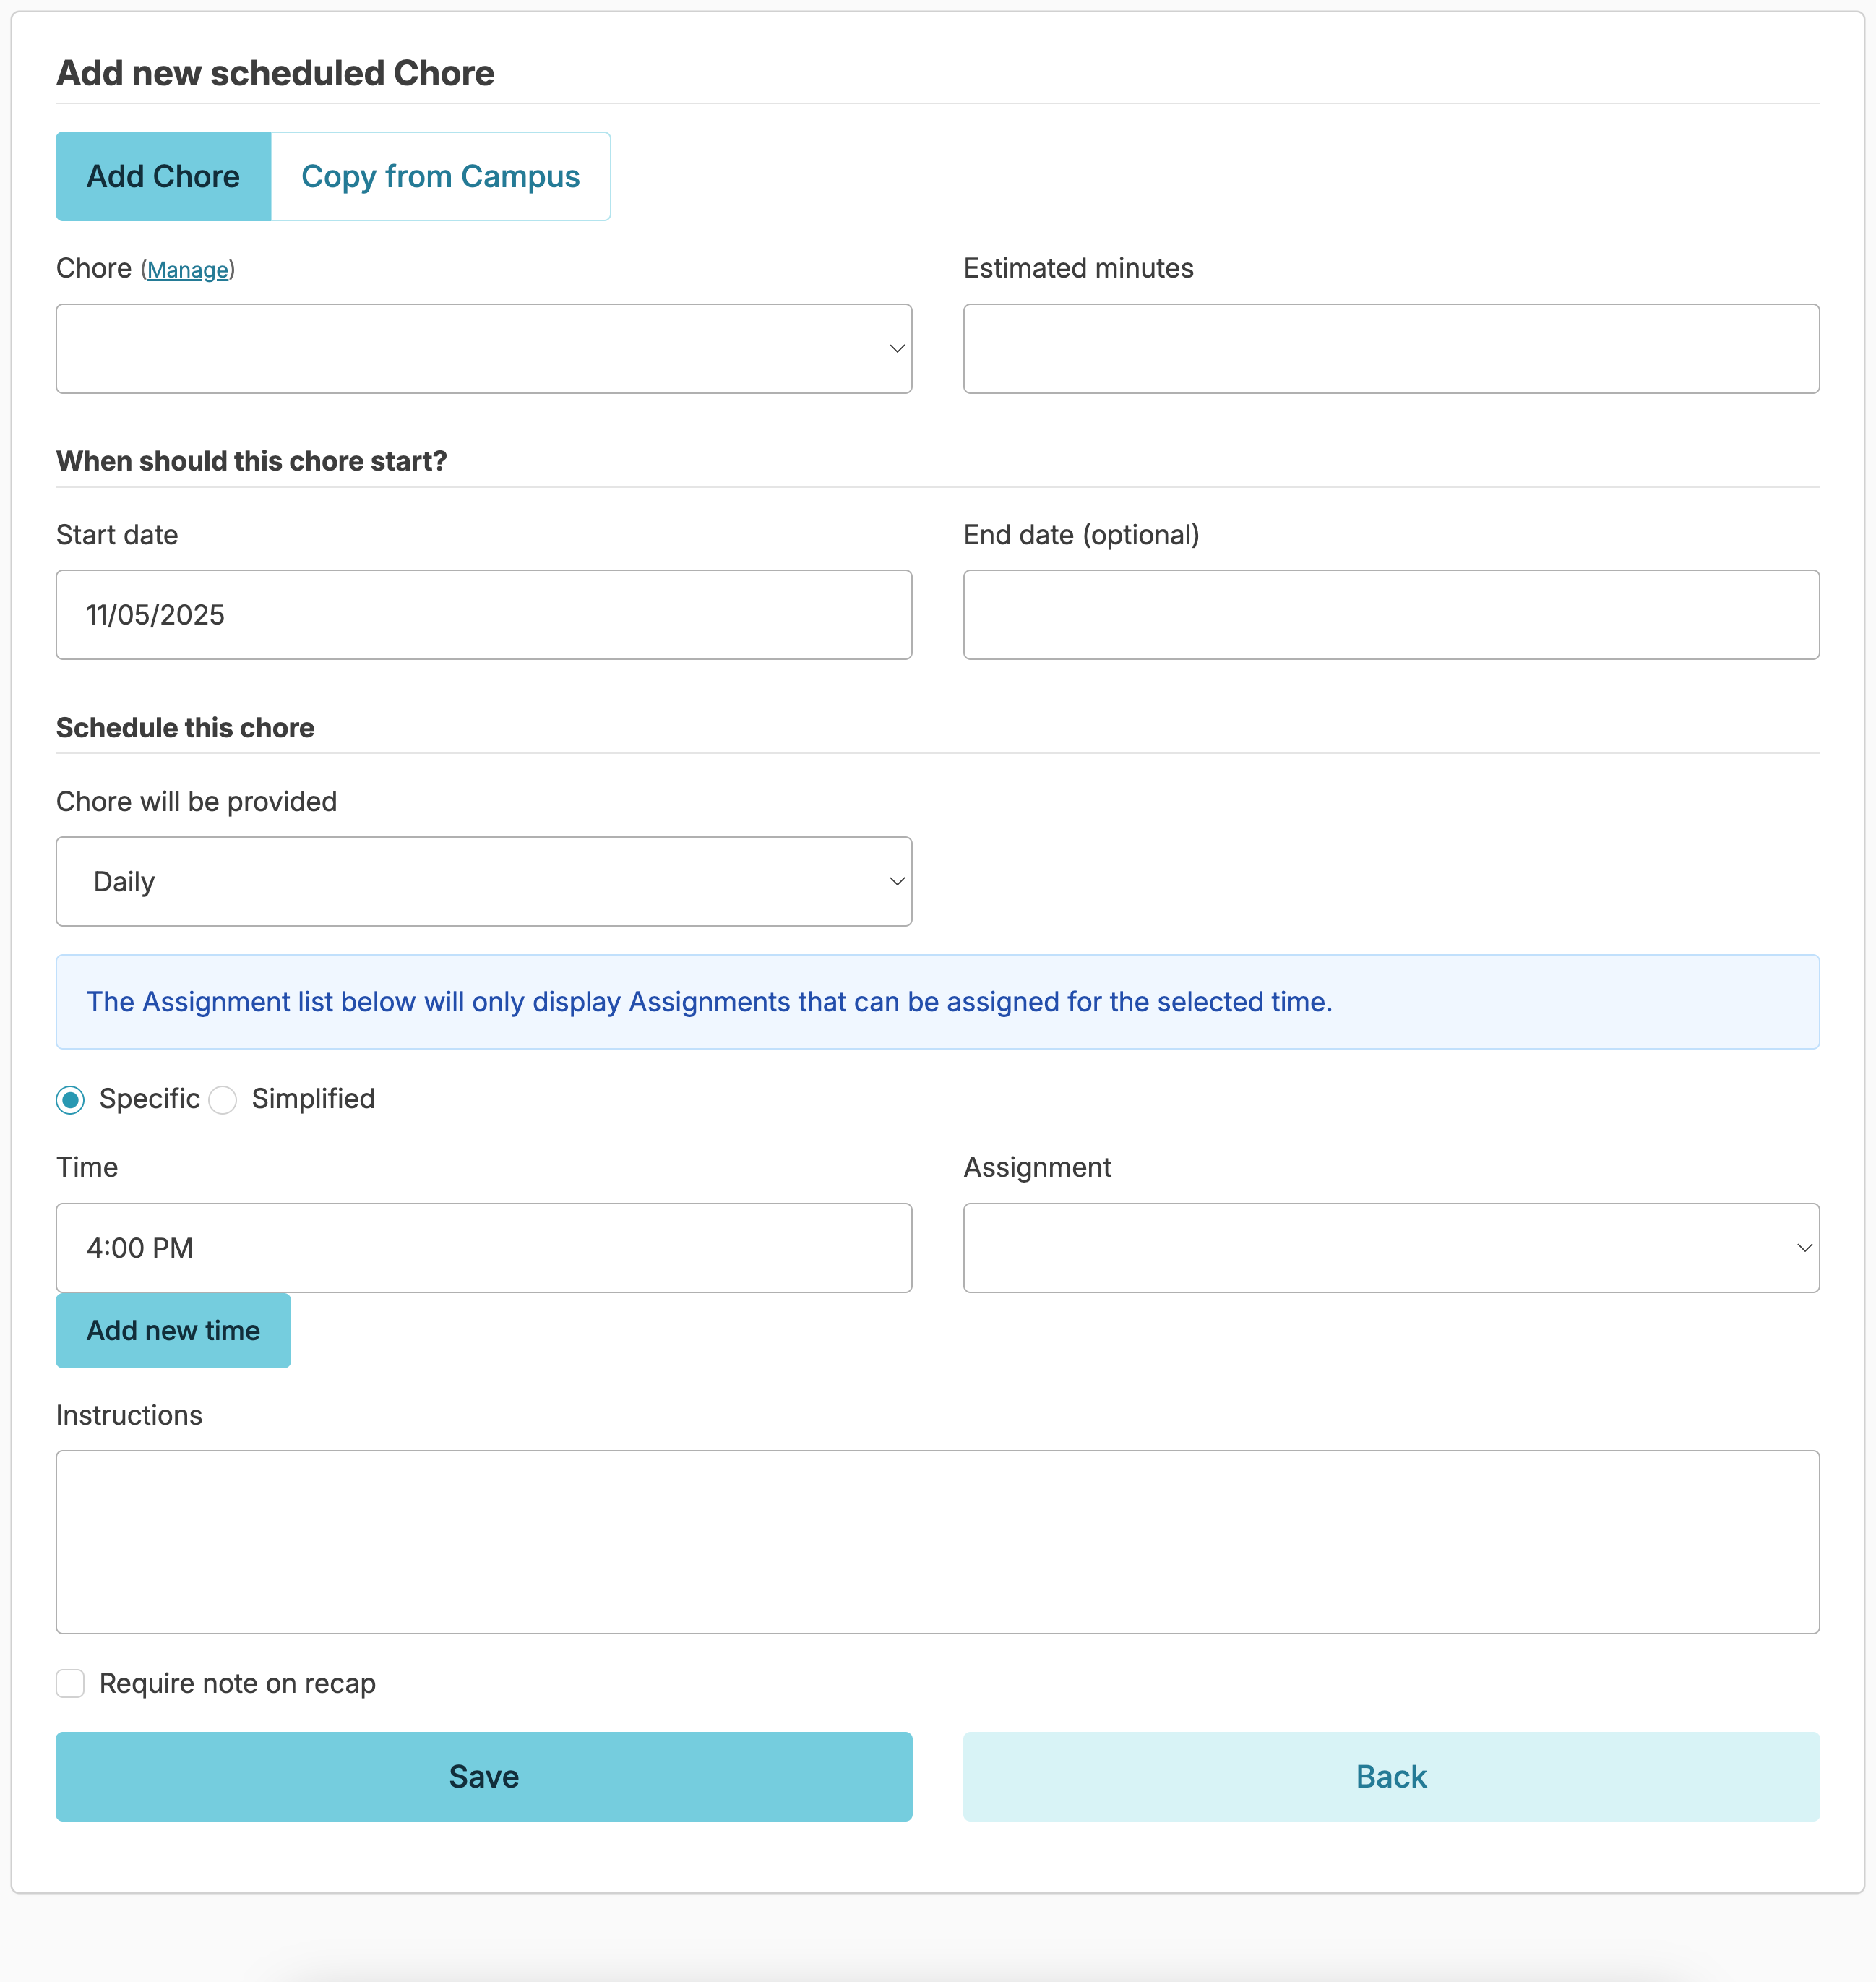
Add a new chore by clickingAdd new Chore entering in the needed information and clicking Save. Note: If you need staff to document details regarding the completion of the chore check the box Require note on recapand specify what information should should include in the 'Instructions' field.
-
Select any existing chore to edit or discontinue
-
Click History to activate a chore that has been discontinued
Manage Chore Types
Users with Administrator (Role 411) or Administrator Assistant (Role 410) can manage or add chore types. Chore types (such as those that involve monitoring temperatures for med storage, food safety requirements) can allow entry of a low or high value and can be made available to reassign.
Because the acceptable ranges for a freezer, refrigerator, or dishwasher would vary, you would add a chore type for each, and set the appropriate high and low values. A login report, Facility Temperatures - Out of Range, can alert you to low or high values entered for any temperature chore.
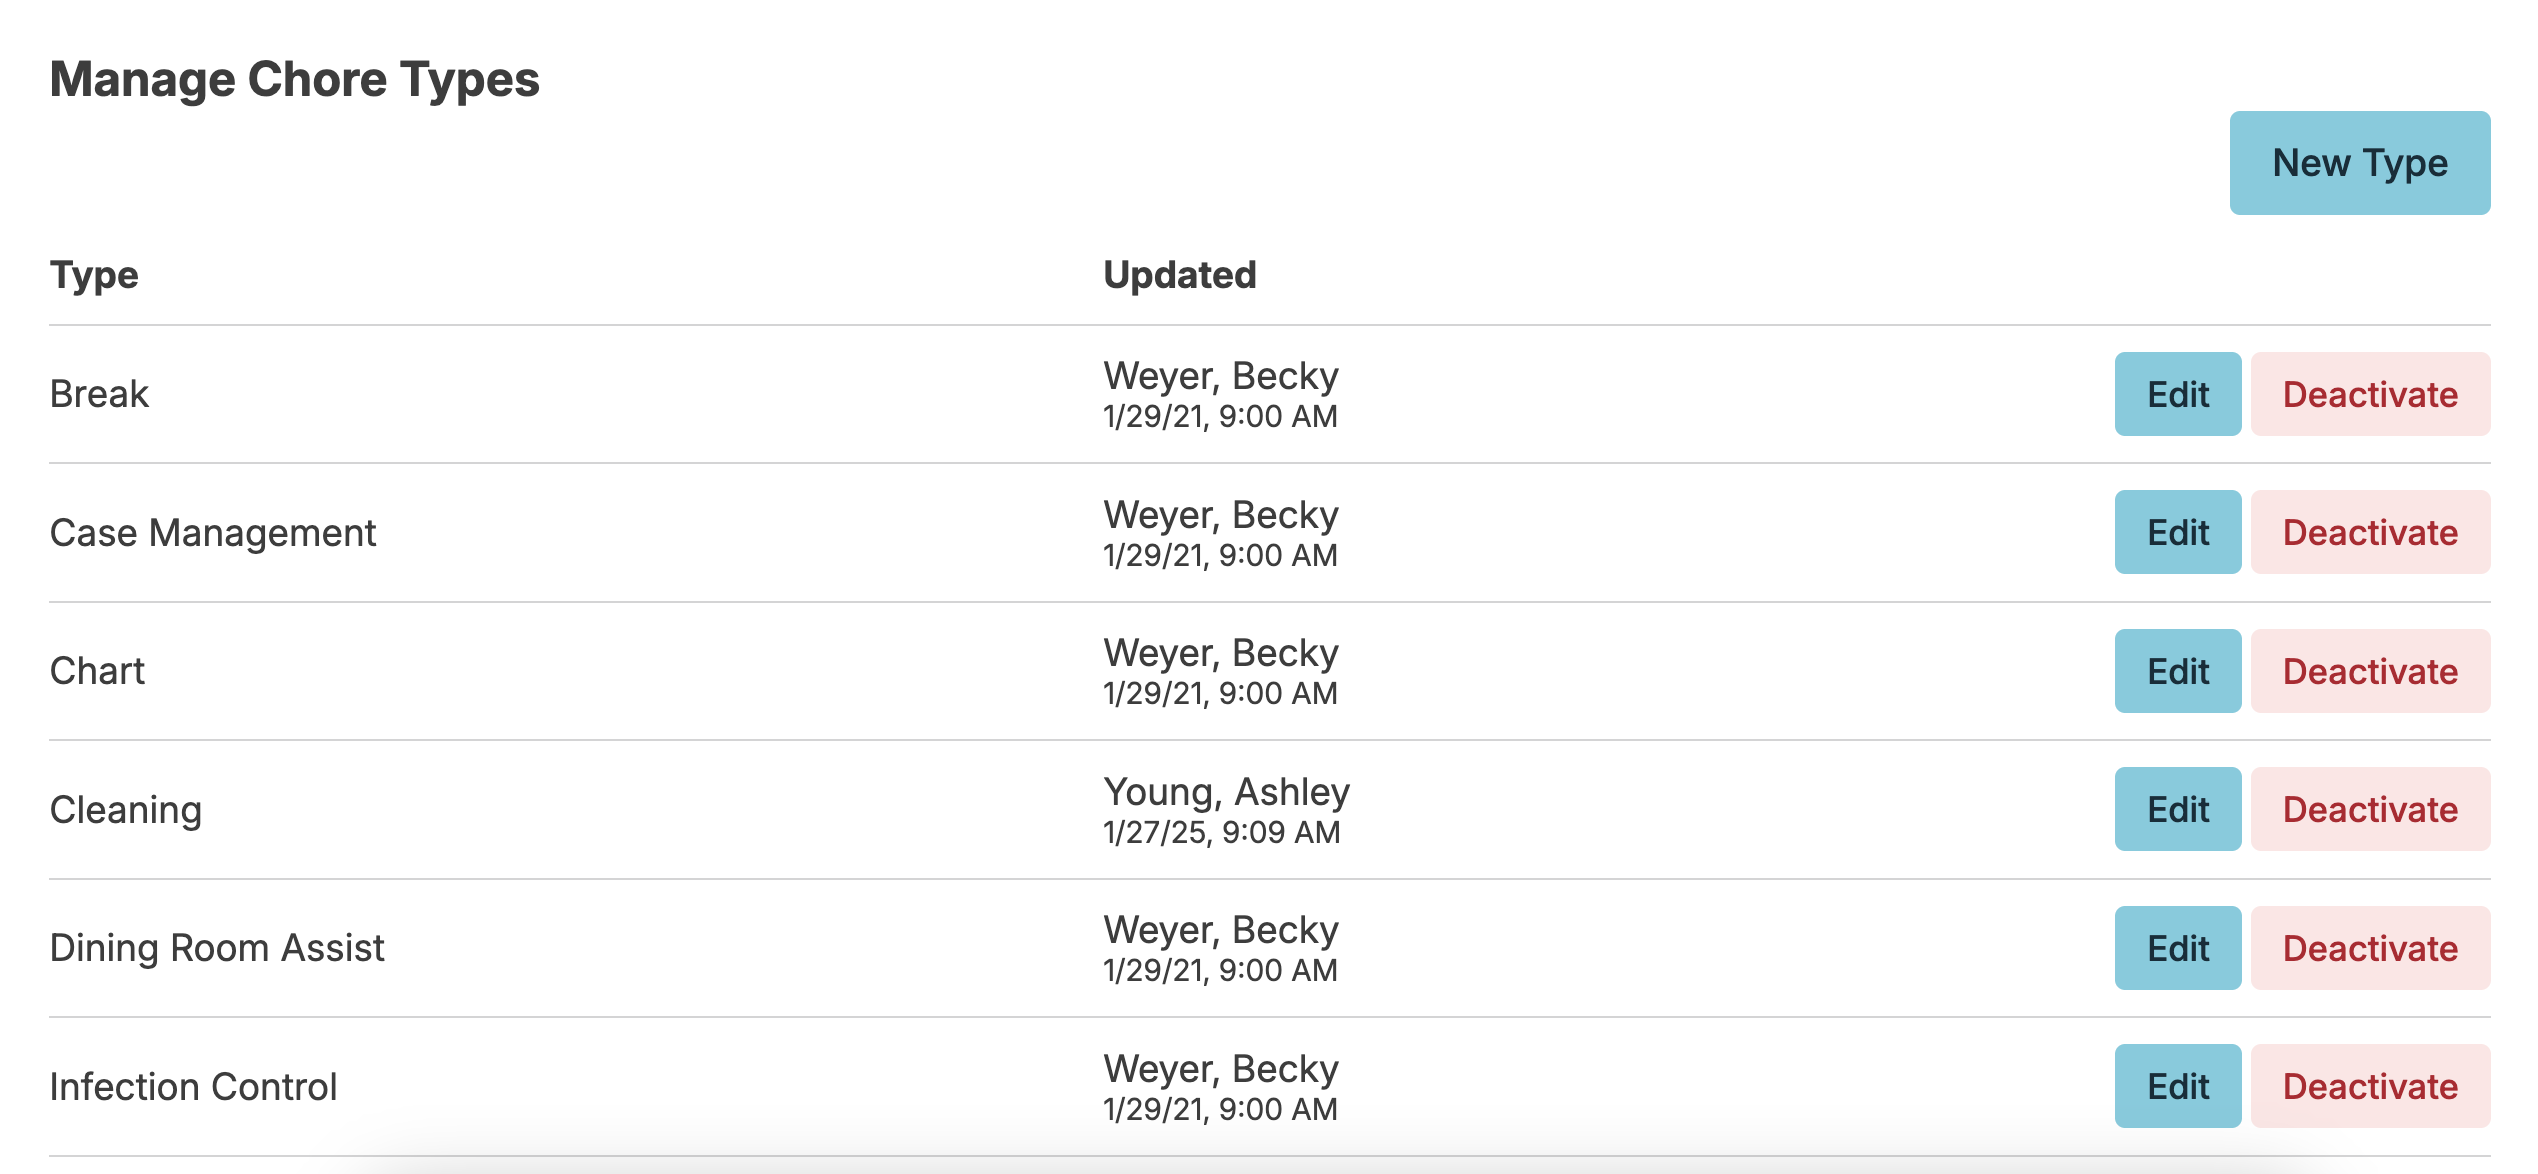
Manage Chore Types
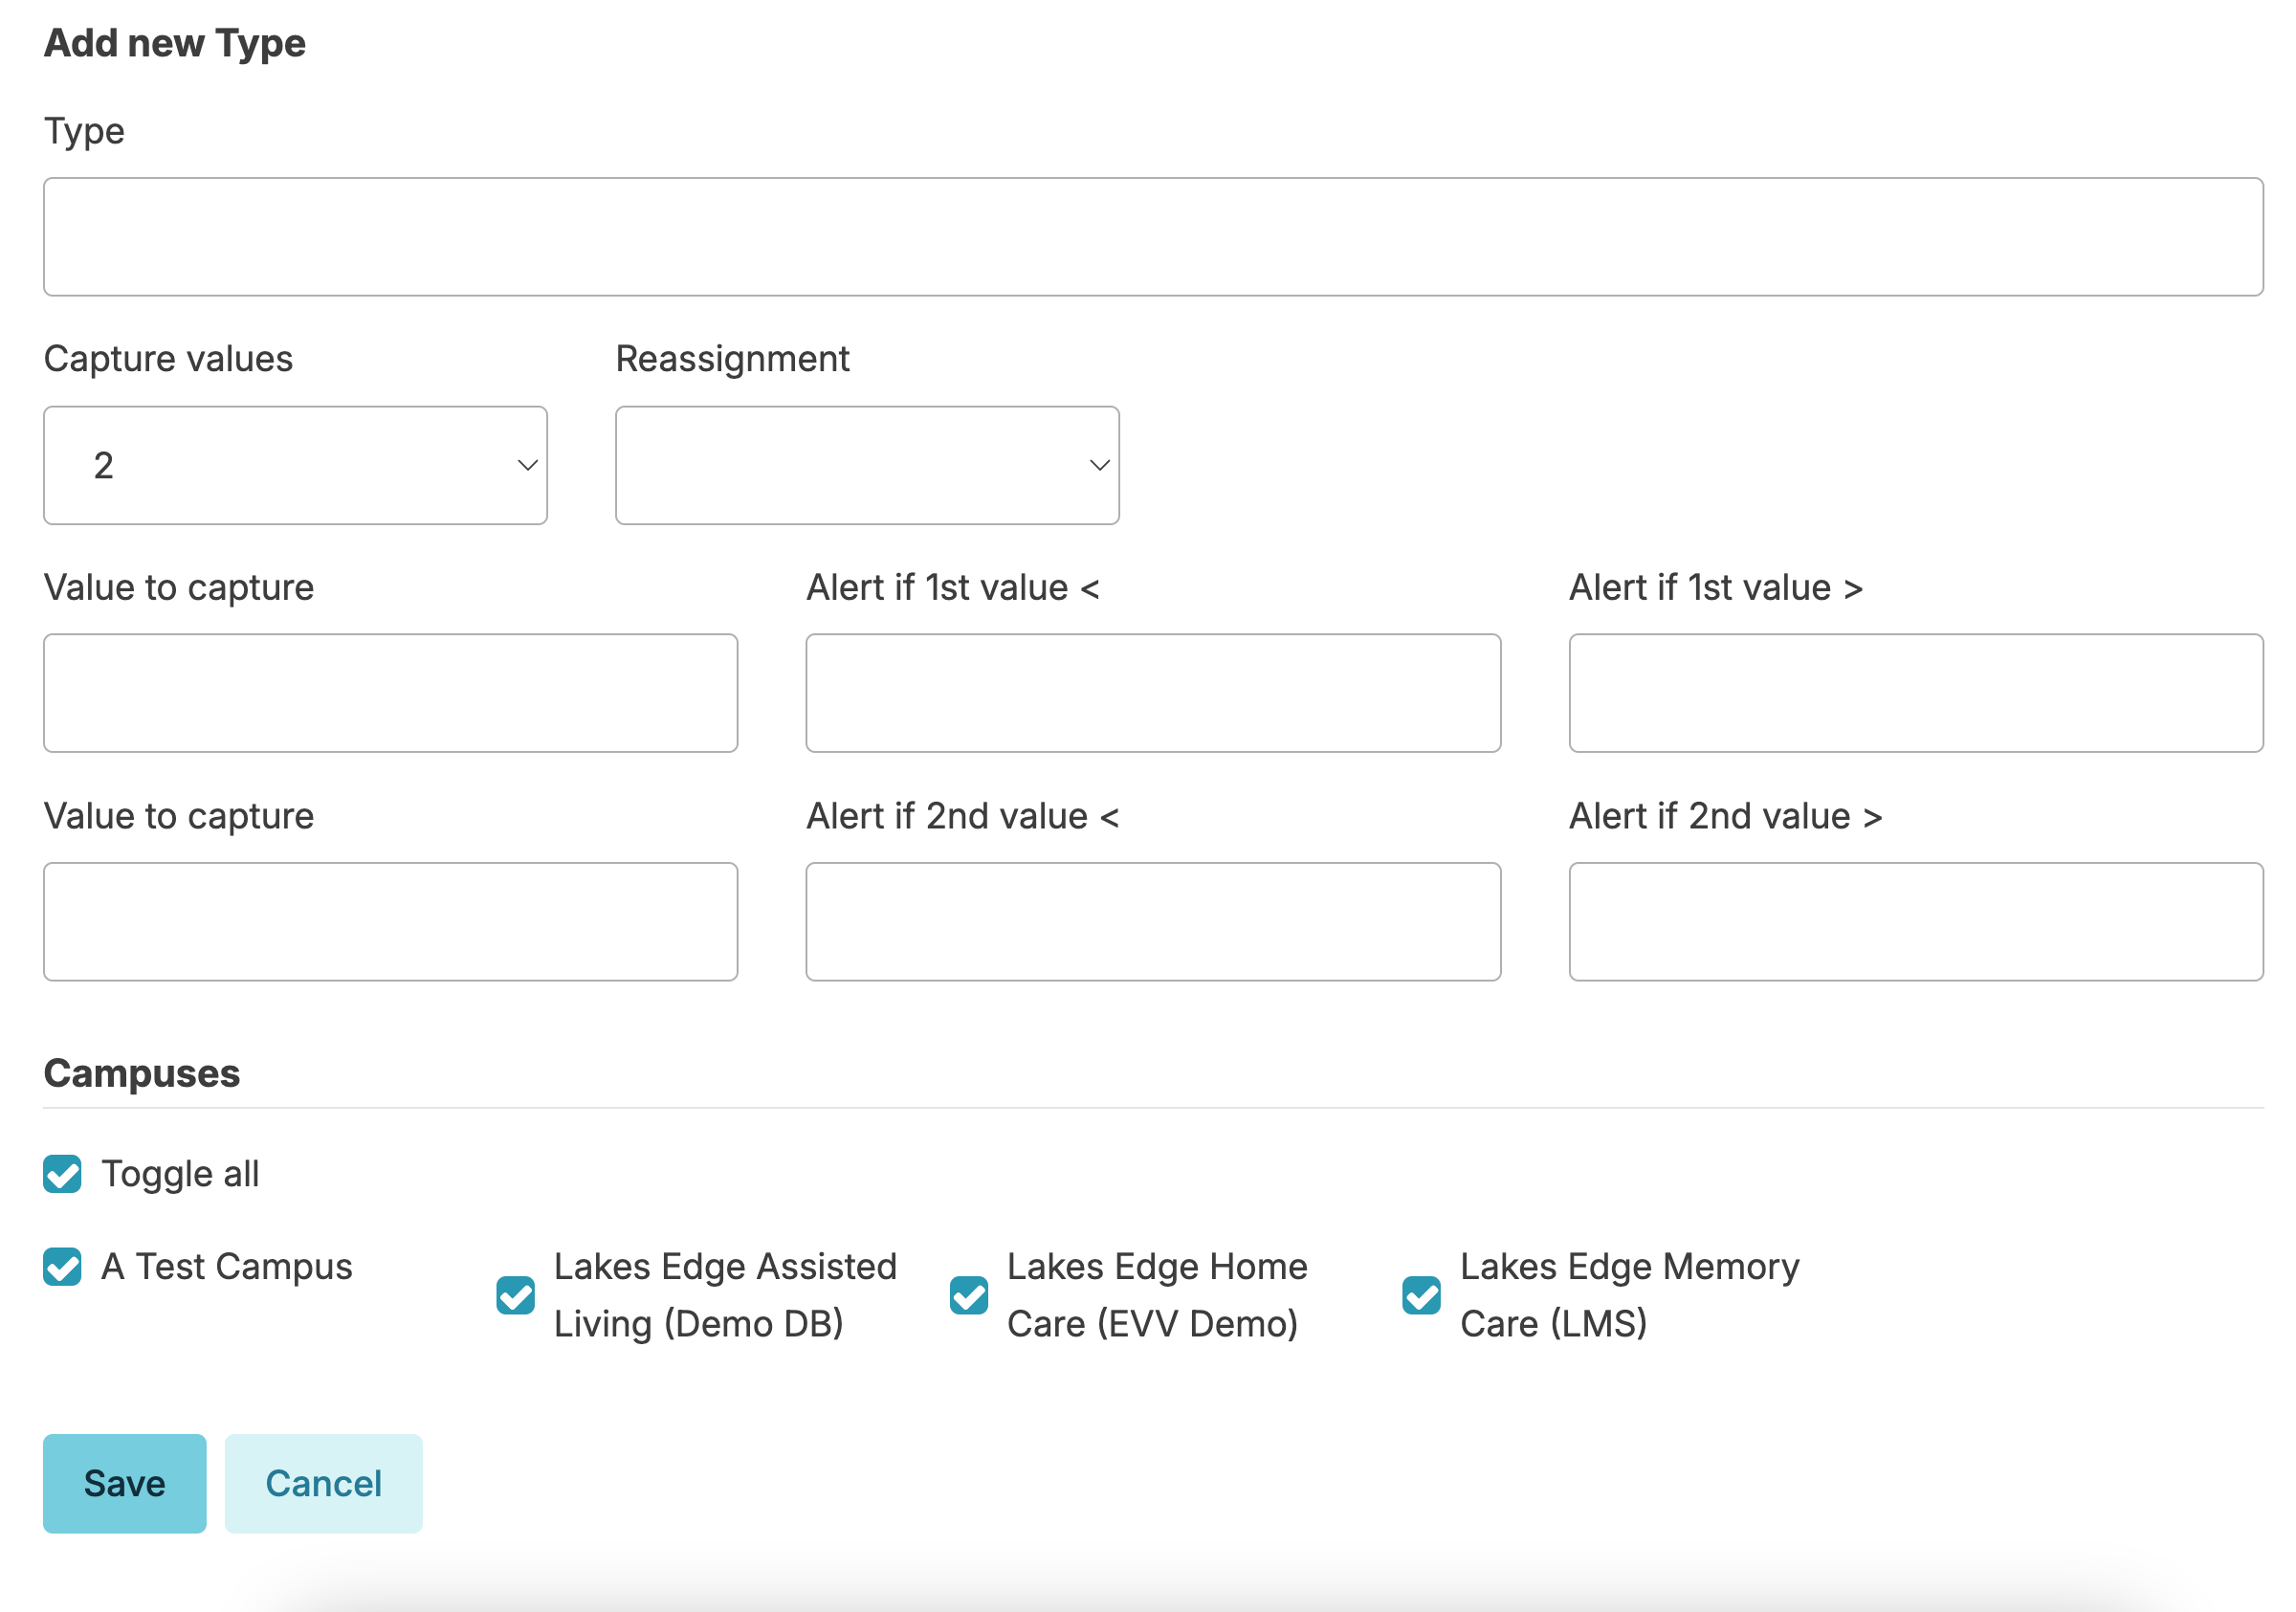
Add New Type
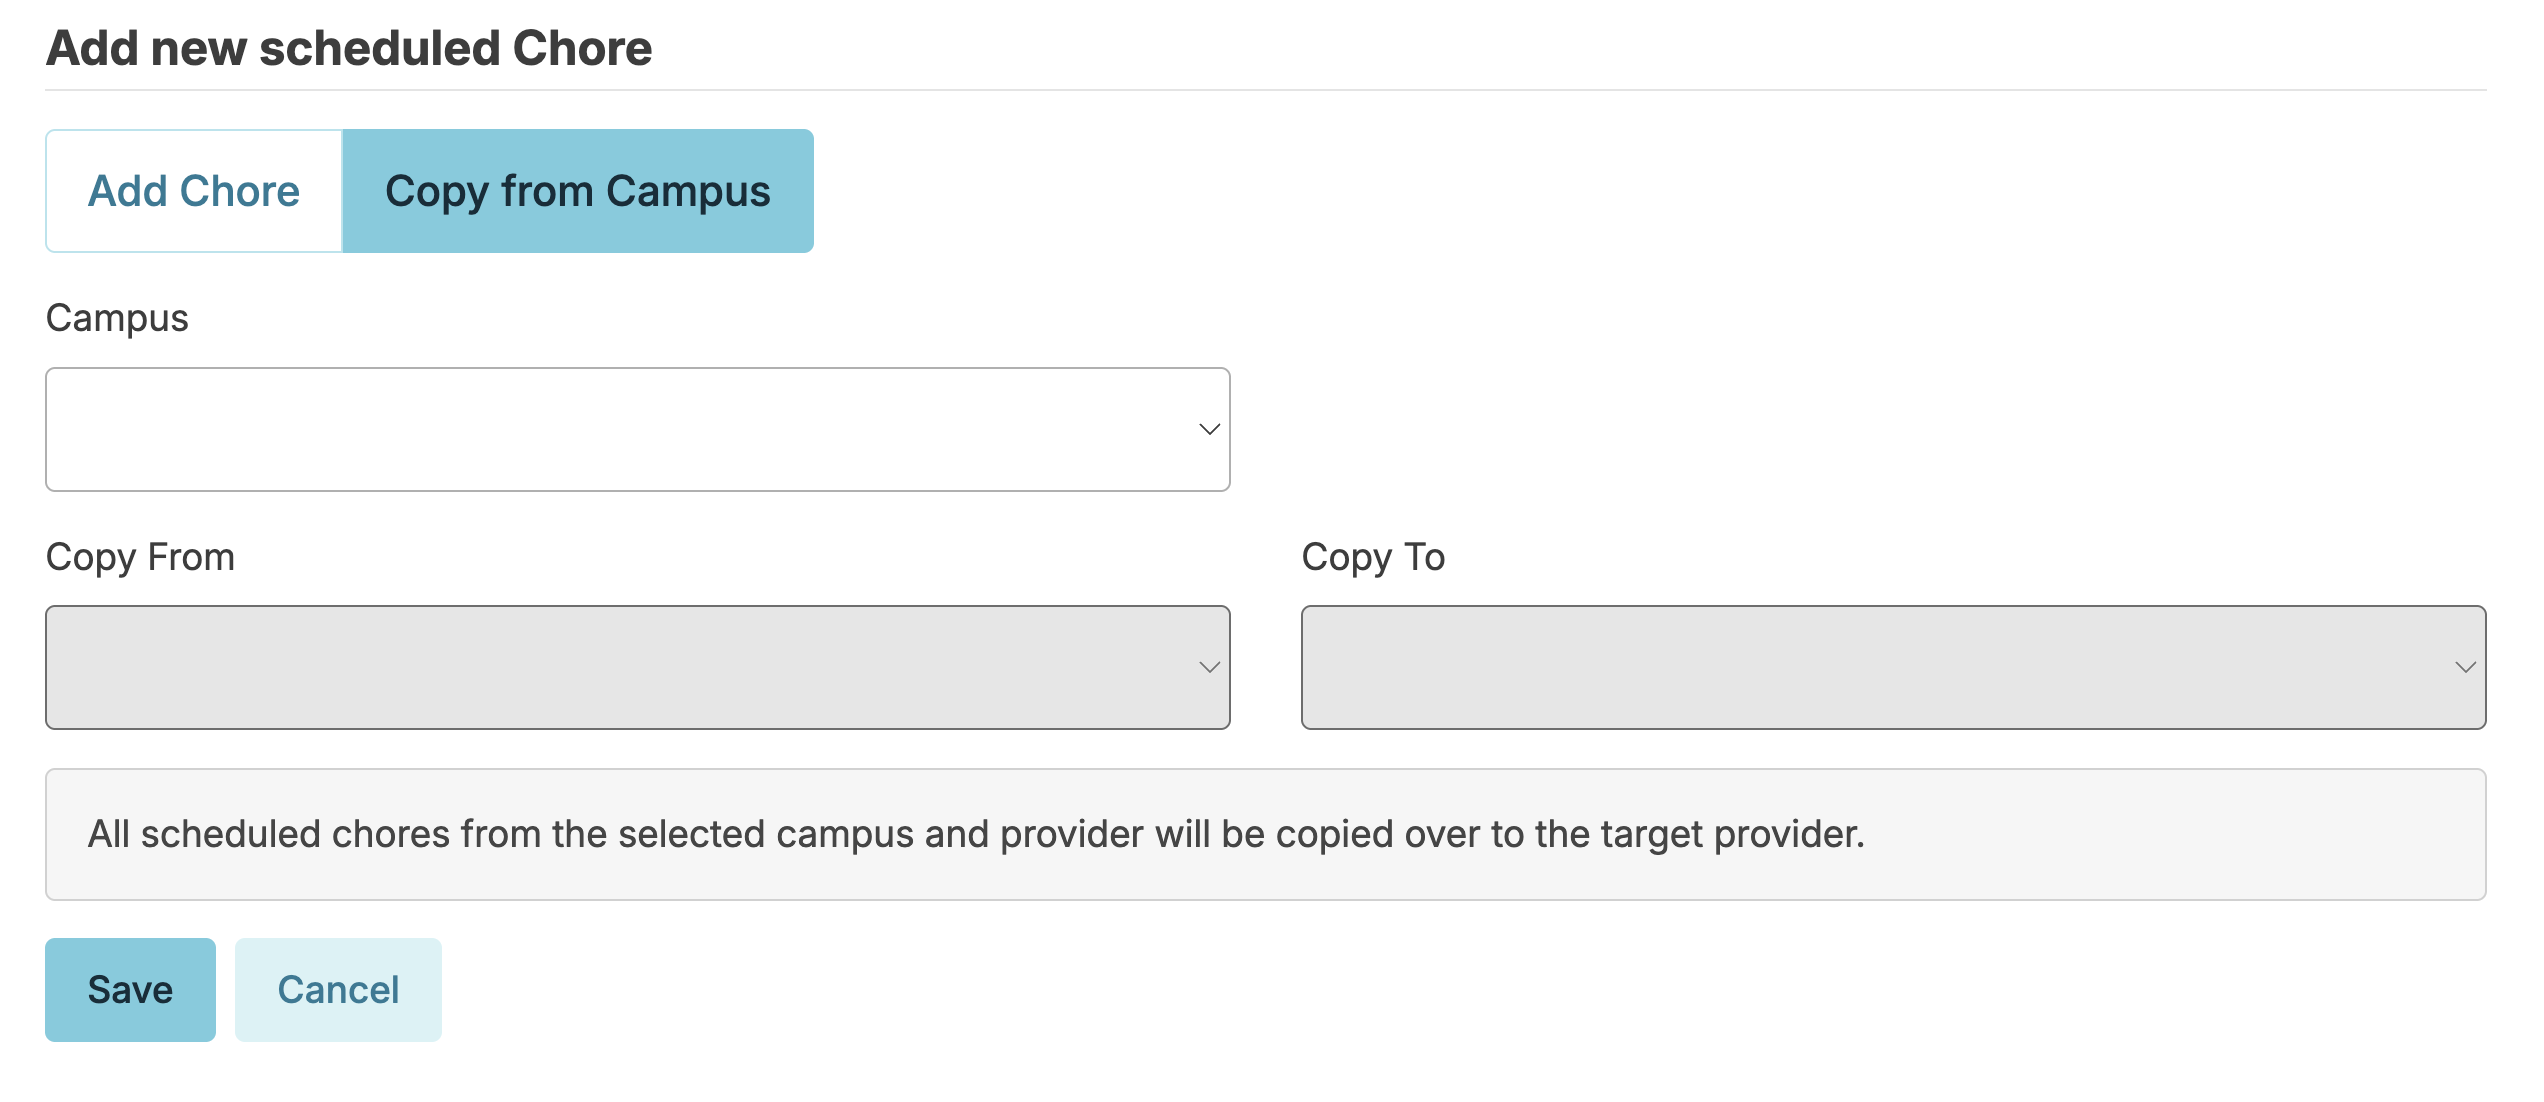
Copy Chores
It is possible to copy chores from one assignment list to another assignment list within the same campus OR to another campus in the same database. Navigate to Admin > Scheduled Chores and click Add new Chore. You have the option of adding a single chore or to 'Copy from Campus' to copy a chore list. Residex will screen and prevent the duplication of chores.
Audits
Audits, which share similar functionality with Residex's incident's, are an important tool in quality management, emergency planning and survey preparations.
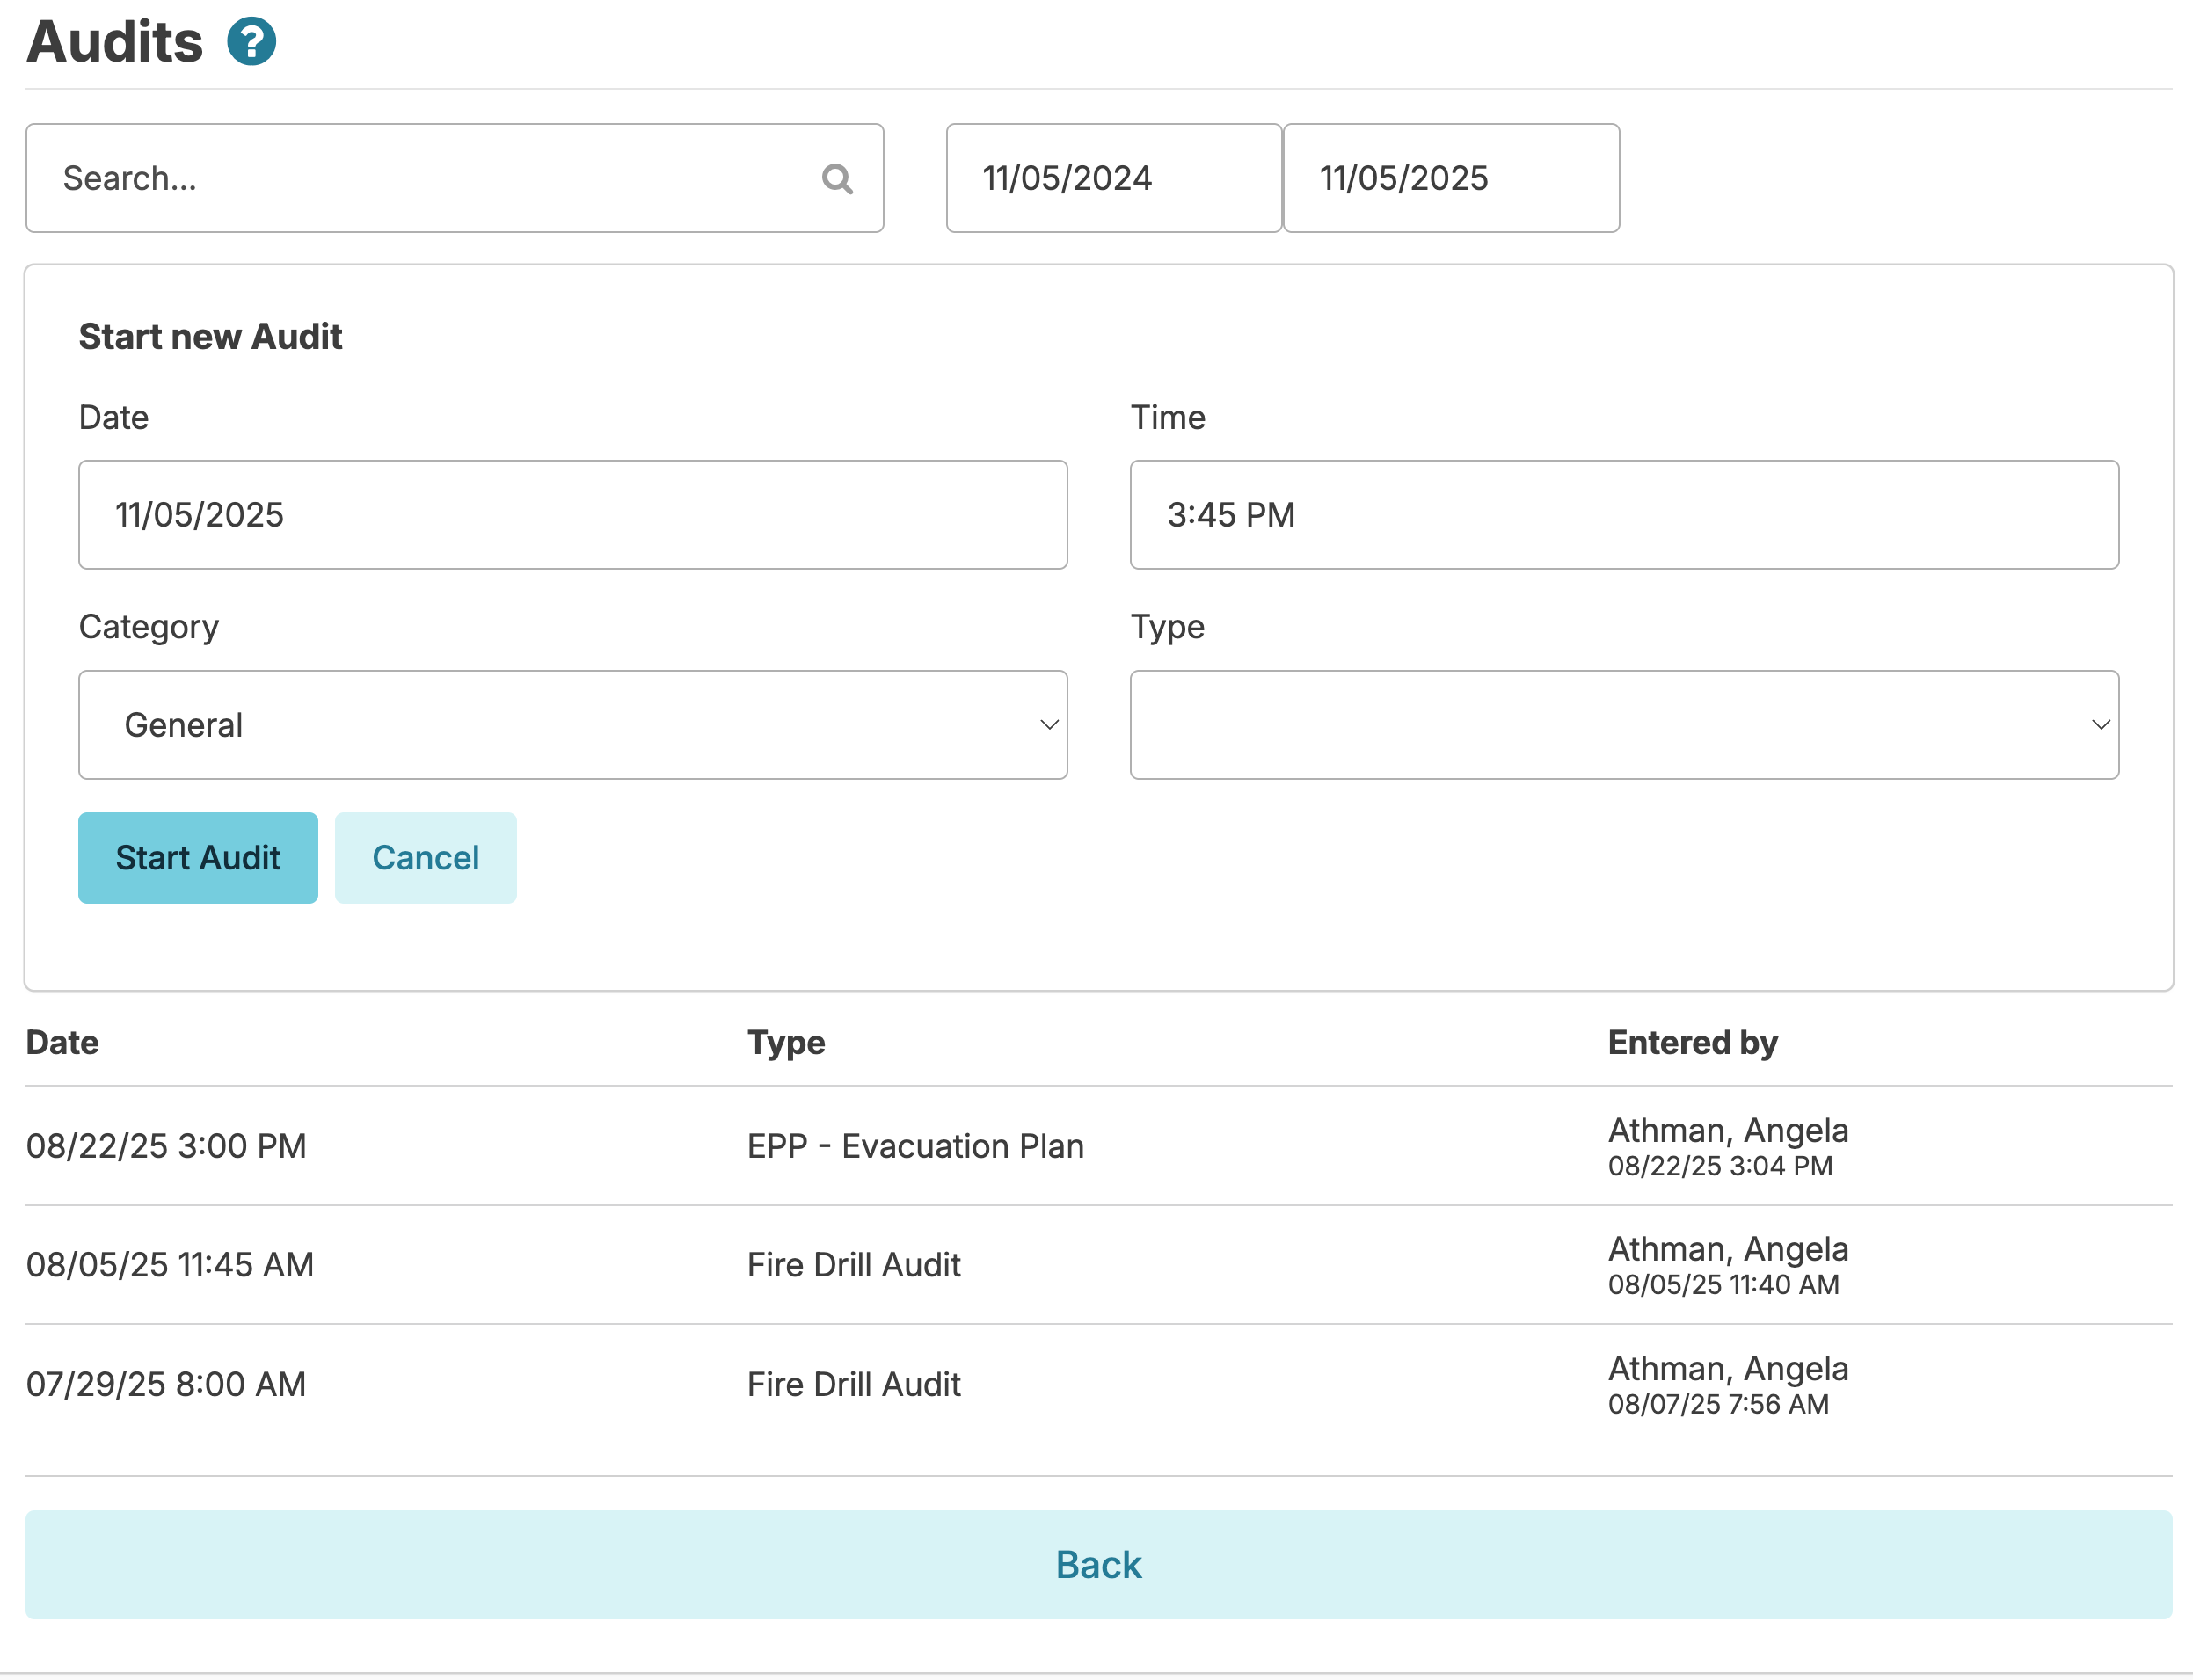
Audits can be completed by navigating to Clinical > Audits. Audits save your progress continuously, recording the name, date and time of the person who completed each individual audit question. Completed audits show final completion details, while those that were initiated but not completed are flagged as open.
Only audits of the type 'Policy Development' and '245D' can be reopened and edited once completed. All others must be canceled and restarted if editing is desired.
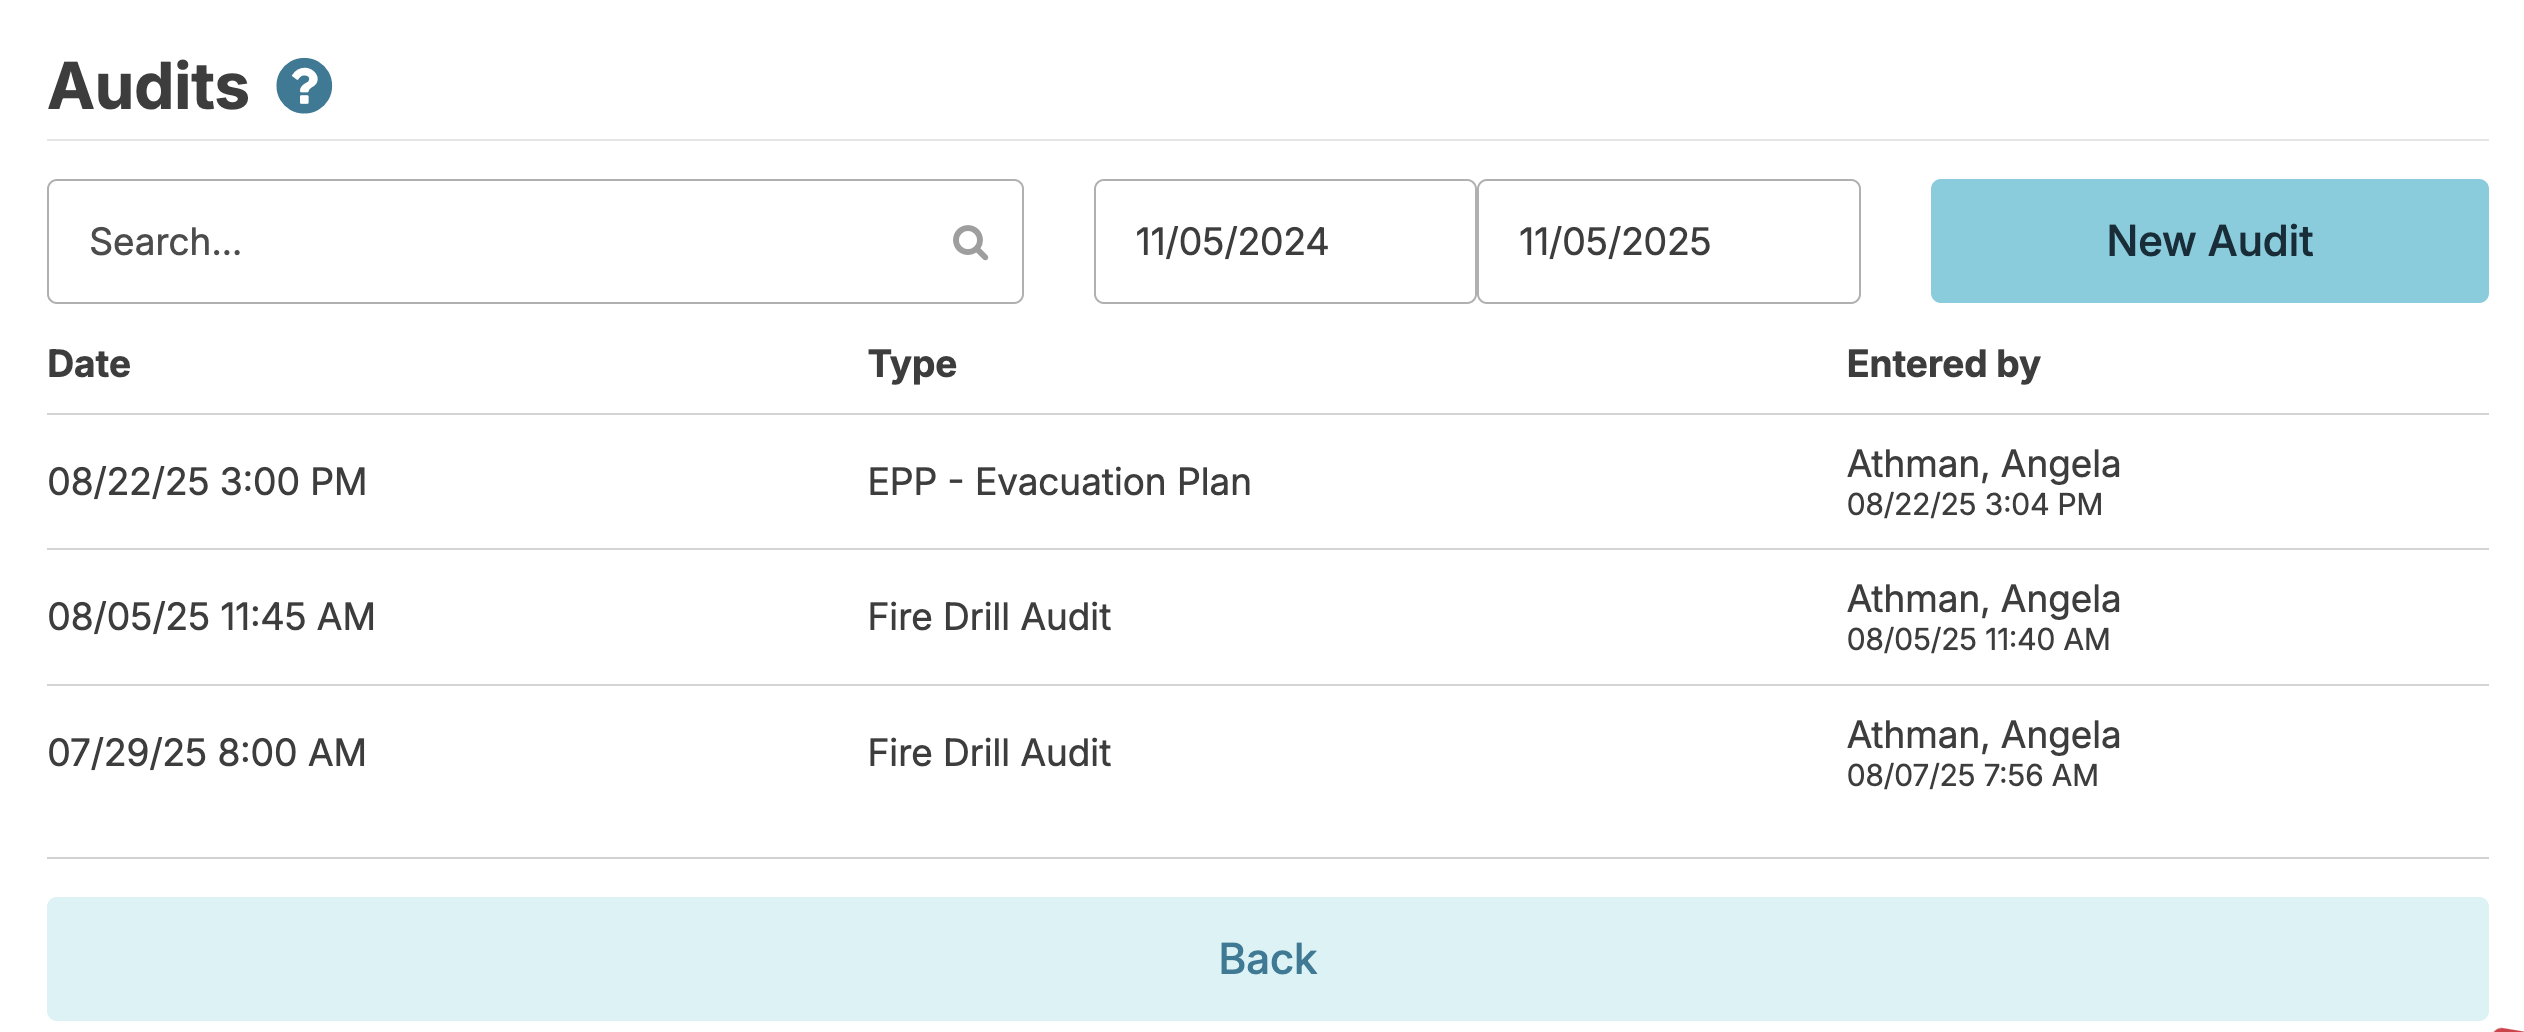
Enter an Audit
Click the New Audit button to enter a new audit. Fields default in the current date and time; select the category and type to bring up the questions to be answered.
Access to Audits
Administrative users with Role 411 are able to set controls as to what provider types can enter and/or view specific audit types. Navigate to:
- Admin > Incident/Audit Types
- Select an audit type
- Select which provider types can enter and/or view
While Incidents/Audits (Role 6) provides access to the Incidents screen, administrative users with Role 411 control which audit types users can enter and/or view.

Residex Send
Sharing sensitive documents is essential in healthcare. Residex Send allows users with or without Residex eFax to securely receive documents from health care resources or family members directly into Residex.
- Residex Send offers one-way functionality - receiving documents sent by outside parties. See our eFax feature for two-way functionality.
- Setup is easy and convenience is huge, allowing family members or parties without access to a fax machine to send documents
- The process is completely HIPAA secure
- Residex users with 'Receive Faxes/Files (Role 42)' can use this feature
Getting Started - Setup
Administrators can navigate to the fax icon > Settings. Under 'Residex Send' click edit to get started. Enter a URL, such as your facility name and click Save. That's it! You're ready to go. The URL is specific to each campus.
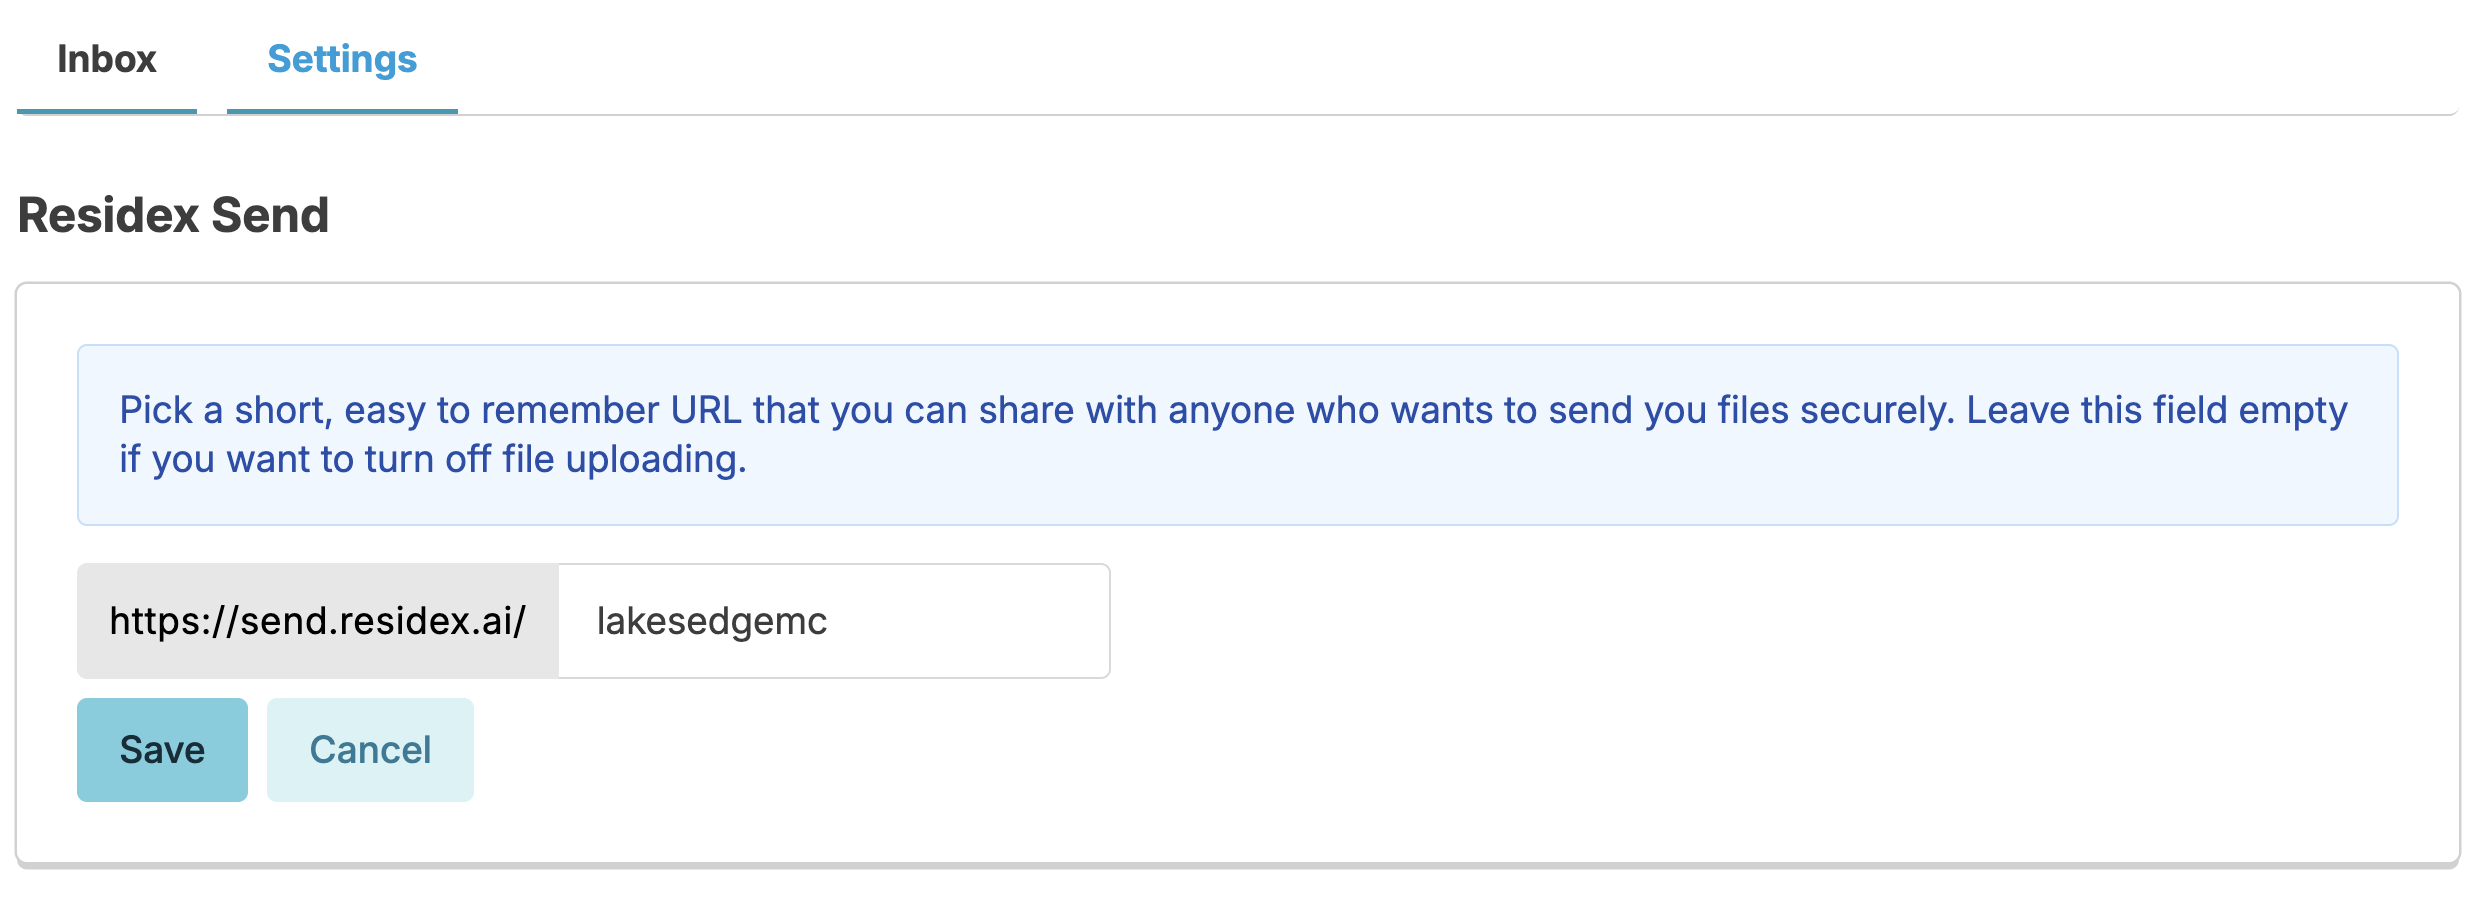
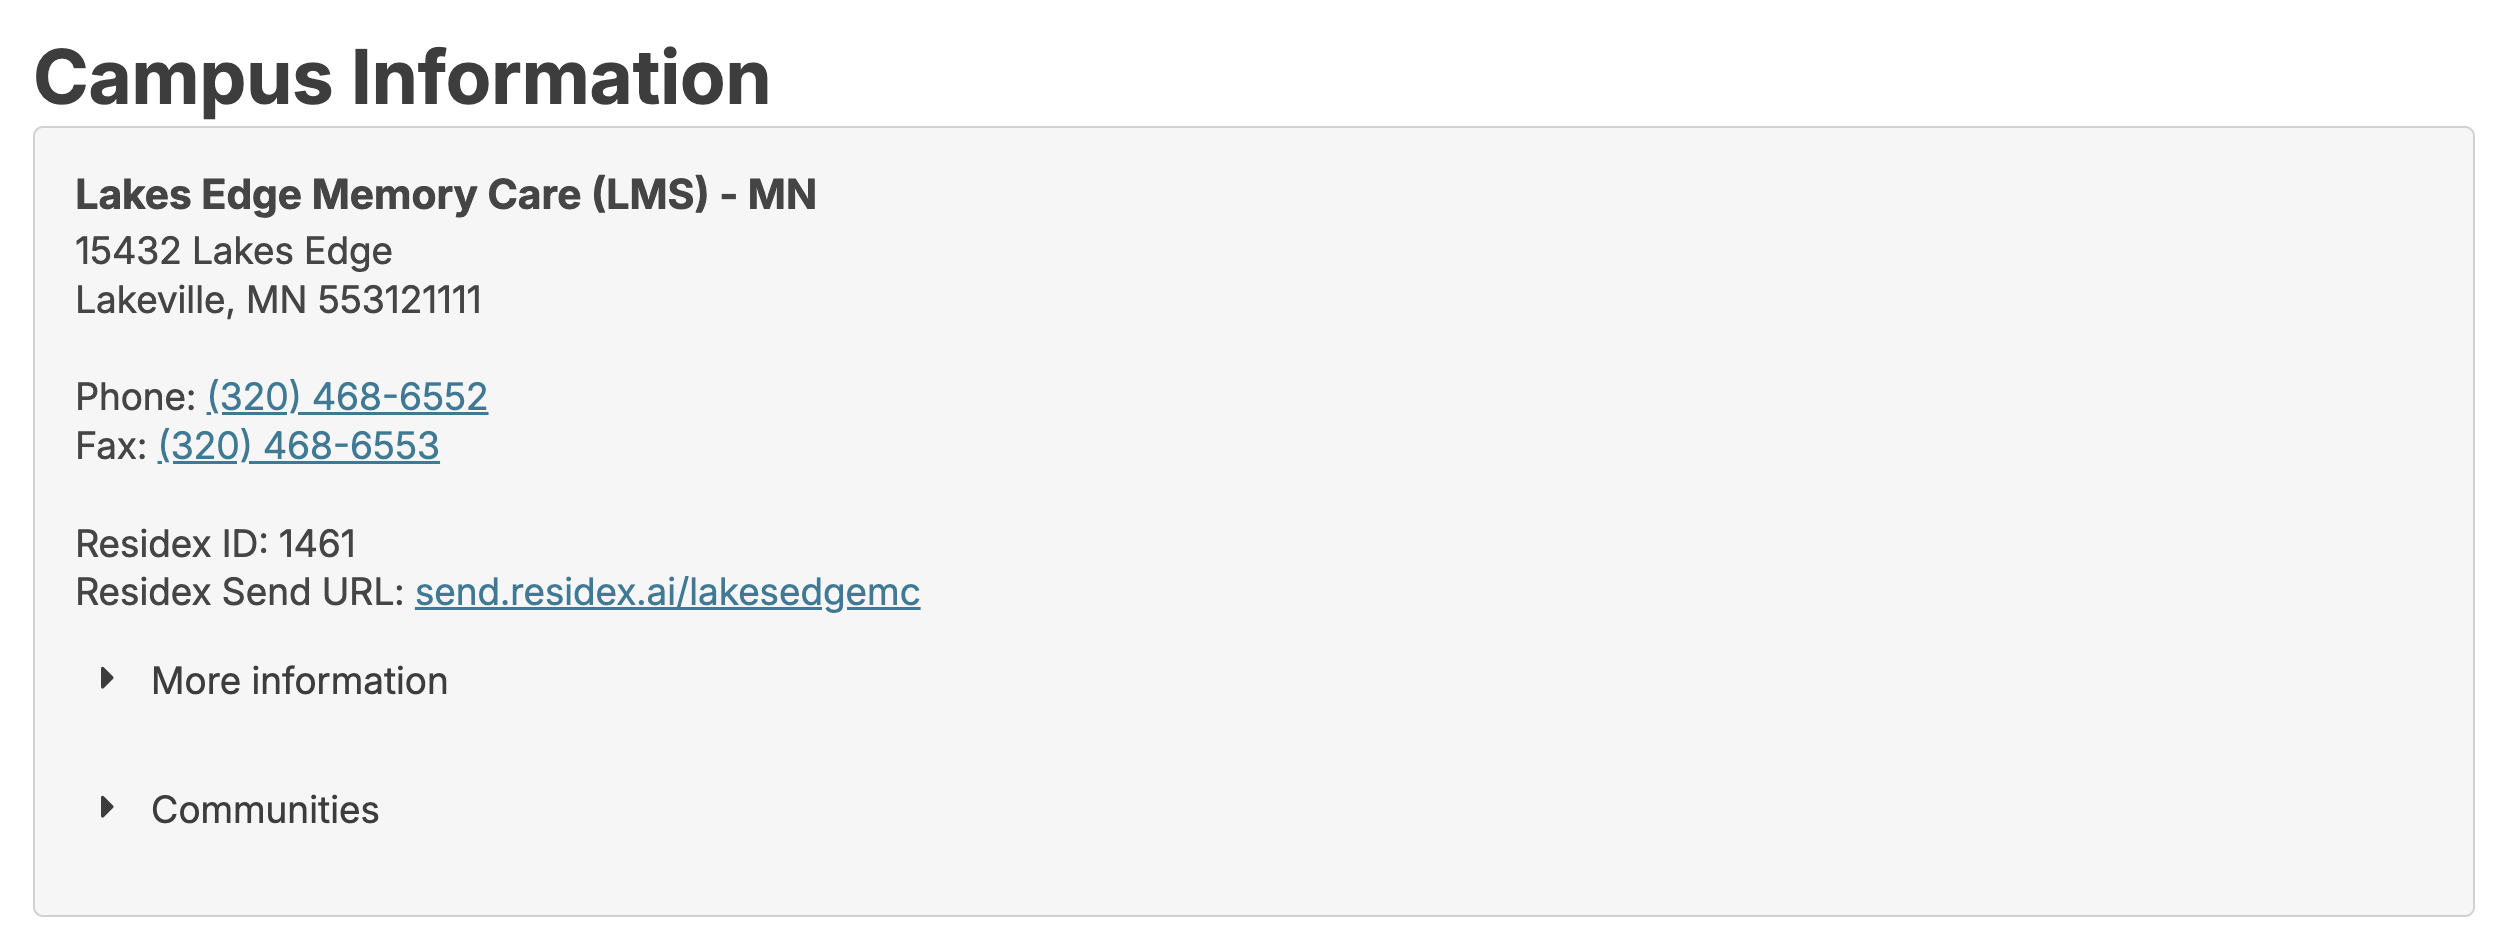
Your Residex Send link will automatically display on your Campus Information screen for staff to easily reference.
Sending a Document
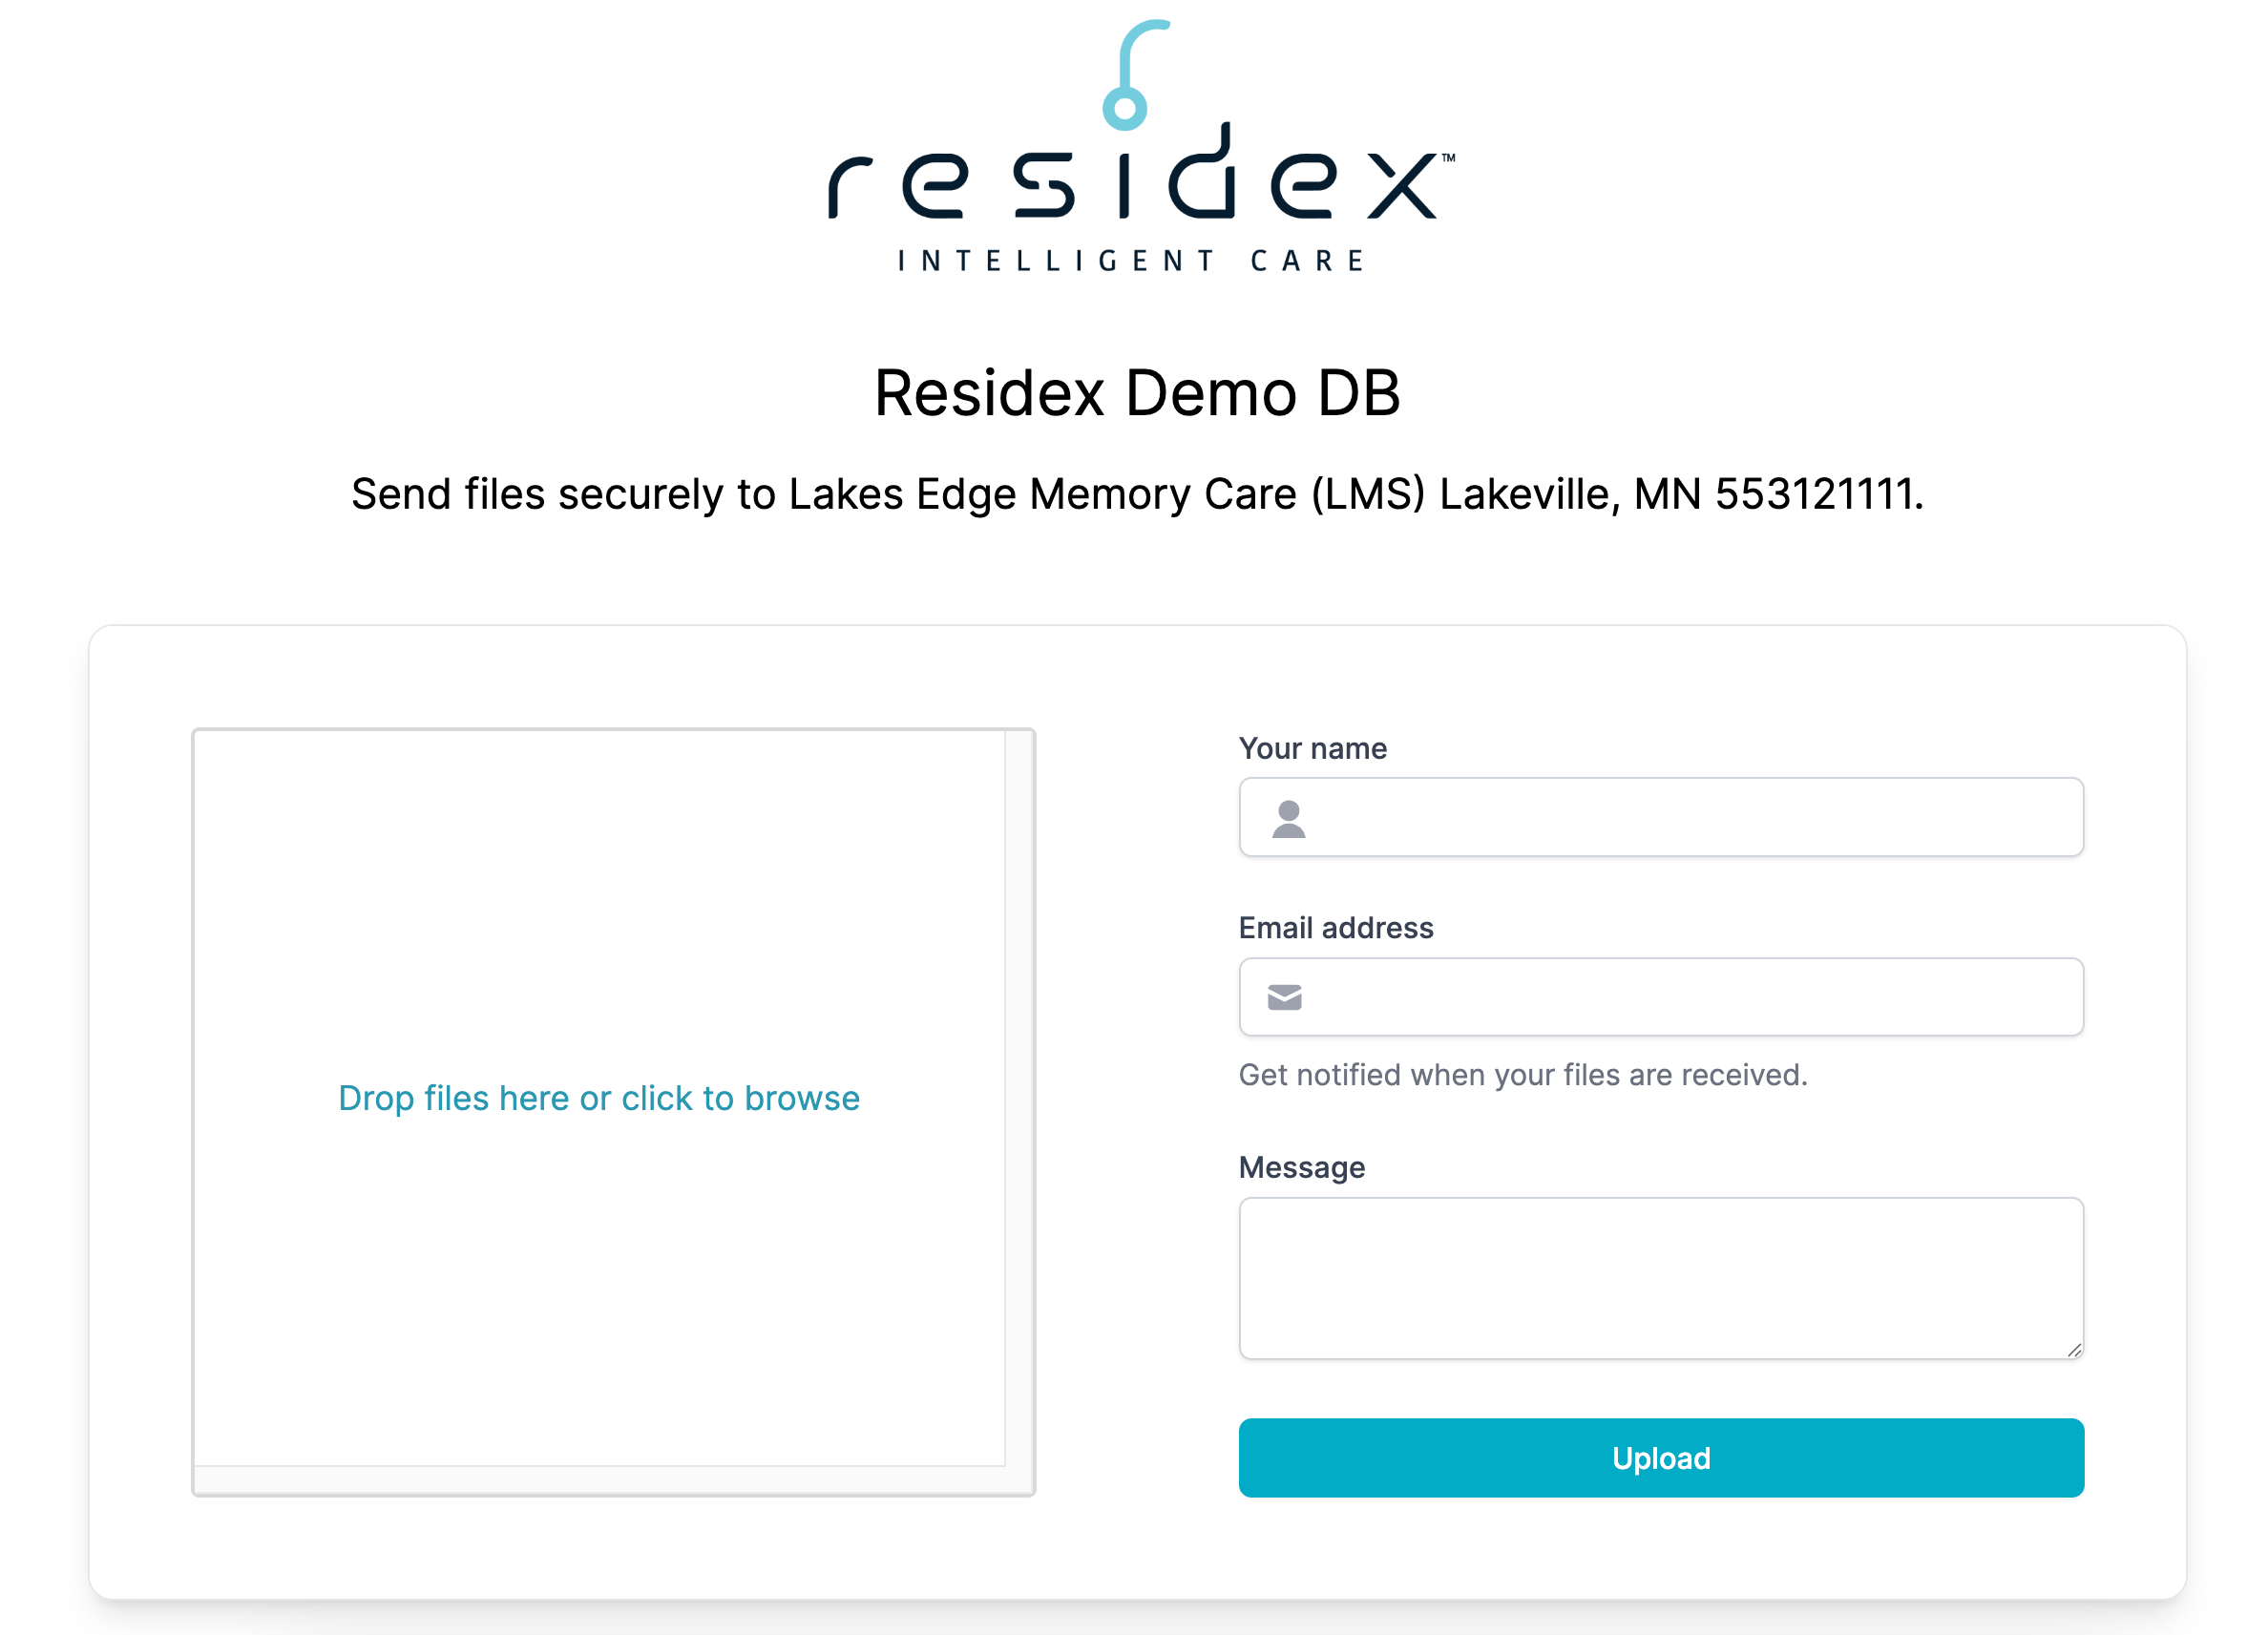
Direct users to use the URL created in the step above, entering or copying and pasting it into a browser.
- They will upload the document/s from a computer file or can drag-and-drop them here
- Enter their name and email
- Include a message and click Upload
- A message appears, letting them know the document was successfully uploaded; they will also receive an email confirmation
Receiving and Processing a Document
If you have received a new document and have Receive Fax/File (Role 42), you will see a Fax/Files alert flag at the bottom of your screen until you or someone else from your team reviews the document and processes it.
- Navigate to the fax icon to view the Inbox
- Another flag will alert you of unprocessed documents
- Note that documents sent via Residex Send are flagged as 'File Upload,' differentiating them from faxes
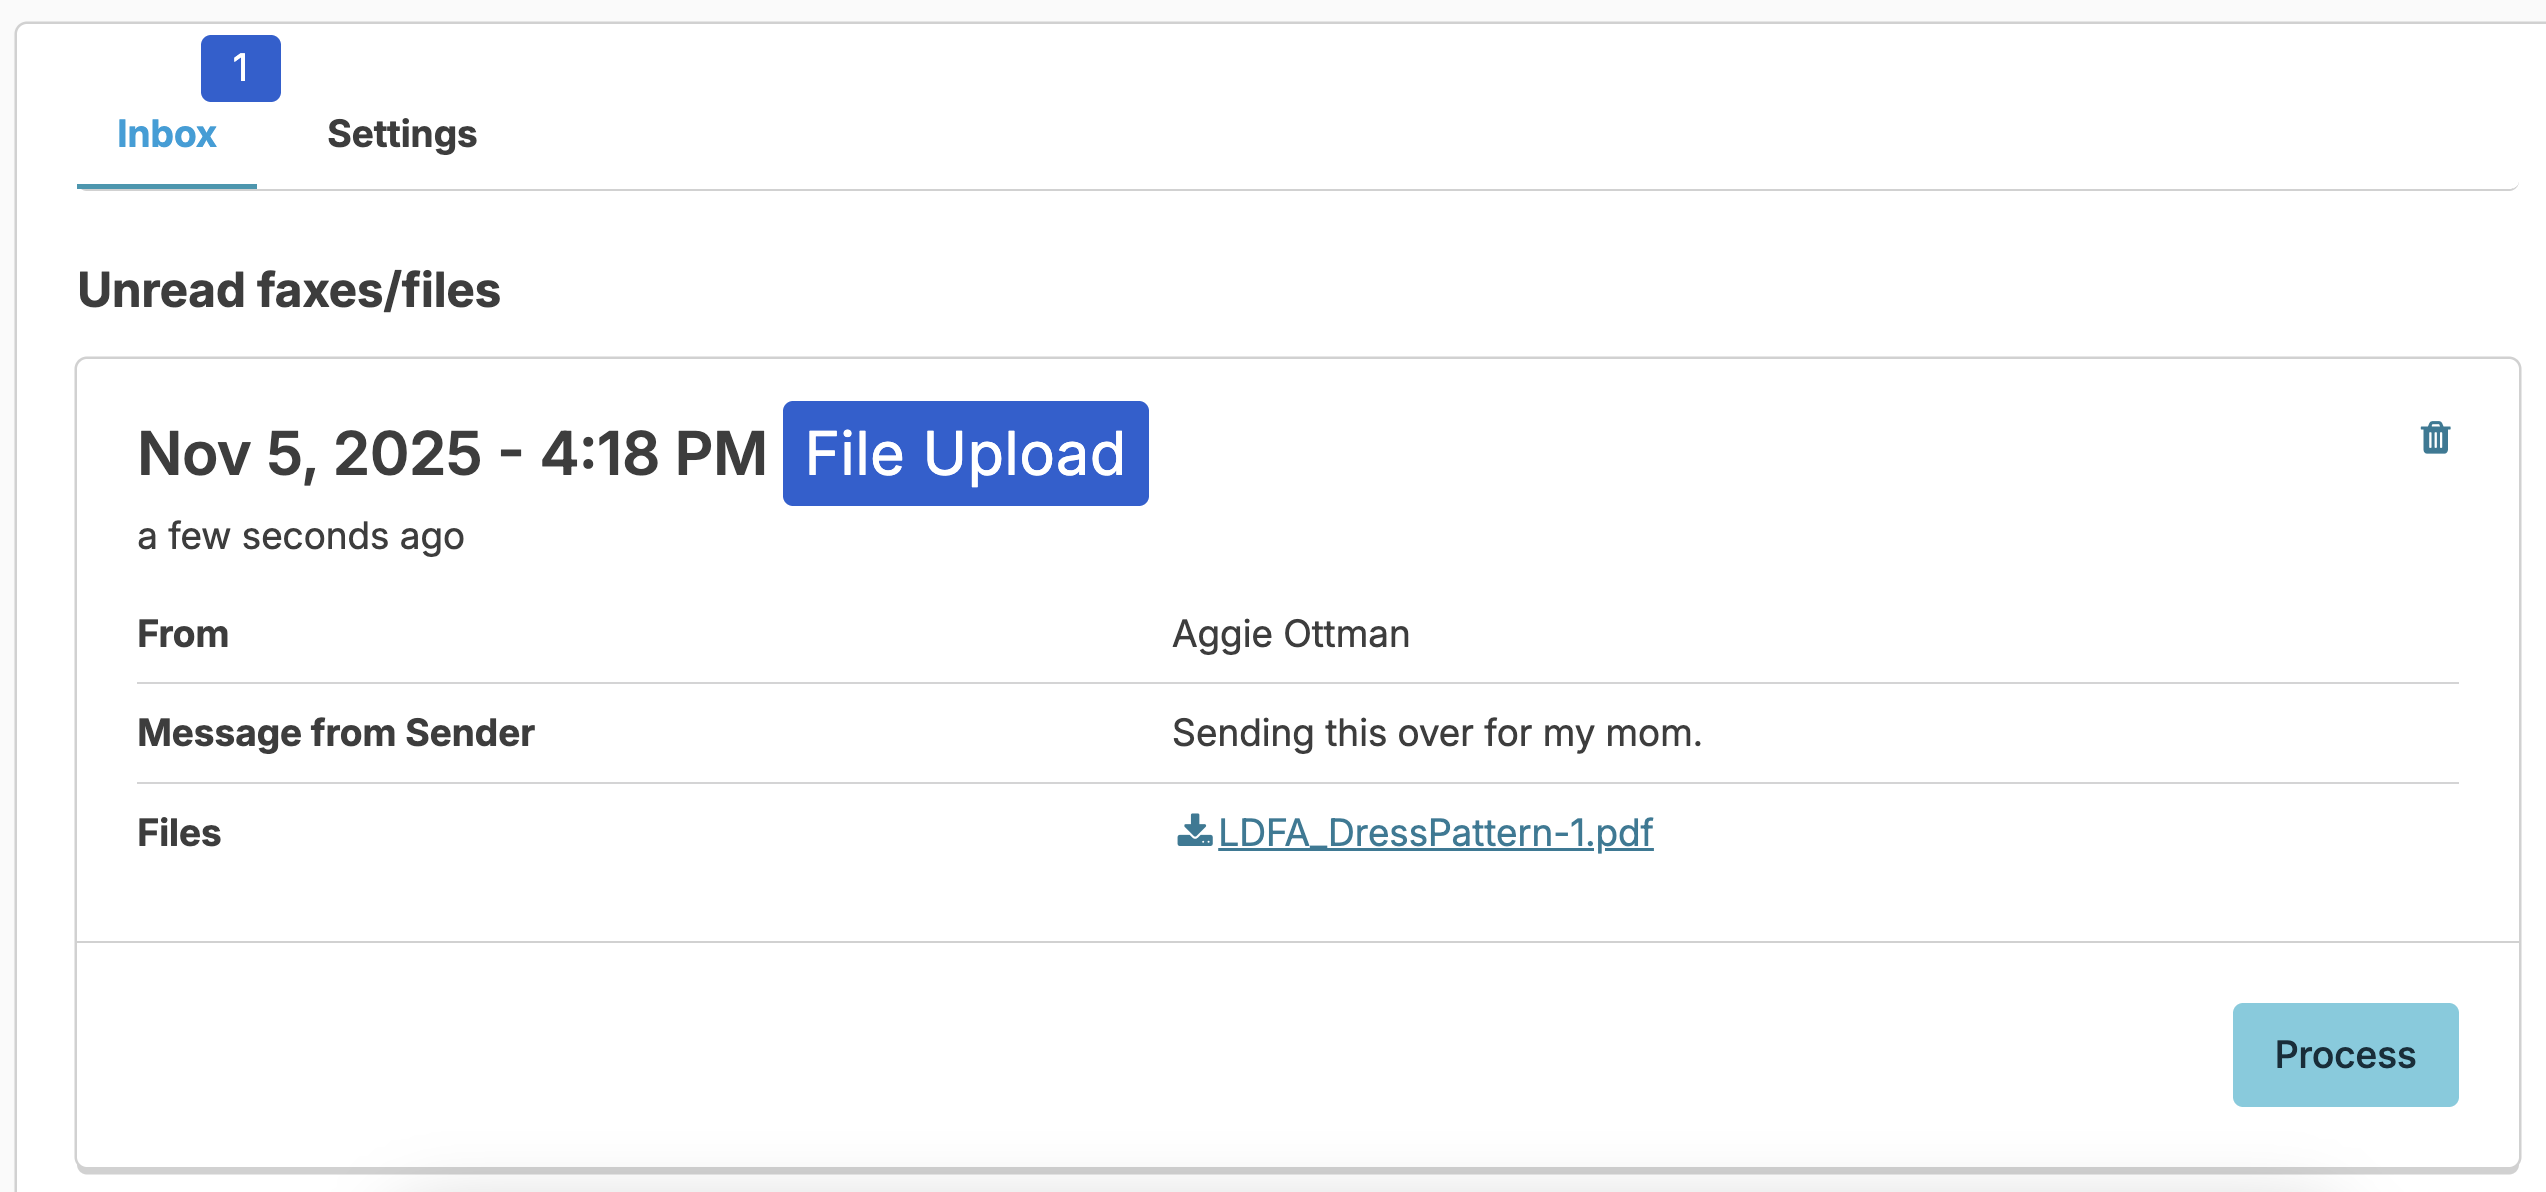
Processing
Click the blue link to view the document. You can use browser print options to print, if needed, but you can continue to process without the need to print.
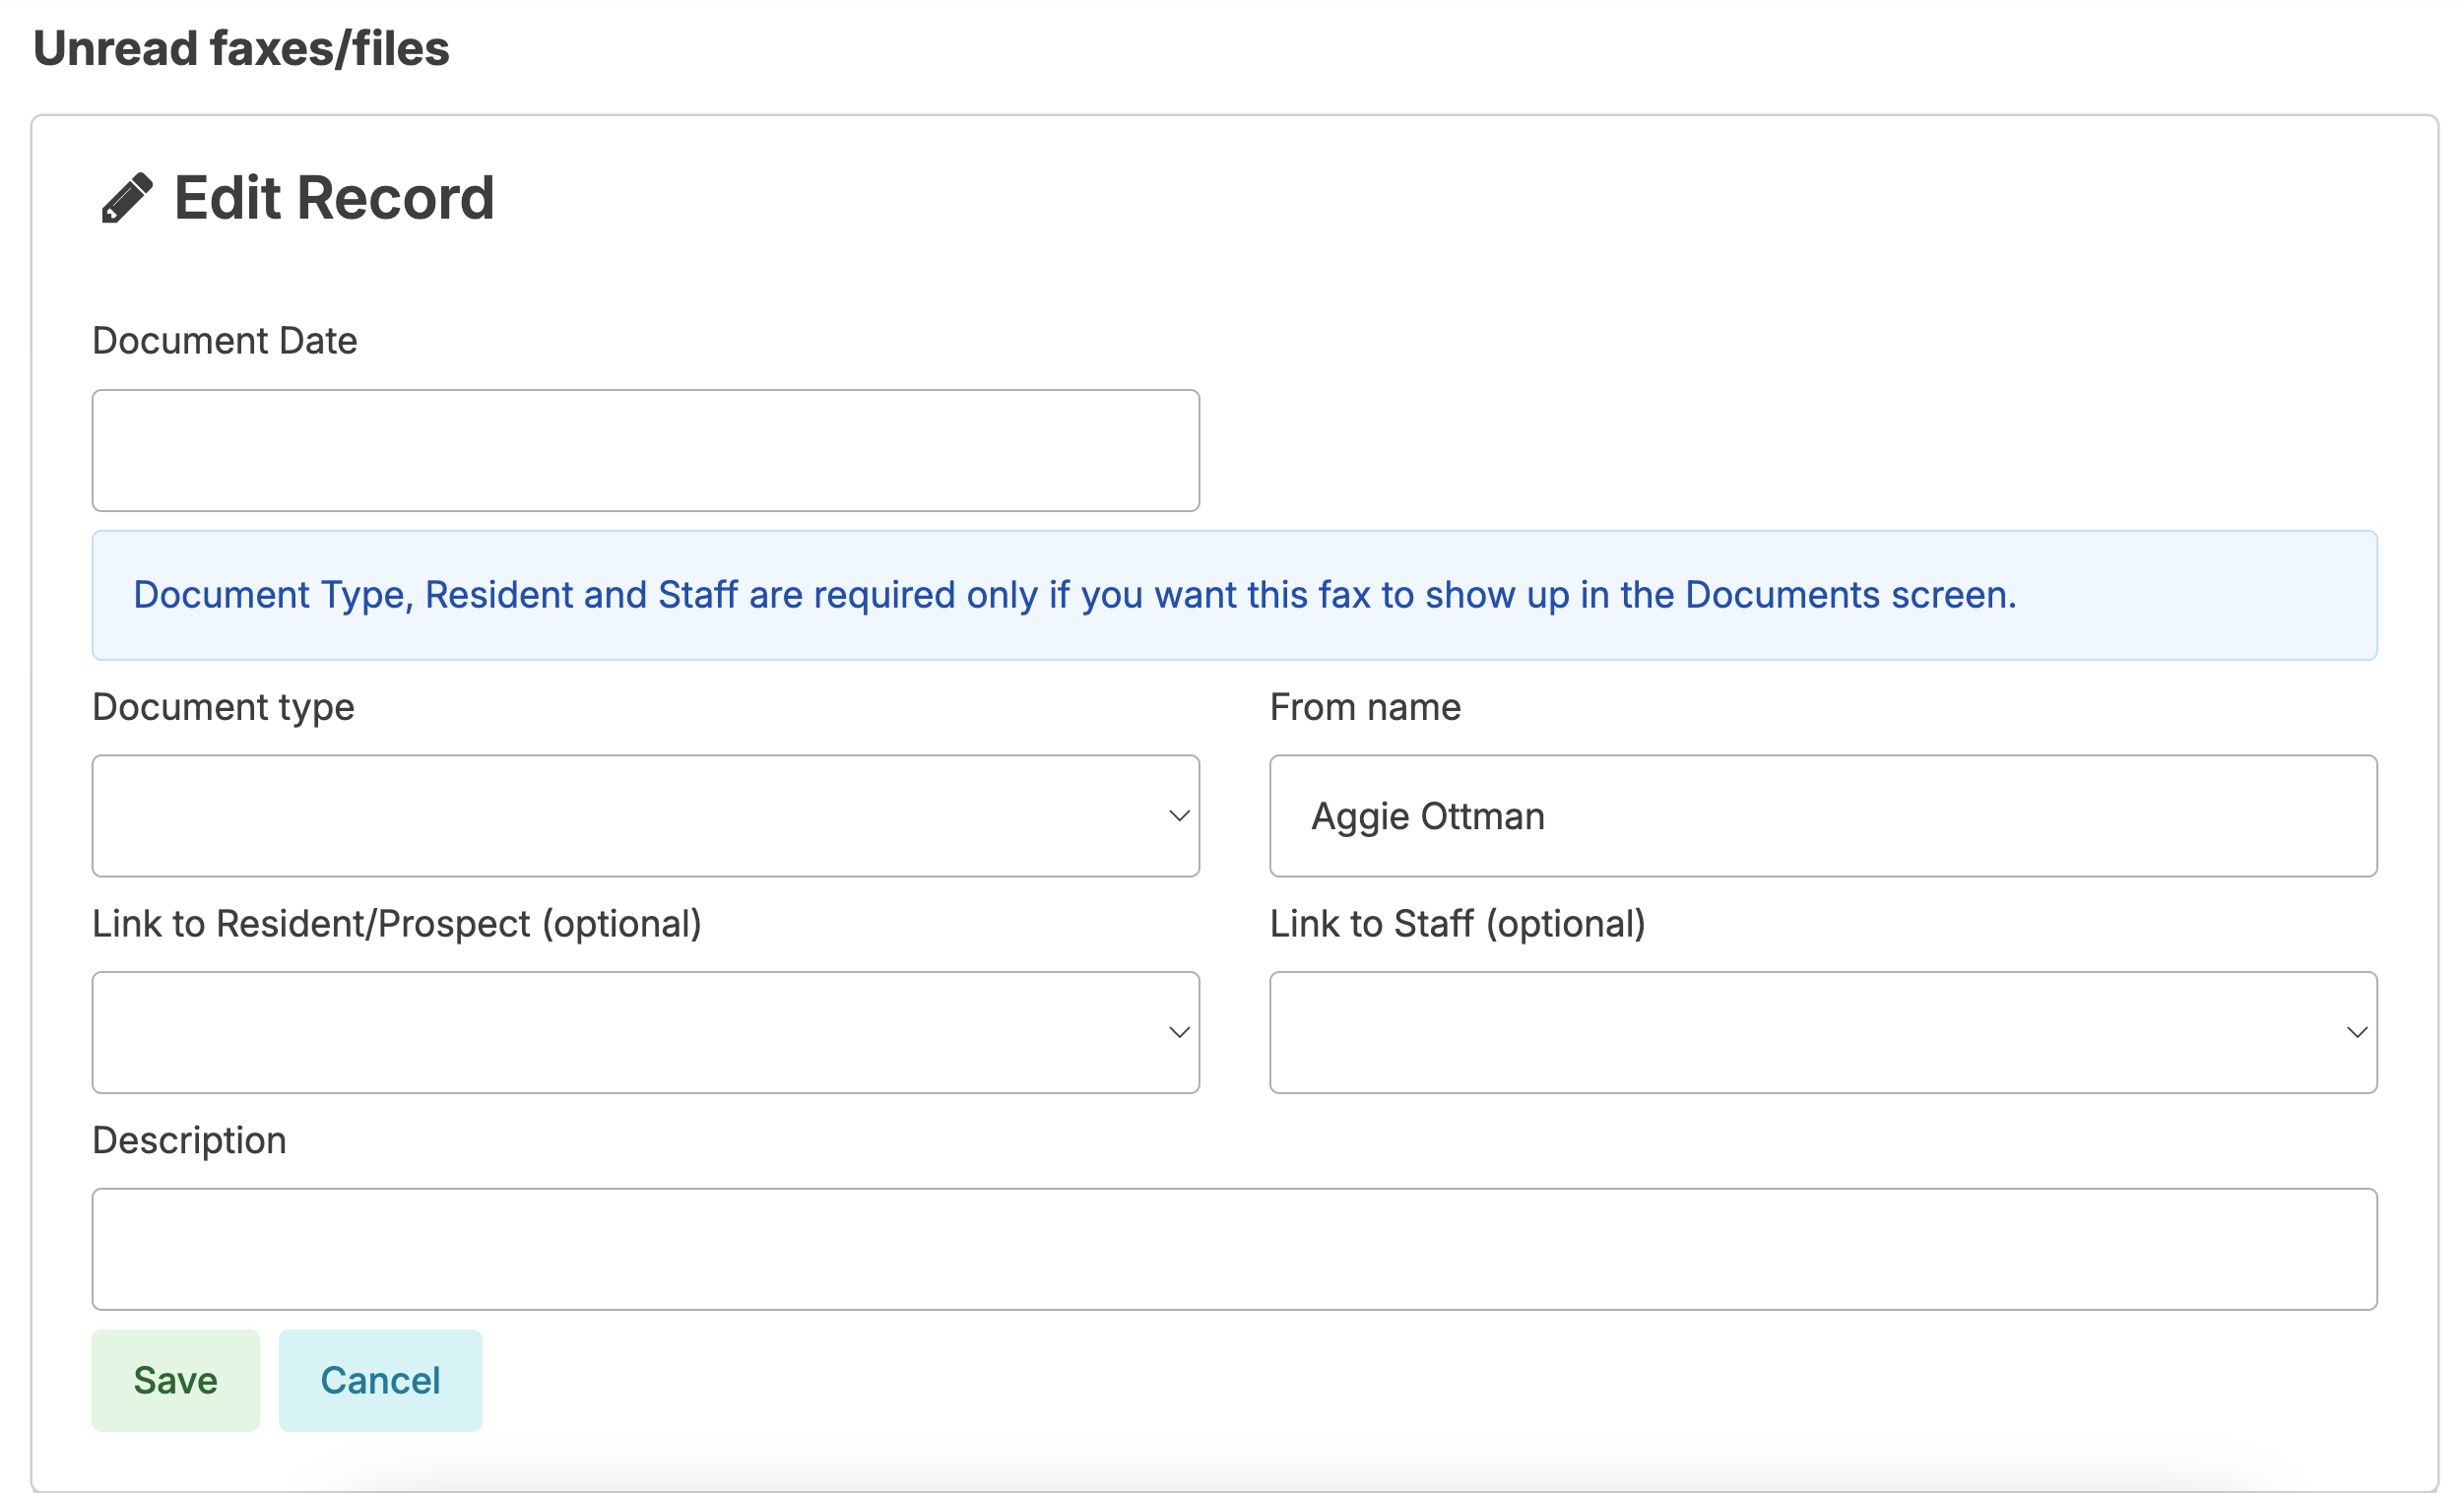
- Click Process
- Enter the date and attachment type. The attachment type will determine whether the document is saved as a campus, staff, or resident document.
- The name of the sender will automatically populate
- You can link this to the specific resident, prospect, or staff person, if appropriate (prospects appear beneath the list of active residents)
- Add a description that will allow you to easily search for this document in the future
- Click Save and you will have saved the document
History
Once saved, the document remains in Residex Send history. You can edit the details, including locations and description, by clicking the blue pen; you can delete the document from Residex Send, though it's not necessary. Deleting from Residex Send will not delete it from resident/staff/campus documents.